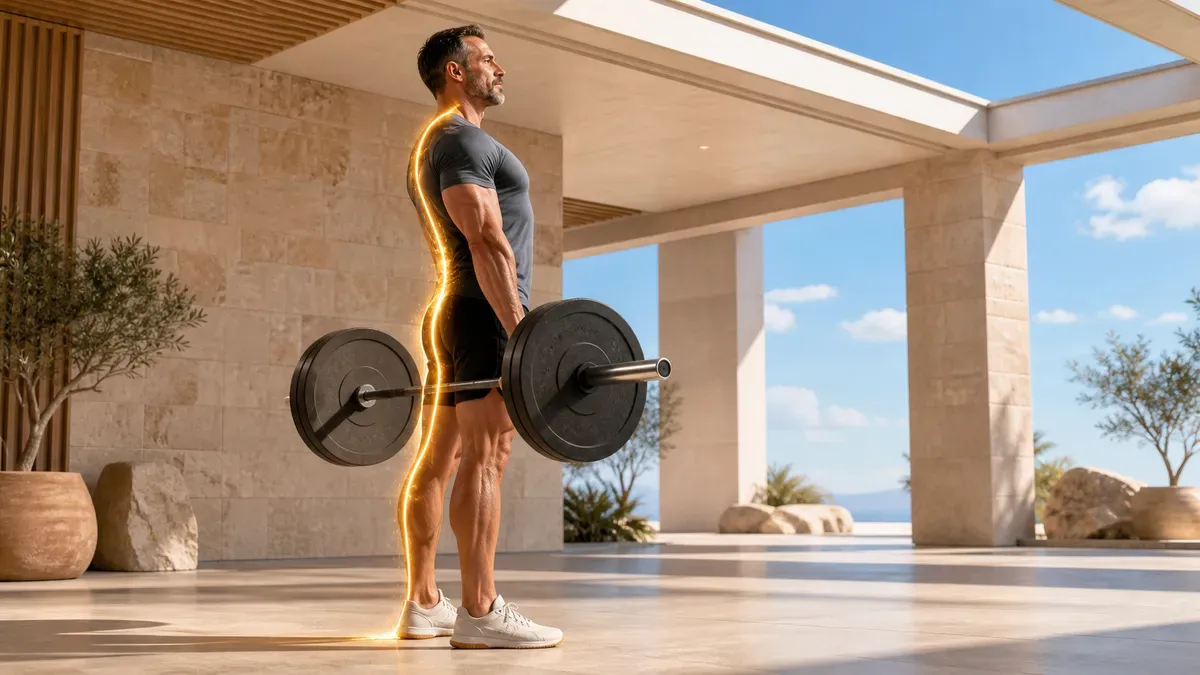
Deadlift form: muscles worked, benefits, and safe progression
Learn deadlift form step by step, muscles worked, safe progressions, common mistakes, variations, and programming for strong, confident lifting at any age.
Quick answer
The deadlift is a strength exercise in which you lift a weight from the floor by extending the hips and knees while keeping the load close to your body. It trains the gluteal muscles, hamstrings, quadriceps, spinal erectors, upper back, forearms, and trunk as one coordinated system.
For reliable deadlift form, place the bar over your midfoot, hinge down without rolling it forward, grip just outside your legs, brace, and use your legs to push the floor away. Keep the bar close as your hips and shoulders rise together. Finish tall without leaning backward, then return the bar by hinging before bending the knees.
Beginners should learn the hip hinge with an elevated kettlebell, trap bar, or lightly loaded barbell rather than testing a maximum. Start with 2–3 sets of 5–8 controlled repetitions, leave 3–4 good repetitions in reserve, and add load only when every repetition starts and finishes in the same position.
Key facts
- The deadlift combines hip extension, knee extension, trunk stabilization, and grip.
- A close bar path reduces the external lever acting on the hips and lower back.
- Deadlift variations redistribute demand rather than creating one universally best technique.
- Progressive resistance develops strength and power when load increases without sacrificing repeatable form.
- Pain, fatigue, and anatomy change the appropriate range, variation, and training dose.
The deadlift is not mandatory. It is one way to train the hip-hinge pattern and the ability to produce force while lifting an external object. A trap-bar deadlift, Romanian deadlift, kettlebell deadlift, cable pull-through, hip thrust, or machine can be a better fit depending on your mobility, symptoms, equipment, and goal.
This guide is general education, not rehabilitation or medical advice. Seek individualized guidance before heavy lifting if you have a recent fracture or operation, osteoporosis with lifting restrictions, uncontrolled blood pressure, pelvic-floor symptoms, neurological symptoms, or persistent back, hip, or knee pain.
What is a deadlift?
A deadlift begins with a stationary load and ends when the lifter stands upright with control. Unlike a squat, where the knees usually travel farther forward and the hips descend more vertically, a deadlift emphasizes the hip hinge: the pelvis moves backward while the trunk inclines and the load remains close.
That does not make the deadlift a “back exercise” or a pure hip movement. The knees extend, the hips extend, the trunk resists unwanted motion, the shoulder girdle holds the arms in position, and the hands connect the body to the load. The exact contribution of each joint changes with the variation, stance, bar shape, limb proportions, and load.
The useful skill is not copying one photograph. It is coordinating the whole lift so that:
- the load begins over a stable base of support;
- the trunk is braced before the weight leaves the floor;
- the bar or handles stay close;
- the knees and hips extend without the lift turning into two disconnected phases;
- the chosen range remains tolerable and repeatable.
If you first need to understand how muscles change roles across a joint action, our guide to agonist and antagonist muscles explains why the same muscle can produce movement in one phase and stabilize it in another.
Which muscles does the deadlift work?
The deadlift trains a chain rather than one isolated muscle.
For direct work across hip extension and knee flexion, follow the hamstring exercise progression.
| Muscle group | Main role during the lift |
|---|---|
| Gluteus maximus | Extends the hips as you stand |
| Hamstrings | Assist hip extension and help control the hinge |
| Quadriceps | Extend the knees, especially from the floor |
| Spinal erectors | Produce and resist spinal motion while the trunk is inclined |
| Abdominal wall and deeper trunk muscles | Create stiffness and transfer force between the legs and load |
| Latissimus dorsi and upper back | Keep the bar close and stabilize the shoulder girdle |
| Forearm and hand muscles | Maintain the grip |
| Adductors and hip rotators | Help control hip position and contribute to extension |
The core strength training guide shows how to develop anti-extension, lateral stability, anti-rotation, and carrying capacity outside the deadlift itself.
For more direct lumbar-extensor work, the lower back exercise guide progresses from low-load control to hinges and supported extensions without treating the deadlift as an isolated back lift.
The upper back works mostly to control the load rather than create a visible shrug. The trapezius exercise guide separates that stabilizing role from direct elevation, retraction, carrying, and upward-rotation work.
A systematic review of 19 electromyography studies found substantial activity across the erector spinae, quadriceps, gluteal muscles, and hamstrings. It also found large methodological differences between studies, so EMG should not be treated as a league table proving which variation “builds the most muscle” (Martín-Fuentes et al., 2020).
The conventional deadlift includes more knee contribution than many people assume. In a laboratory comparison, the conventional lift produced greater rectus femoris and gluteus maximus activity than the Romanian deadlift under the tested loading conditions (Lee et al., 2018). The Romanian variation begins from standing, keeps a small knee bend, and emphasizes a longer controlled hinge; it is not simply a conventional deadlift with less weight.
No deadlift variation fully replaces a balanced program. Pair a hinge with a squat, push, pull, carry, and appropriately chosen single-leg or power work. The goblet squat guide covers the complementary squat pattern in detail.
How to deadlift step by step
These steps describe a conventional barbell deadlift. Use full-size plates or raise the bar on stable blocks so the starting height fits your current mobility and control. Clear the floor, secure the plates, and avoid a surface or footwear that slides.
1. Place the bar over your midfoot
Stand with feet around hip width and toes pointing mostly forward or slightly outward. Looking from above, the bar should cross roughly over the middle of the whole foot—not over the toes and not touching the shins yet.
This starting relationship matters because the combined lifter-and-bar system must remain balanced. If the bar begins too far forward, you must either pull it back toward you or work against a longer horizontal distance.
2. Hinge and take your grip
Push the hips backward and reach down without rolling the bar. Bend the knees only as much as needed for the shins to come close to the bar. Grip the bar just outside the legs with both arms straight.
Start with a double-overhand grip. It builds grip practice and keeps the shoulders symmetrical. Use chalk when permitted before relying on straps. A mixed grip can secure heavy loads, but it places the arms in different rotations; if you use it, alternate sides and never try to curl the bar with the supinated arm.
3. Build tension before you lift
With the bar still on the floor:
- Press the whole foot into the ground.
- Brace the trunk as if preparing to receive a firm push.
- Pull the shoulder blades gently toward your back pockets without trying to squeeze them together.
- Take the slack out of the bar and your body until you feel connected to the load.
- Choose a head position that keeps the neck comfortable and follows the trunk rather than craning toward a mirror.
Do not jerk a loose body against a heavy bar. The goal is a quiet setup followed by deliberate force.
4. Push the floor away
Begin the lift by driving through the whole foot. Think “push” rather than violently yanking with the arms. The hips and shoulders should rise together through the first part of the pull.
Keep the bar in light contact with, or very close to, the legs. The knees move back enough to clear the bar, but they should not snap backward while the chest stays down. If the hips rise several inches before the plates leave the floor, the starting position did not match the force you could produce.
5. Bring the hips through
Once the bar passes the knees, continue extending the hips until you stand tall. Keep the ribs stacked over the pelvis and the knees straight but not aggressively driven backward.
Lockout is not a backbend. Leaning behind the bar does not make the repetition more complete; it adds motion after the task is already finished.
6. Return the bar with control
Begin the descent by pushing the hips backward while keeping the bar close to the thighs. When the bar passes the knees, bend the knees and guide it to the floor. Reset your brace and foot pressure before the next repetition.
Touch-and-go repetitions can be useful for experienced lifters, but beginners learn more from a brief reset. The floor gives you a consistent start and stops one imprecise repetition from pulling the next one out of position.
What does “neutral spine” really mean?
“Keep a neutral spine” is useful only if it means a controlled, tolerable trunk position—not forcing every person into one exact visible curve. Human spines differ, and some movement occurs under load. The practical goal is to avoid a large, uncontrolled change between setup and pull, particularly when the load or fatigue is high.
Deadlifts impose real compression and shear forces. A single-subject musculoskeletal model estimated high L5–S1 loads during a 150 lb (68 kg) deadlift, while also showing that the estimates changed substantially with assumptions about anatomy and muscle moment arms (Ramirez et al., 2023). That is evidence that loading mechanics matter—not a universal injury threshold or proof that deadlifts are inherently unsafe.
Use these boundaries:
- choose a starting height that you can reach without losing control;
- brace before the bar moves;
- keep the load close;
- stop a set when trunk position changes more than planned;
- progress exposure gradually rather than testing your tolerance in one session.
If back pain is already present, do not assume that deadlifts are either forbidden or curative. A 2021 review found only three eligible studies of programs that included deadlifts for low-back pain and judged the evidence promising but limited (Fischer et al., 2021). A clinician can determine whether a hinge is appropriate and which range, load, and variation to use.
Eight common deadlift mistakes
| Mistake | What it changes | Practical correction |
|---|---|---|
| Starting with the bar near the toes | Lengthens the lever and pulls balance forward | Set the bar over midfoot before bending down |
| Squatting the bar away from you | Shins push the bar forward | Hinge first, then bend the knees until the shins meet the bar |
| Hips shooting up first | Turns the lift into a harder stiff-leg pull | Reduce load and push the floor away with hips and shoulders rising together |
| Jerking the bar from a loose setup | Creates an abrupt change in position | Brace and take out slack before applying full force |
| Letting the bar drift forward | Increases demand on the hips and trunk | Engage the upper back and keep the bar close to the legs |
| Bending the elbows | Transfers heavy load to structures not meant to curl it | Keep both arms long and treat them as straps |
| Leaning back at lockout | Adds lumbar extension without completing more work | Finish with ribs over pelvis and glutes engaged |
| Chasing repetitions after form changes | Turns fatigue into a new technique | End the set at technical failure, not after it |
Film a light set from the front-quarter and side. Check bar distance, foot pressure, hip-and-shoulder timing, and whether the final repetition resembles the first. Video is feedback, not a medical diagnosis, and a good deadlift need not match someone else’s limb angles.
Which deadlift variation should you choose?
Variations change joint positions and where the exercise is most demanding.
| Variation | Main feature | Useful when |
|---|---|---|
| Elevated kettlebell or barbell deadlift | Shorter reach to the floor | Learning the hinge or working around limited range |
| Conventional deadlift | Narrow stance, hands outside legs | Building a general floor-pull skill and hip strength |
| Trap-bar deadlift | Load surrounds the body | You prefer a more upright start or greater knee contribution |
| Sumo deadlift | Wide stance, hands inside legs | A wider hip position fits your anatomy and goal |
| Romanian deadlift | Starts from standing with controlled descent | Training the hinge and hamstrings through a chosen range |
| Rack pull or block pull | Bar starts above the floor | Practicing heavier lockout work or reducing starting range |
| Single-leg Romanian deadlift | Unilateral hinge with balance demand | Building side-to-side control with lighter loads |
A study in male powerlifters found that the trap bar shifted peak moments away from the lumbar spine and hip and toward the knee compared with a straight bar under its test conditions (Swinton et al., 2011). A 2025 study in 11 strength-trained women also found variation-specific differences: the trap bar produced greater velocity and knee moments, while conventional and sumo pulls produced larger hip moments near lockout (Gundersen et al., 2025).
These are average results from small trained samples, not a prescription for every body. Conventional, sumo, and trap-bar deadlifts are different tools. Choose the one that gives you a stable start, tolerable range, and clear path for progression.
A beginner deadlift progression
Do not earn the right to lift from the floor by repeatedly failing from the floor. Raise the load until you can organize the movement, then lower it over time.
| Level | Exercise | Starting dose | Advance when |
|---|---|---|---|
| 1 | Wall hip hinge | 2 × 8 | You reach the wall with the hips without squatting down |
| 2 | Dowel hip hinge | 2 × 6–8 | Head, upper back, and pelvis maintain controlled contact |
| 3 | Elevated kettlebell deadlift | 3 × 6 | Every repetition starts over midfoot with a close load |
| 4 | Elevated trap-bar or barbell deadlift | 3 × 5 | The last repetition matches the first |
| 5 | Floor deadlift | 3 × 5 | You can add the smallest plate increment without changing form |
Start with 10–30 lb (5–15 kg) for a kettlebell or an unloaded technique bar when that is challenging enough. A standard 45 lb (20 kg) barbell is not automatically a beginner load, and small plates may place it too low. Use stable risers rather than reaching deeper than you can control.
Repeat each level for at least two sessions. Lower the starting height in small steps, or add repetitions, before adding weight. Change only one variable at a time.
How to program deadlifts
Deadlifts create a large whole-body training demand, so more is not always better. Put them early in a session when they are the main strength exercise. Use a lighter Romanian or kettlebell variation later when it serves as accessory work.
For technique and general strength
- 1–2 sessions per week;
- 2–4 sets of 4–8 repetitions;
- 2–3 minutes of rest;
- stop with 3–4 repetitions in reserve while learning, then 2–3 as skill improves.
For maximal strength
- 1–2 deadlift exposures per week;
- 3–5 sets of 2–5 repetitions;
- 3–5 minutes of rest;
- keep most work at 2–3 repetitions in reserve and test rarely.
For muscle growth
- 2–4 sets of 6–10 repetitions with a conventional or trap-bar variation;
- or 2–4 sets of 6–12 repetitions with a Romanian deadlift;
- use straps selectively when grip ends the set before the target muscles;
- stop before fatigue changes the hinge or bar path.
The 2026 American College of Sports Medicine position stand emphasizes consistency over complexity. For healthy adults, it recommends training all major muscle groups at least twice weekly and tailoring load and weekly volume to strength, hypertrophy, or power goals (ACSM, 2026). A deadlift session contributes to that plan; it does not complete it.
Use the strength-training frequency guide to distribute weekly work, and the training-to-failure guide to choose a stopping point. Heavy deadlifts are usually a poor place to chase failed repetitions.
What benefits can deadlifts provide?
Whole-body strength
The lift trains force transfer from the floor through the legs and trunk to the hands. That coordinated demand can improve deadlift strength and support other lifting tasks, but the transfer depends on how similar the task is.
Rapid force production
In a randomized study of 54 novices, ten weeks of supervised deadlift training twice weekly improved measures of rapid knee torque and increased vertical jump height by 7.4% in the training group (Thompson et al., 2015). One study in young adults does not prove the same result for every athlete, but it shows that deadlift training can transfer beyond the one-repetition maximum.
Grip and trunk capacity
Holding a progressively heavier load trains grip and the ability to maintain trunk position. Grip may still need direct work, and deadlift load is not a clinical measure of health. If you want a standardized marker, use a dynamometer-based grip-strength test rather than comparing gym numbers between people.
A scalable floor-lifting pattern
Deadlifts can rehearse lifting an object close to the body, but a barbell is more predictable than a suitcase, child, or box. Training builds capacity; it cannot eliminate the need to assess the shape, grip, and environment of a real-world object.
Support for healthy aging
The benefit comes from progressive resistance training, not a special anti-aging property of the deadlift. A 2025 network meta-analysis of 151 randomized trials in adults aged 60 and older found that even low-volume resistance training improved physical function, lean mass, and muscle size, while moderate-to-higher volumes tended to produce larger lower-limb strength gains (Radaelli et al., 2025).
The World Health Organization recommends muscle-strengthening work for all major muscle groups on two or more days per week, alongside aerobic activity (WHO guidelines). Our complete exercise and longevity guide shows how strength, aerobic fitness, balance, and recovery fit together.
Track the training context with SuperAge
A phone or wearable cannot evaluate spinal position, decide whether a repetition was technically acceptable, or clear an injury. It can help you see the context around training: completed workouts, sleep, resting heart rate, heart-rate variability, daily activity, and longer-term recovery trends.
Record the variables the sensor cannot know:
- variation and starting height;
- load, sets, and repetitions;
- estimated repetitions in reserve;
- grip used;
- discomfort during and 24 hours after training;
- whether the last repetition matched the first.
Then compare weekly patterns. If load or repetitions rise while sleep, normal movement, and motivation remain stable, the dose may be tolerable. If performance falls while soreness and fatigue persist, reduce load, sets, or proximity to failure before adding complexity.
SuperAge organizes Apple Health and Apple Watch trends in one private view. Treat those trends as context, not permission: a favorable recovery score cannot make a painful deadlift safe, and one unusual reading does not prove that you must skip training.
Download SuperAge to review activity and recovery trends while you build a repeatable strength routine.
Are deadlifts safe?
No exercise is risk-free, and risk cannot be inferred from the appearance of one repetition alone. Load, fatigue, training history, prior injury, supervision, and the consequences of a failed attempt all matter.
An updated 2024 systematic review found injury incidence of 1.0–4.4 injuries per 1,000 training hours in powerlifting overall. The lower back and pelvis, shoulder, and elbow or upper arm were commonly reported sites, but study methods and injury definitions varied substantially (Tung et al., 2024). Those data describe a strength sport built around maximal squat, bench press, and deadlift performance—not a beginner doing controlled submaximal hinges.
Risk management is practical:
- learn with a load you can stop at any point;
- use collars and a clear lifting area;
- avoid maximal tests when fatigued, ill, or unfamiliar with the variation;
- do not use a mixed-grip arm to curl the bar;
- progress one variable at a time;
- include enough recovery for the whole week, not just the next morning;
- obtain coaching or clinical input when pain or medical history changes the decision.
Mild muscular effort and next-day soreness can occur after a new dose. Sharp pain, radiating symptoms, sudden weakness, or loss of function are not useful training targets. The DOMS recovery guide explains the difference between ordinary delayed soreness and a problem that needs a different response.
When to stop and seek assessment
End the set immediately if pain changes your movement, grip suddenly fails, you feel faint, or you cannot control the return to the floor.
Seek urgent medical care for:
- chest pain, fainting, or unusual shortness of breath;
- new leg weakness, spreading numbness, saddle numbness, or bowel or bladder changes;
- a sudden pop followed by major swelling, bruising, or inability to bear weight;
- severe pain after a fall or in someone at high fracture risk;
- dark urine with severe swelling or weakness after unusually hard exercise.
Arrange non-urgent assessment when pain persists, worsens across sessions, repeatedly travels below the knee, disrupts sleep, or changes normal walking and daily tasks. Our joint-friendly exercise guide provides a broader framework for modifying range and load without treating every symptom as damage.
Key takeaways
- Set the load over midfoot, brace before it moves, and keep it close.
- Push the floor away so the hips and shoulders rise together.
- Finish tall without leaning backward, then hinge before bending the knees on the descent.
- Use an elevated load or trap bar when the floor start exceeds your current controllable range.
- Begin with 2–3 sets of 5–8 repetitions and several repetitions in reserve.
- Progress repetitions, range, sets, or load one variable at a time.
- Choose a variation for your anatomy, symptoms, equipment, and goal—not because one style is universally best.
- Treat persistent pain, neurological symptoms, and loss of function as reasons for assessment.
Frequently asked questions
Is the deadlift a back exercise or a leg exercise?
It is a whole-body lift. The hips and knees extend, the spinal muscles and abdominal wall stabilize the trunk, the upper back keeps the load close, and the hands maintain grip. The relative demand changes with the variation and technique.
Should the bar touch my shins?
The bar should remain very close and may lightly contact the shins. It should not scrape them as a technique goal. Long socks can protect the skin, while a close controlled path keeps the external lever manageable.
How low should my hips be?
Low enough for you to create leg drive, but not so low that the shins push the bar forward. Your hip height depends on limb proportions, stance, grip width, and bar height. The key test is whether the bar stays over midfoot and the hips and shoulders rise together.
Is a trap-bar deadlift safer than a barbell deadlift?
The trap bar can produce a more upright position and shift demand toward the knees for some lifters, but “safer” depends on the person, load, range, symptoms, and execution. It is a useful alternative, not a guarantee against injury.
Should I use conventional or sumo stance?
Use the stance that gives you a stable start and tolerable hip position. Sumo shortens the vertical bar path and changes knee and ankle mechanics on average, while conventional generally uses a narrower stance. Neither is universally superior.
How often should I deadlift?
One or two weekly exposures are enough for many general-strength programs. A second session can use a lighter variation. Frequency should reflect total weekly hinge volume, other sports, recovery, and how close sets are taken to failure.
Are deadlifts appropriate after 50 or 60?
Age alone is not a prohibition. Start with a controllable range and load, progress gradually, and choose support or supervision when balance, osteoporosis, joint replacement, cardiovascular disease, or pain changes the risk. The goal is useful strength, not matching a younger athlete’s numbers.
Can I deadlift with low-back pain?
Sometimes, but not by default. Limited evidence suggests programs including deadlifts can help selected people with low-back pain, yet the correct variation and dose depend on the diagnosis, symptoms, confidence, and current capacity. Seek a clinician who can assess and coach the movement.
References
- American College of Sports Medicine. ACSM unveils landmark 2026 resistance training guidelines. 2026.
- Martín-Fuentes I, et al. Electromyographic activity in deadlift exercise and its variants: a systematic review. PLOS ONE. 2020.
- Lee S, et al. An electromyographic and kinetic comparison of conventional and Romanian deadlifts. Journal of Exercise Science & Fitness. 2018.
- Swinton PA, et al. A biomechanical analysis of straight and hexagonal barbell deadlifts using submaximal loads. Journal of Strength and Conditioning Research. 2011.
- Gundersen AH, et al. A biomechanical comparison between conventional, sumo, and hex-bar deadlifts among resistance-trained women. Journal of Strength and Conditioning Research. 2025.
- Thompson BJ, et al. Barbell deadlift training increases the rate of torque development and vertical jump performance in novices. Journal of Strength and Conditioning Research. 2015.
- Ramirez V, et al. Trunk muscle forces and spinal loads during heavy deadlift. International Journal for Numerical Methods in Biomedical Engineering. 2023.
- Fischer SC, et al. Effect of an exercise program that includes deadlifts on low back pain. Journal of Sport Rehabilitation. 2021.
- Tung MJY, et al. Injuries in weightlifting and powerlifting: an updated systematic review. BMJ Open Sport & Exercise Medicine. 2024.
- Radaelli R, et al. Effects of resistance training volume on physical function, lean body mass and lower-body strength in older adults. Sports Medicine. 2025.
- World Health Organization. WHO guidelines on physical activity and sedentary behaviour. 2020.
Last updated: August 11, 2026. This article is for general education and does not replace individualized medical, physiotherapy, or exercise-professional advice.
Related Articles

Lower back exercises: strength, technique, and progression
Learn lower back exercises with clear technique, safe progressions, a two-day strength plan, and evidence-based limits for stronger lumbar muscles.