Ice climbing for beginners: technique, gear, and safety
Learn ice climbing technique, essential gear, cold and avalanche hazards, beginner training, and a safer progression from first lesson to real ice.
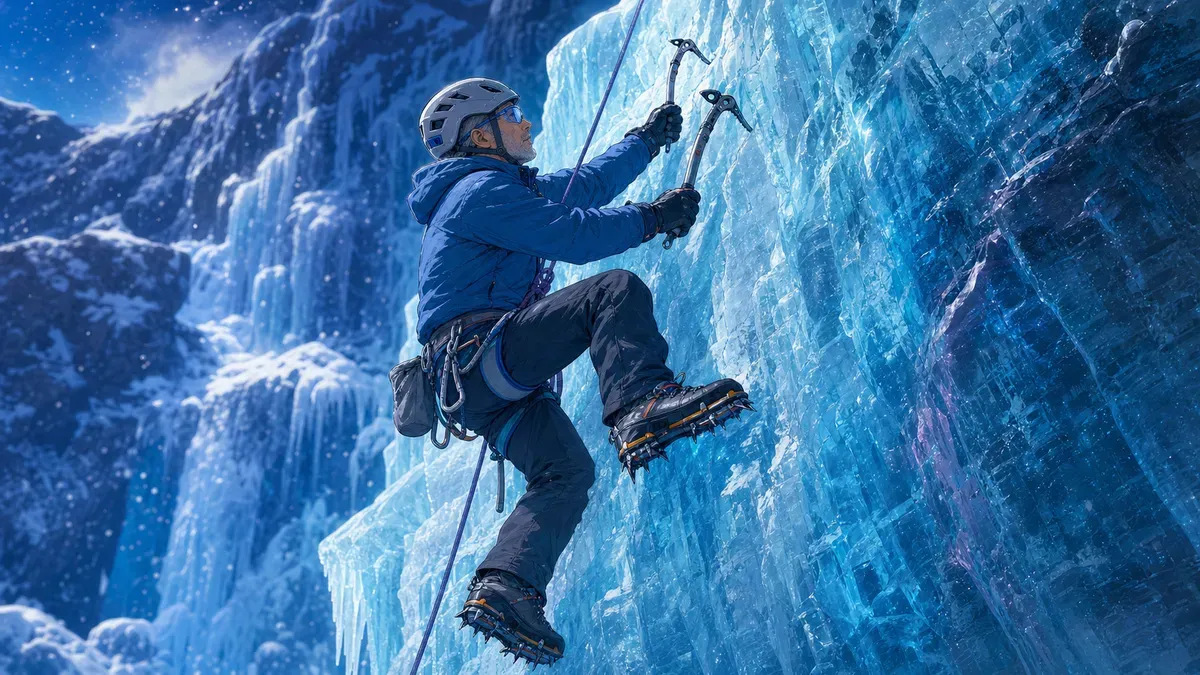
Ice climbing uses crampons and technical ice tools to move up frozen waterfalls, ice walls, and mixed winter terrain. It is learnable, but it is not a sport to teach yourself from an article: ice changes with temperature, protection requires judgment, falling ice is common, and the approach may cross avalanche terrain.
The safest beginner pathway is an instructor-led day on a short, managed top-rope route. Learn equipment checks, efficient footwork, tool placement, belaying, hazard zones, retreat decisions, and cold management before considering independent climbing or leading. This guide explains what those skills involve so you can arrive prepared, ask better questions, and progress without confusing fitness with technical competence.
Quick answer
Beginners should start ice climbing with a qualified guide or instructor on a top rope, not by placing their own protection. The core movement pattern is stable tool placements, quiet crampon kicks, hips close to the ice, straight arms when possible, and upward force produced mainly by the legs.
Use certified, mutually compatible equipment; keep a helmet and eye protection on near the ice; manage cold and wet clothing; and assess weather, ice condition, avalanche exposure, descent, and escape options before climbing. Turn around when the environment, equipment, or team exceeds the least-experienced climber’s competence.
Key facts
- Ice climbing instruction builds technical judgment: supervised practice connects movement, belaying, ice assessment, and retreat skills.
- Crampon precision reduces wasted effort: deliberate foot placements let the legs carry more load and the forearms recover.
- Falling ice drives injury risk: helmets, eye protection, spacing, and positions outside the fall line reduce exposure but cannot remove it.
- Cold and wind accelerate heat loss: dry layers, insulated hands and feet, food, fluids, and planned warming breaks protect performance and tissue.
- Avalanche terrain changes the objective: a frozen wall can be climbable while its approach, gully, or slope above remains unacceptable.
Ice climbing is a specialized branch of the broader full-body climbing workout. Fitness helps, but winter movement, rope systems, environmental judgment, and rescue planning are separate competencies.
What ice climbing actually involves
“Ice climbing” can describe several environments with different risks:
| Environment | Main feature | Beginner implication |
|---|---|---|
| Water ice | Frozen waterfalls or seepage that changes with weather | Learn on a managed route whose condition has been assessed that day |
| Alpine ice | Older, compact ice on mountain routes | Adds navigation, altitude, remoteness, and complex retreat decisions |
| Mixed climbing | Alternating rock, ice, frozen turf, or snow | Requires techniques and equipment use beyond a first water-ice lesson |
| Artificial ice wall | Deliberately formed ice in a managed venue | Can simplify access, but tools, crampons, ice fall, and belaying still require instruction |
| Dry tooling | Ice tools used on rock or designed indoor holds | Does not teach natural-ice quality or winter mountain judgment |
A short top-rope session and a remote multi-pitch route are not different versions of the same risk. Remoteness, avalanche exposure, variable anchors, route finding, and descent complexity can multiply consequences even when the climbing moves feel easy.
The New Zealand Alpine Club places basic snowcraft, avalanche education, navigation, and mileage on easier objectives before advanced technical-ice leadership. Mountaineering Scotland similarly emphasizes that equipment ownership is not skill and that winter movement, rope work, fitness, and instruction form the foundation (NZAC, Mountaineering Scotland).
For lower-consequence winter walking on deep snow, the beginner snowshoeing guide covers flotation equipment and movement while keeping technical climbing and avalanche exposure outside the beginner progression.
For a nontechnical approach or a separate cold-weather day hike, the winter hiking safety guide provides the broader layering, traction-selection, navigation, emergency-pack, and turnaround framework.
Why a qualified instructor is the first piece of safety gear
Written descriptions cannot show whether a tool placement is solid, a crampon fits a boot, an ice feature is detached, a belayer is exposed to falling debris, or an anchor is appropriate for that specific ice. Those decisions depend on sound, temperature history, geometry, local conditions, and practiced rope skills.
For a first session, look for a qualified mountain guide, climbing instructor, alpine club course, or established ice venue with:
- a clear guide-to-client ratio and stated prerequisites;
- helmets, compatible rental equipment, and a pre-climb fit check;
- a top-rope learning area away from overhead climbers where possible;
- explicit instruction in knots, belay checks, commands, lowering, and emergency procedures;
- a weather, ice, access, and avalanche plan; and
- a conservative alternative or cancellation policy when conditions deteriorate.
Previous rock-climbing experience helps with harnesses, tying in, belaying, and movement awareness, but it does not transfer automatically to crampons, tool use, ice quality, avalanche terrain, or cold management. If that movement base is new, practice it with the rock climbing techniques guide before treating ice as a separate, instructor-led progression. Strong gym climbers should still begin as winter novices.
Ice climbing gear: think in compatible systems
The International Climbing and Mountaineering Federation advises choosing certified equipment for the intended activity, checking compatibility, fitting protective items correctly, following inspection and retirement instructions, and avoiding counterfeit or undocumented gear. Its standards cover helmets, harnesses, ropes, braking devices, ice anchors, ice tools, and crampons (UIAA equipment guidance).
For a guided top-rope day, the operator may provide technical items. Do not buy a full rack before you understand what fits your boots, body, route type, and local conditions.
| System | Typical components | What must be checked |
|---|---|---|
| Head and eyes | Climbing helmet, impact-resistant eye protection | Secure fit over winter layers; clear vision; no cracks or known damaging impact |
| Feet | Insulated mountaineering boots, compatible crampons, anti-balling plates | Boot-crampon compatibility, secure attachment, sharp undamaged points, warm toes without constriction |
| Hands and tools | Technical ice tools, dexterous gloves, spare insulated gloves or mitts | Tool condition, pick security, grip with gloves, ability to operate all equipment without bare skin |
| Rope system | Harness, dynamic rope, locking connectors, belay device | Approved pairing, correct threading, partner check, manufacturer instructions, instructor oversight |
| Protection | Ice screws and anchor materials for qualified leaders | Ice quality, placement, redundancy, rescue and retreat competence; not a beginner self-teaching task |
| Clothing | Moisture-managing base, insulation, weatherproof shell, belay parka | Ventilation while moving, rapid insulation while stopped, dry spares, unrestricted harness and helmet fit |
| Emergency | First-aid kit, headlamp, communication, navigation, repair items, group shelter | Accessible with gloves, charged, weather-protected, and matched to remoteness and response time |
Crampons are not universally interchangeable with boots. Their binding, stiffness, front points, and frame need to match the boot and terrain; an apparently attached crampon can still be dangerously imprecise. The NZAC’s compatibility overview shows why fit must be checked as a system rather than inferred from a category label (NZAC crampons guide).
Efficient beginner technique: feet first, arms quiet
Ice climbing often feels like an upper-body workout because beginners overgrip the tools, pull with bent arms, and place their feet repeatedly. Efficient movement reverses that pattern: establish a stable frame, stand through the legs, and use the tools primarily for balance and connection.
1. Build a balanced stance
Keep the feet comfortably apart and the hips organized beneath the upper body. A stable stance lets you relax one limb at a time. Hanging far from the wall increases the lever on the arms; pressing the hips rigidly into the ice can make it harder to see the feet. The useful position is close, balanced, and adjustable.
2. Place the feet deliberately
Look at the target, lift the knee enough that the front points meet the ice cleanly, and make one controlled kick. Test the placement by weighting it progressively. Repeated frantic kicks fracture ice, waste energy, and increase the chance of striking a rope or your own leg.
Keep crampon points clear of the rope, gaiters, and trouser cuffs. Move one foot at a time while the other three points of contact remain organized. On lower-angle ground, instruction may use different crampon techniques; front-pointing is not the answer to every slope.
3. Make purposeful tool placements
Choose sound-looking ice, swing from the appropriate joints as demonstrated, and aim for one controlled placement rather than many maximal blows. A tool must be assessed before it is trusted. The visual appearance alone is not enough: natural ice may be brittle, aerated, detached, sun-affected, or poorly bonded.
Never swing when a person is directly below, and never climb directly beneath another party. Tools and crampons are sharp; spacious, deliberate movement is part of partner safety.
4. Stand up instead of doing a pull-up
Once the placements are secure, press through the legs and bring the hips upward. Keep the arms straighter when the position allows, then move one tool or foot at a time. Think place, test, stand, breathe, not swing, pull, rush.
5. Rest before the forearms fail
Grip only as hard as the placement and situation require. In a stable stance, lower one arm, open and close the hand, and shake gently while the other side and the rope system support the position. Switch sides before the pumped feeling becomes a loss of dexterity.
The climbing and grip-strength guide explains why forearm capacity matters, while the home grip-strength guide separates a health measurement from sport-specific technical skill.
Falling ice, ropes, and the belay zone
In a prospective study of 70 ice climbers, 42 injuries occurred over 4,275 hours, and falling ice was involved in 59.5% of them. Most injuries were mild, but the head was the most frequently injured area. The sample was small and does not define every venue’s risk, yet it makes the exposure pattern hard to dismiss (Runer et al., 2017). A separate event study found 16 minor injuries over 912 participation hours, illustrating how setting and study design can produce different incidence estimates (Ganti et al., 2021).
Practical controls include:
- wear a climbing helmet and impact-resistant eye protection from approach to departure when overhead ice is possible;
- keep the belayer out of the climber’s direct fall line when the rope system and venue allow;
- do not stand beneath other climbers, hanging features, or recently struck ice;
- manage rope coils so crampons cannot step on them and falling fragments cannot bury them;
- communicate before climbing, lowering, clearing ice, or changing the rope system; and
- keep spectators and loose equipment outside the hazard zone.
A helmet does not make a large falling block safe. When ice is shedding, detached, booming, or threatened by other parties, the correct control may be to move or leave.
Read the whole environment, not just the frozen wall
Ice condition is dynamic. A route may change across a day as sun, temperature, running water, snow loading, or repeated climbing alters it. Beginners should not try to reduce those variables to one “good temperature” rule. Ask the local professional how the recent temperature history affects that specific formation.
Before leaving the trailhead, discuss:
- current and recent weather, including wind and rapid warming;
- the local avalanche forecast and whether the approach, climb, belay, or descent crosses start zones, paths, or terrain traps;
- objective overhead hazards such as snow, cornices, loose rock, trees, and detached ice;
- route length, daylight, descent method, escape options, and turnaround time;
- communication coverage and emergency response delay; and
- the least-experienced member’s technical and physical capacity.
Avalanche forecasts are a starting point, not a permission slip. Terrain choice controls exposure, and online slope layers can be too coarse for field decisions. Formal avalanche education teaches forecast use, terrain recognition, group travel, and companion rescue; it cannot be replaced by carrying rescue equipment (Avalanche.org basics, terrain-based planning).
The avalanche formation and warning-sign guide adds the snowpack mechanics, major problem types, red flags, and companion-rescue logic behind those planning rules.
Cold management protects judgment and dexterity
Cold hands do more than feel unpleasant: they make buckles, knots, tools, and belay devices harder to operate. Wet layers, wind, long belays, insufficient food, and constrictive boots or gloves can accelerate the problem.
The CDC recommends loose insulating layers, protection for the face, ears, hands, and feet, waterproof insulated footwear, warm breaks, dry spare clothing, and monitoring partners for cold stress. It also warns against touching cold metal with bare skin (CDC cold-stress guidance). Wind chill describes increased heat loss from exposed skin as wind rises; it does not tell you whether the ice itself will freeze or thaw (National Weather Service).
Use a simple system:
- Start slightly cool, not sweaty. Vent on the approach before base layers become wet.
- Insulate before stopping. Put on the belay layer immediately rather than after shivering starts.
- Protect dexterity. Carry dry spare gloves or mitts and change them before hand function declines.
- Fuel and drink regularly. Use foods and bottles you can operate with gloves.
- Watch each other. Uncontrolled shivering, clumsiness, confusion, slurred speech, unusual fatigue, or poor decisions require action.
Frostnip can present as pale, numb exposed skin that improves with appropriate warming; it is a warning that conditions favor frostbite. The Wilderness Medical Society recommends prompt prevention and field decisions appropriate to the situation (WMS frostbite summary). Suspected hypothermia, persistent numb or hard skin, blistering, confusion, or deteriorating coordination requires stopping exposure and obtaining medical help; hypothermia is clinically assessed in the field because reliable core temperature may be unavailable (WMS hypothermia guidance).
Physical preparation without pretending the gym teaches ice
Ice climbing rewards general aerobic fitness, leg strength, shoulder control, trunk stiffness, grip endurance, balance, and the ability to work while carrying a pack. Training supports those capacities; it does not certify your belaying, anchor judgment, or hazard assessment.
Climbing research suggests that general and specific strength can support performance, while higher intensity, previous injury, and poorly managed load are relevant overuse concerns. Evidence for many popular prevention rituals remains mixed, so technique, progressive exposure, and recovery matter more than a magic warm-up (Saeterbakken et al., 2024, Quarmby et al., 2023).
A six-week pre-course plan
This example assumes you can already walk briskly and perform basic resistance exercise without concerning symptoms. Use two strength days and two or three easy aerobic days per week, leaving at least one easier day before your course.
| Weeks | Aerobic base | Strength focus | Climbing-specific practice |
|---|---|---|---|
| 1–2 | 2–3 sessions of 25–40 min easy walking, stairs, cycling, or hiking | Split squat, step-up, row, calf raise, loaded carry; 2 sets each | Easy indoor climbing or rope-skills lesson if available |
| 3–4 | One 45–60 min hilly session plus 1–2 easy sessions | 3 controlled sets; add trunk anti-rotation and shoulder external rotation | Technique-focused routes well below limit; stop before grip failure |
| 5 | One 60–90 min hike with a light pack plus 2 easy sessions | Maintain load; do not chase soreness | Practice gloves, layers, snacks, and pack access in cold conditions |
| 6 | Reduce total volume by about one third | One light full-body session early in the week | Equipment fit check and rest; no last-minute maximal finger training |
Use rating of perceived exertion to keep most aerobic work around 3–4 out of 10. Progress one variable at a time with the training-load guide, and use the balance-training guide for stable step-ups and single-leg control. Do not begin aggressive hangboard work just for a first ice day; tendons adapt more slowly than motivation.
A safer first-day progression
Conditions and instruction determine the order, but a well-managed introduction often moves from low consequence to greater complexity:
| Stage | What you practise | Readiness signal |
|---|---|---|
| Ground school | Harness, helmet, crampon fit, tool handling, knots, commands, partner check | You can repeat checks and commands without prompting |
| Low-angle movement | Flat-foot and edge awareness, balance, deliberate steps | Crampons remain clear of ropes and clothing |
| Short top rope | Tool placement, front points, hips, straight-arm rests, lowering | Movements remain controlled and communication stays clear |
| Repeated easy laps | Efficiency, pacing, glove management, rest positions | Technique remains stable before forearm fatigue dominates |
| More varied ice | Adapt placement and footwork under direct coaching | You can explain why a placement or position is accepted or rejected |
| Independent next step | Course debrief and a specific skills plan | The instructor, not enthusiasm alone, identifies the next appropriate environment |
Leading ice, constructing anchors, rappelling from ice, and traveling in avalanche terrain are separate learning objectives. Do not bundle them into an unsupervised second day because the first top-rope session felt easy.
Use SuperAge after technique and safety are covered
Ice climbing performance is not captured by one wearable number. SuperAge can help organize the background signals that support a good day—sleep, resting heart rate, activity consistency, cardio fitness, and recovery trends—but it cannot inspect ice, certify equipment, evaluate an anchor, or read avalanche terrain.
Track a few repeatable outcomes:
- approach time and perceived effort with a similar pack;
- number of easy top-rope laps completed with stable technique;
- forearm pump and whether dexterity returns during a normal rest;
- sleep, resting heart rate, and subjective fatigue before and after the session;
- any finger, elbow, shoulder, knee, or foot pain during the next 48 hours; and
- the guide’s technical feedback and your next practice priority.
Compare trends across several weeks rather than turning one cold-day heart-rate reading into a fitness verdict. The goal is more capacity with the same or lower effort, preserved movement quality, and no accumulating pain.
Download SuperAge to review fitness and recovery trends around your outdoor training while keeping route safety in qualified human hands.
No-go signs and medical red flags
Do not start—or stop and retreat—when:
- a qualified local leader rejects the ice or route;
- avalanche conditions, overhead snow, rapid warming, or the descent exceed the plan;
- essential equipment is damaged, incompatible, missing, or cannot be operated with gloves;
- communication fails or a partner cannot complete the agreed safety checks;
- falling ice, crowding, or rope position leaves no defensible belay zone;
- cold, wetness, darkness, fatigue, or anxiety is degrading decisions; or
- the team lacks a realistic retreat and emergency plan.
Seek urgent medical help after a significant fall, head impact, loss of consciousness, severe bleeding, chest pain, unusual shortness of breath, suspected fracture, loss of sensation, confusion, slurred speech, loss of coordination, or progressive cold injury. Do not continue climbing to “test” a neurological symptom or an injured limb.
For persistent finger, elbow, shoulder, knee, or foot pain, swelling, weakness, or reduced range of motion, stop loading the area and obtain a qualified assessment. A first ice-climbing trip is not worth converting a manageable problem into a rescue.
Frequently asked questions
Can a complete beginner try ice climbing?
Yes, on a suitable instructor-led top rope with fitted equipment and conservative conditions. You do not need elite upper-body strength, but you do need to follow commands, communicate clearly, tolerate cold, and accept that the guide may change or cancel the objective.
Do I need rock-climbing experience first?
It is helpful but not always required for an introductory course. Indoor climbing can teach harness use, tying in, belaying, and basic movement. Ice-specific footwork, tools, ice assessment, winter hazards, and cold management still require separate instruction.
Is ice climbing mostly arm strength?
No. Efficient climbers use stable crampon placements and leg drive, keep the arms straighter when possible, and rest before the forearms fail. Pulling constantly with bent arms is a common way to waste energy.
What equipment should I buy first?
For a first day, rent or use guide-provided technical equipment when possible. Start with compatible, well-fitted clothing and boots only after confirming course requirements. Learn how systems fit and function before buying tools, crampons, rope gear, or protection.
Are helmets enough protection from falling ice?
No. A helmet is essential, and eye protection is sensible, but neither makes a large falling block safe. Spacing, belay position, avoiding the fall line, route choice, timing, and leaving unstable ice are higher-level controls.
How fit should I be for a first ice-climbing day?
You should be comfortable with the operator’s stated approach, elevation gain, time outside, and pack weight. General hiking fitness, leg strength, balance, and moderate climbing endurance help. Ask for the exact physical demand rather than relying on a vague “beginner” label.
Can I ice climb when the temperature rises above freezing?
No universal temperature threshold can establish safety. Recent temperature history, sun, water flow, formation structure, altitude, wind, and local conditions all matter. Follow current local professional assessment and be ready to change objectives.
When can I start leading ice?
After structured instruction and substantial supervised mileage, when a qualified mentor or guide confirms competence in protection, anchors, rope management, route selection, ice assessment, retreat, and emergency response. Top-rope confidence alone is not readiness to lead.
Key takeaways
- Begin with a qualified instructor on a managed top rope.
- Use certified, compatible equipment and complete partner checks every time.
- Climb from deliberate feet and legs; use quiet tools, straight-arm rests, and controlled pacing.
- Treat falling ice, avalanches, cold, weather, approach, and descent as parts of the same objective.
- Build fitness progressively, but never substitute strength for technical or environmental competence.
- Turn around early when conditions or team function move beyond the plan.
References
- Runer A, et al. A 1-year prospective analysis of ice climbing injuries. Clinical Journal of Sport Medicine. 2017.
- Ganti A, et al. Epidemiology of ice climbing injuries among recreational ice climbers. Wilderness & Environmental Medicine. 2021.
- Saeterbakken AH, et al. The connection between resistance training, climbing performance, and injury prevention. Sports Medicine - Open. 2024.
- Quarmby A, et al. Risk factors and injury prevention strategies for overuse injuries in adult climbers. Frontiers in Sports and Active Living. 2023.
- UIAA. Ten things to consider when buying climbing gear. Updated 2026.
- Mountaineering Scotland. Getting started in winter climbing.
- New Zealand Alpine Club. So you want to start climbing?.
- New Zealand Alpine Club. Crampons 101.
- CDC/NIOSH. Cold and work: types, causes, preparation. Updated 2026.
- Wilderness Medical Society. Frostbite clinical practice guideline summary.
- Wilderness Medical Society. Accidental hypothermia clinical practice guideline summary.
- National Weather Service. Wind chill chart and calculator.
- National Avalanche Center and American Avalanche Association. Avalanche basics and terrain-based trip planning.
Related Articles
Nordic walking technique: poles, benefits, and a beginner plan
Learn Nordic walking technique, pole fit, common mistakes, evidence-based benefits, and a practical four-week beginner plan for safe progress.