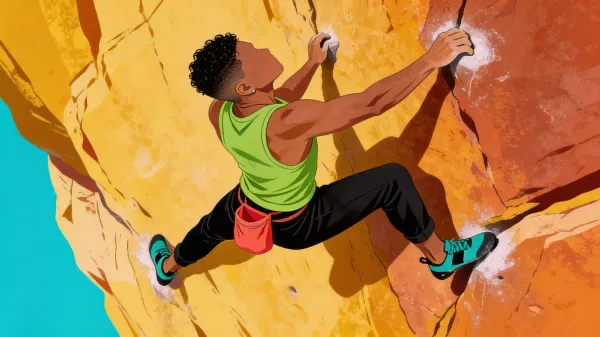
Rock climbing techniques: footwork, balance, and efficient movement
Learn rock climbing techniques for quieter feet, better balance, efficient hips, relaxed arms, safer falls, and a progressive four-week practice plan.
Good rock climbing technique is not a collection of impressive tricks. It is the repeatable ability to place a foot, shift your center of mass, move one limb, and regain a stable position without spending more grip strength than the move requires.
For a beginner, the fastest gains usually come from quieter feet, straighter arms, deliberate hip movement, and easier routes climbed with attention. Those skills make climbing feel less like repeated pull-ups and more like coordinated movement. They also create a better base for harder techniques later.
This guide focuses on movement, not knots, belaying, anchors, or outdoor protection systems. Learn those safety-critical systems from qualified instruction and follow the rules of the wall or crag where you climb.
Quick answer
The most useful rock climbing techniques for beginners are precise toe placement, pushing through the legs, keeping the arms relaxed when possible, moving the hips over the supporting foot, and using three points of contact while learning. Read the route before leaving the ground, move from one balanced position to the next, and practice on terrain easy enough that technique—not survival—gets your attention.
A simple sequence works for most moves: look, shift, place, load, reach, stabilize. Look at the next foothold, shift your weight so one foot can move, place the toe accurately, load it, reach with the free hand, then settle before the next move.
Key facts
- Precise footwork transfers body weight to the legs, reducing unnecessary demand on the hands and forearms.
- Center-of-mass shifts create stable reaching positions, allowing one limb to move without the body swinging away from the wall.
- Relaxed arms preserve finger-flexor endurance, while repeatedly pulling with bent elbows accelerates fatigue.
- Route preview organizes movement choices, helping climbers make fewer and shorter stops even when it does not guarantee completion.
- Progressive load management protects fingers and shoulders, especially before connective tissues have adapted to climbing-specific stress.
Climbing technique complements the broader strength, balance, and cognitive demands described in our complete climbing workout guide. This article narrows the lens to how you actually move on the wall.
The movement model behind efficient climbing
Every climbing move can be viewed as three phases: preparation, placement, and stabilization. A recent biomechanical systematization describes the same logic in more formal terms: shift the center of mass, place a hand or foot, then establish a new stable position (Sports, 2026).
That model matters because beginners often reverse the order. They reach first, discover that their body is poorly supported, grip harder, and then try to drag their feet into position. Efficient climbers build the platform before asking a hand to let go.
Use this six-word cue:
- Look: identify the next foothold and the handhold that follows it.
- Shift: move your hips until the foot you want to move becomes light.
- Place: set the toe once, accurately, without scraping for the hold.
- Load: press through that foot and feel it accept body weight.
- Reach: move the free hand while the rest of the body stays organized.
- Stabilize: pause just long enough to breathe, soften the grip, and plan again.
Research comparing climbers of different levels supports this whole-body view. Experienced climbers tend to apply less force to holds, use a wider movement repertoire, and coordinate postural shifts before releasing a limb (systematic review). Technique is therefore not simply “use your feet” or “keep your hips close.” It is the timing between contact, balance, and movement.
Eight foundational rock climbing techniques
1. Use the toe, not the middle of the shoe
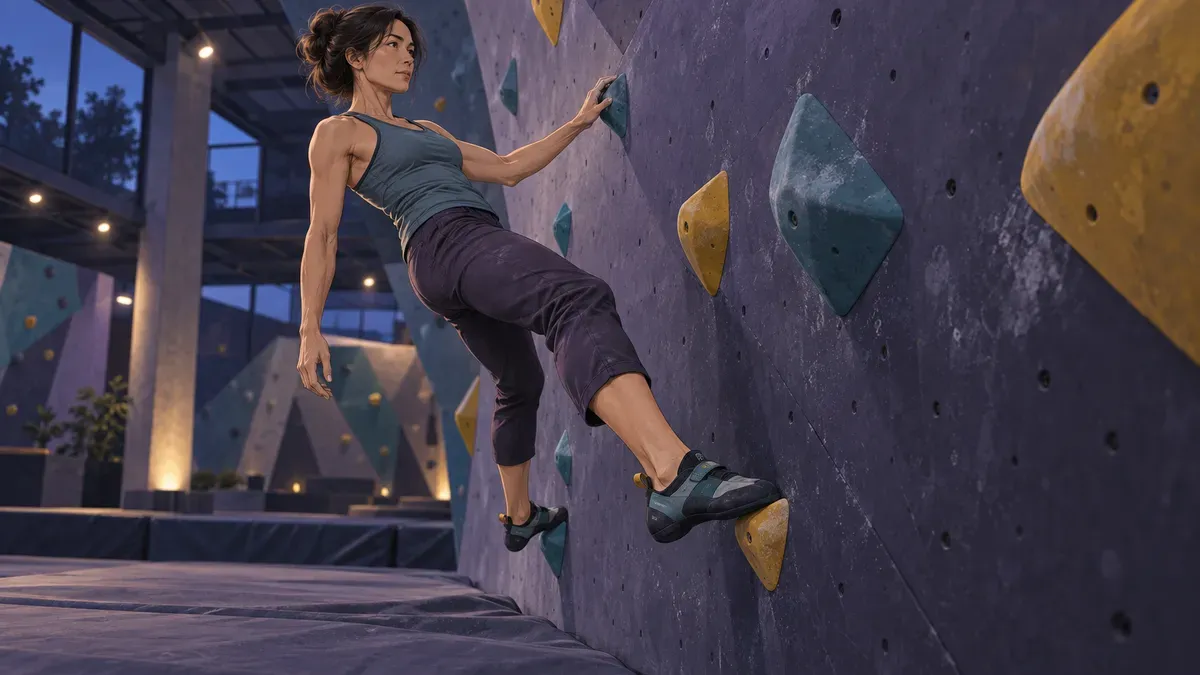
Place the inside edge near the big toe—or the outside edge when the body is turned—on the useful part of the foothold. A precise toe gives the ankle room to rotate and lets the hips move independently. Standing on the middle of the sole may feel secure on a large hold, but it reduces reach and makes small holds harder to trust.
Practice silent feet: choose the foothold, watch your toe until it lands, and try to make no sound. Do not look away before contact. A quiet placement is not automatically perfect, but noise often reveals a rushed foot, a correction, or a poorly planned weight shift.
On a sloping foothold, position the shoe to maximize rubber contact and press in the direction that creates friction. The useful cue is not always “heel down” or “heel up”; it is load the surface you actually have.
2. Push the wall away with your legs
The legs can produce force for longer than the forearms can sustain hard gripping. After placing a foot, extend the knee and hip to move your body upward. Let the hands guide and connect you to the wall instead of trying to perform a pull-up on every move.
A good drill is to climb an easy vertical route while imagining that every handhold is fragile. You may hold it, but you cannot yank it. If you stall, ask whether a higher foot or a stronger leg drive solves the move before pulling harder.
This does not mean the upper body is passive. It means the largest available muscles perform the bulk of the lifting whenever the geometry allows it.
3. Keep straight arms when you are resting or planning
When you hang with the elbows repeatedly flexed, the biceps and shoulder muscles work continuously. With straighter arms and engaged shoulders—not loose, collapsed joints—the skeleton carries more of the load while the muscles spend less energy.
The cue is soft elbows, active shoulders. Avoid locking the joint aggressively, shrugging into the ears, or hanging on painful end ranges. Bend the arm when a move requires it, then return to a less costly position when you stabilize.
Finger and shoulder endurance still matter in climbing, particularly on steep terrain, but technique controls how quickly those resources are spent. If your forearms pump within a few moves on easy ground, grip pressure and bent-arm time are useful things to examine before blaming fitness.
4. Move the hips over the supporting foot
Your center of mass is usually near the pelvis. To unweight the left foot, move your hips toward the right foot; to reach far with the right hand, a loaded right or left foot may be best depending on hold direction and wall angle. There is no universal “hips always close” rule.
On vertical terrain, moving the hips laterally over a foothold often creates balance. On a slab, keeping the center of mass over the feet generates friction. On an overhang, bringing the hips closer to the wall can reduce the lever pulling you away—but sometimes extending the hips briefly creates momentum or reaches a distant hold.
Think hips where the move needs them, not hips frozen against the wall.
5. Build diagonal tension
One hand and the opposite foot often form the strongest diagonal line: right hand with left foot, or left hand with right foot. This resembles the coordinated pattern used in walking and crawling. Loading the diagonal can stop the torso from rotating away and free the other hand or foot.
Try a slow traverse. Before moving the right hand, deliberately press the left foot. Notice whether the right hand becomes lighter. Then reverse the pattern. This exercise teaches force transfer better than memorizing a pose.
6. Flag to prevent the barn-door swing
A flag places the free leg against or near the wall for counterbalance. The foot does not need a hold. It acts like a movable counterweight that keeps your center of mass inside the available support line.
If your body swings open like a door when you release one hand, repeat the move and extend the free leg across or behind the loaded leg. Change the flag’s height and direction until the swing disappears. The goal is not to copy a textbook shape; it is to balance the rotational force created by the holds.
Flagging is especially useful on sparse vertical routes and traverses. Learn it first on large holds, close to the floor, where you can explore without clinging.
7. Turn one hip toward the wall
Climbing square to the wall is simple, but it can shorten reach and make steep moves tiring. Rotating one hip inward turns the body sideways, brings one shoulder closer to the next hold, and can let the climber use the outside edge of a shoe.
Two common expressions of this principle are:
- Side-on movement: rotate a hip toward the wall while keeping both feet on usable holds.
- Drop knee: rotate a leg inward and lower the knee to create tension and extend reach.
Treat a drop knee as a position, not a forced stretch. If it creates knee, hip, or ankle pain, exit the position. The difference between flexibility and usable mobility explains why having passive range does not guarantee control at the edge of that range.
8. Preview the route and breathe at stable positions
Before starting, trace the handholds, identify likely footholds, notice where the wall angle changes, and choose one or two places where you might pause. You do not need to predict every move. The goal is to reduce avoidable indecision.
In an experiment on indoor climbers, a three-minute visual preview did not make route completion more likely, but it did reduce the number and duration of stops (Sanchez et al.). Later work found that the holds climbers looked at during planning were closely linked to those used during execution (Frontiers in Psychology, 2024).
Pair preview with breathing. Exhale during the hard part of a move; once stable, take one deliberate breath and relax whichever fingers do not need full force. Breathing will not solve poor geometry, but breath-holding is a useful sign that tension has spread beyond what the move requires.
Match technique to the wall angle
Slab: trust the feet and stack over them
On a slab, the wall leans away from you. Keep your center of mass over the footholds, make small steps, and resist pulling your chest toward the wall with the hands. Friction improves when force travels into the surface of the foothold. Looking down long enough to place each foot is a feature, not a flaw.
Good slab drills include no-hand climbing on very easy terrain under supervision, pausing on one foot, and repeating a route with fewer hand corrections.
Vertical wall: shift before you reach
Vertical climbing rewards lateral weight transfer. Move the hips toward the supporting foot, establish diagonal tension, then reach. Flagging and side-on positions often solve moves that feel too far away when you remain square.
If a reach feels impossible, test three questions: Can the foot go higher? Can the hip move farther sideways? Can the body rotate so the reaching shoulder becomes closer to the hold?
Overhang: keep tension between hands and feet
On steep terrain, gravity pulls the hips away from the wall. Use higher feet, turned hips, heel or toe hooks when taught, and deliberate core tension to keep force moving through the feet. Straight arms still save energy at rest positions, but the shoulders and trunk must remain active.
Beginners do not need to learn on severe overhangs. A mildly steep wall with large holds teaches tension without turning every attempt into a grip-strength test. Build the shoulder capacity described in our shoulder strength and mobility progression alongside—not during—a fatigued climbing session.
Drills that turn cues into automatic skill
Choose routes at least two or three difficulty steps below your limit. If falling is likely on every move, the body will prioritize getting through the move rather than learning a cleaner option.
Silent feet
Climb slowly and require every placement to be quiet. If the foot scrapes or readjusts, return to the previous position when safe and repeat it. Complete two easy routes with precision rather than ten rushed routes.
One-touch feet
Once a foot touches a hold, do not reposition it. This forces visual commitment before contact. Keep the terrain easy, because the objective is accuracy—not awkwardly defending a bad placement.
Hover before contact
Pause the toe about 1 inch (2–3 cm) above the target for one second, then place it. The hover exposes whether the rest of the body is stable enough for precise footwork.
Straight-arm traverse
Traverse on large holds while returning to soft, nearly straight arms between moves. Shift the hips and bend the knees instead of keeping the elbows flexed. Stop if the shoulders feel pinched or unstable.
Downclimb the route
Reverse an easy sequence instead of dropping or lowering immediately when the setting allows it. Downclimbing forces you to look at the feet and control the lowering phase. It also adds volume, so account for it in the session rather than treating it as free practice.
Three versions of one move
Repeat a short easy section using three solutions: square hips, one hip turned in, then a flag. Compare grip pressure, balance, and reach. Climbing has many workable solutions; the most efficient one depends on your body and the route.
A four-week beginner technique plan
Two sessions per week are enough to build skill while leaving recovery time. Keep most climbing comfortable and end the session before finger or shoulder control deteriorates.
| Week | Main focus | Session practice | Progress marker |
|---|---|---|---|
| 1 | Foot accuracy | Silent feet and one-touch feet on easy routes | Fewer scrapes and corrections |
| 2 | Balance | Hip shifts, diagonal loading, and three-point pauses | One hand can release without swinging |
| 3 | Rotation | Flags and side-on positions on vertical terrain | Longer reach with no extra pull |
| 4 | Flow | Route preview, deliberate breathing, and easy repeats | Fewer stops and softer grip |
Start each session with 10–15 minutes of general movement and progressively easier climbing. The direct evidence that a warm-up prevents climbing injuries is limited, so do not turn “warming up” into a guarantee. Its practical role is to rehearse movement and increase intensity gradually.
Rest long enough between attempts that you can practice the intended skill. On boulders, that may mean two or three minutes after a demanding effort. Finish with a few minutes of easy movement only if your technique remains controlled.
Track session difficulty, finger or joint symptoms, and how many hard attempts you made. The science of recovery between workouts is more useful than copying another climber’s schedule.
Safety is a separate skill, not a side effect of good movement
Better footwork may reduce wasted effort, but it does not make unsafe systems safe. Indoor bouldering, top-rope climbing, lead climbing, autobelay use, and outdoor climbing have different hazards and require different instruction.
- Start with an induction or beginner course. The British Mountaineering Council recommends climbing walls as a controlled entry point and qualified instruction before moving outside (BMC starting guidance).
- Learn the wall’s fall and landing rules. A 2025 study of injured adult boulderers found that lower-limb injuries dominated, with ankle sprains the most common outcome (BMJ Open Sport & Exercise Medicine). Practice downclimbing and controlled landings with staff rather than improvising from high on the wall.
- Keep landing zones clear. Mats reduce impact; they do not remove the possibility of injury. Never walk or sit beneath another climber.
- Use partner checks for ropes and autobelays. National autobelay guidance hosted by the UIAA emphasizes training, self-checks, partner checks, a functional test, and confirming the carabiner before descent (2024 guidance). Follow the equipment maker and facility instructions.
- Do not transfer indoor competence directly outdoors. Rock quality, weather, route finding, access, anchors, protection, and falling consequences add systems that this movement guide does not teach. Use qualified local instruction.
For standards, recalls, and general equipment-safety information, consult the UIAA Safety Commission. For ice, crampon and tool technique create a separate discipline; begin with our ice climbing technique and safety guide.
Manage finger and shoulder load as technique improves
New climbers often gain coordination and confidence faster than finger connective tissues adapt. That mismatch can tempt you onto smaller holds and harder sessions before the hands are ready.
A 2025 systematic review found that adult climbing injuries are commonly overuse problems involving fingers and shoulders, while evidence for individual preventive measures remains incomplete (systematic review). Another study found that regular fingerboard training was associated with more self-reported finger pain or injury in advanced men with fewer than six years of climbing, while the relationship differed in experienced climbers (Wilderness & Environmental Medicine). That does not prove that fingerboards caused the injuries, but it argues against treating advanced finger training as a beginner shortcut.
Use these practical boundaries:
- Stop a move that causes sharp finger, elbow, or shoulder pain.
- Avoid high-intensity fingerboard, campus-board, and repeated full-crimp training as a new climber unless a qualified coach or clinician has a specific reason for it.
- Add difficult moves gradually instead of increasing grade, session duration, and frequency in the same week.
- Leave at least one recovery day between early sessions; add more if symptoms or movement quality worsen.
- Seek a sports clinician familiar with climbing for persistent swelling, loss of motion, weakness, a pop, bruising, or pain that changes how you move.
Tape is not a substitute for assessment or load management. The injury literature does not support preventive finger taping as a universal shield, and people already managing pain may be more likely to tape.
Use SuperAge to support the practice, not score the route
Climbing grades show what you completed; they do not explain whether you are recovering well enough to learn from the next session. SuperAge can add context by organizing sleep, resting heart rate, heart-rate variability, activity, and longer-term health trends already available through Apple Health.
Look for patterns rather than one-day verdicts. A declining HRV trend, elevated resting heart rate, poor sleep, persistent soreness, and unusually heavy warm-up can support the choice to make the session technical and easy—or to rest. They cannot diagnose a finger pulley or decide whether a safety system is correct.
The training readiness guide explains how to combine signals without letting a single number control the day. Over months, pair those trends with practical climbing outcomes: quieter feet, fewer unnecessary readjustments, controlled downclimbing, and consistent pain-free practice.
Common technique mistakes and the better question
| Mistake | What it costs | Better question |
|---|---|---|
| Reaching before shifting weight | Swinging and harder grip | Which foot must carry me first? |
| Looking away during foot placement | Scrapes and readjustments | Can I watch the toe until contact? |
| Pulling with bent arms on every move | Early forearm and arm fatigue | Can the legs move my hips instead? |
| Keeping hips fixed against the wall | Lost balance or reach | Where should my center of mass go? |
| Trying harder routes to learn faster | Survival movement replaces practice | Is this easy enough to repeat cleanly? |
| Copying another climber exactly | Poor fit for reach and mobility | What principle makes their solution work? |
| Training through finger pain | Compensation and higher load | What needs rest or assessment now? |
Key takeaways
- Build each move in order: look, shift, place, load, reach, stabilize.
- Use accurate toes and leg drive before adding more pulling effort.
- Move the hips to create balance; do not force one body position on every wall angle.
- Practice flags, diagonal tension, and side-on movement on routes well below your limit.
- Preview the route and use stable positions to breathe and soften the grip.
- Treat fall skills, belaying, autobelay use, and outdoor systems as separate safety competencies taught by qualified people.
- Progress hard finger loading slowly and respond early to pain or loss of movement quality.
Put one technique on the wall today
Choose one easy route and one cue—silent feet, straight arms, or shift before reach. Climb it three times, changing only that variable, and note which attempt required the least grip pressure. Small, repeatable experiments build technique more reliably than collecting more tips.
FAQ
What is the most important rock climbing technique for beginners?
Precise foot placement combined with deliberate weight shifting gives beginners the highest practical return. Watch the toe land, load the foot, and move the hips before reaching. This lets the legs contribute and reduces the urge to overgrip.
Should I keep my hips close to the wall?
Often, but not always. On overhangs, reducing the distance between hips and wall can lower the lever pulling you away. On vertical routes, shifting sideways may matter more. On slabs, the center of mass must stay over the feet, which may place the torso away from the wall. Put the hips where balance and force direction require them.
Should beginners climb with straight arms?
Use relaxed, nearly straight arms when resting or planning, while keeping the shoulders active and comfortable. Bend the elbows when the move demands it. “Straight arms” is an energy-saving cue, not an instruction to lock joints or hang passively in a painful position.
What is flagging in rock climbing?
Flagging extends a free leg to counterbalance rotation. The foot may press on the wall or hover without a foothold. It helps keep the center of mass within the support created by the loaded hand and foot, preventing the body from swinging open.
How can I improve climbing footwork at home?
General balance, ankle mobility, calf strength, and controlled single-leg work can help, but foothold accuracy is task-specific. The most direct practice happens on an easy climbing wall with silent-feet, hover, and one-touch drills. Our balance training guide can support the general capacity.
How often should a beginner practice climbing technique?
Two sessions per week is a useful starting point for many adults. It provides repeated exposure while leaving recovery time. Adjust for age, training history, other exercise, pain, and session intensity. More frequency is not better if precision and joint comfort deteriorate.
Do I need strong fingers before I start climbing?
No. Beginner routes use large holds and are designed to teach movement. Skill practice and gradual climbing volume should come before specialized finger-strength work. Avoid using a fingerboard as an entry requirement.
Can I learn rock climbing techniques without an instructor?
You can observe and practice movement cues, but safety systems should not be self-taught from an article. An instructor or qualified wall staff member can also spot movement errors that are difficult to feel. Use this guide as practice structure after completing the required induction or course.
References
- Augste C, et al. Biomechanical principles and techniques—a systematization for sport climbing. Sports. 2026.
- Saul D, et al. Determinants for success in climbing: a systematic review. Journal of Exercise Science & Fitness. 2019.
- Sanchez X, et al. Efficacy of pre-ascent climbing route visual inspection in indoor sport climbing. Scandinavian Journal of Medicine & Science in Sports. 2012.
- Musculus L, et al. Embodied planning in climbing: how pre-planning informs motor execution. Frontiers in Psychology. 2024.
- Bielecki JE, et al. Epidemiology of musculoskeletal injuries among climbers—a systematic review. Journal of Clinical Medicine. 2025.
- Sjöman A, et al. A finger in the game: sport-specific finger strength training and onset of injury. Wilderness & Environmental Medicine. 2023.
- Soulé B, et al. The art of falling: identifying the fall scenarios associated with bouldering injuries. BMJ Open Sport & Exercise Medicine. 2025.
- British Mountaineering Council. Five steps to start climbing.
- Norwegian Climbing Federation Safety Commission. National guidelines for use of autobelay. 2024.
- International Climbing and Mountaineering Federation. Climber safety.
This article is educational and cannot replace in-person safety instruction, individualized coaching, or medical assessment. Climbing involves fall, equipment, environmental, and overuse risks.
Related Articles
Skateboard tricks for beginners: skills, safety, and progression
Learn skateboard tricks for beginners with a five-skill progression, safety setup, practice schedule, common fixes, and readiness checks for the ollie.