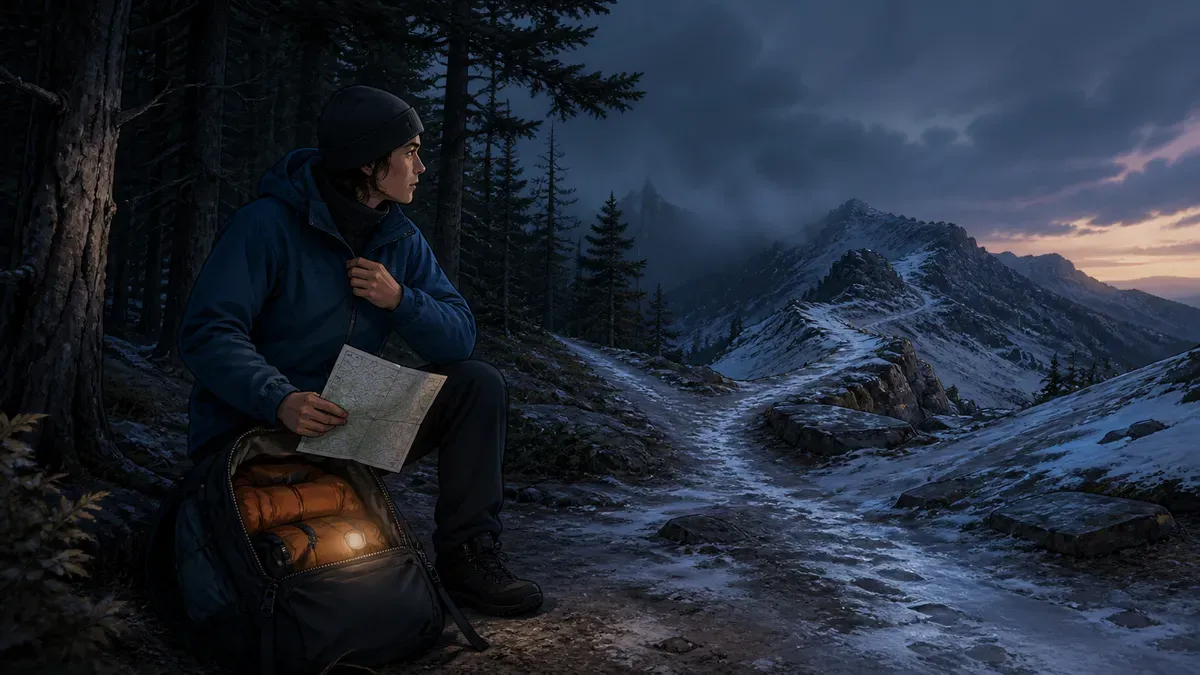
Winter hiking safety: layering, gear, and a smarter trip plan
Plan safer winter hiking with a practical layering system, traction choices, weather checks, cold-injury warning signs, and firm turnaround rules.
Winter hiking safety starts before the trailhead. A cold-season day hike asks you to manage short daylight, rapidly changing weather, wet clothing, ice or snow, navigation changes, and a slower-than-expected return. The safest plan matches the route, clothing, traction, food, emergency insulation, and turnaround time to the actual forecast and to the least-prepared person in the group.
Dress so you can remove insulation before you sweat heavily, add it before a stop, and protect yourself from wind and precipitation. Check official weather, trail, road, and avalanche information; carry independent navigation and light; choose traction for the surface; and define conditions that will make you turn around. Winter equipment widens a safety margin only when you have tested it and know its limits.
Quick answer
For a safer winter hike, choose a familiar or low-consequence route with an easy exit, then shorten your normal distance for snow, ice, wind, and reduced daylight. Wear a moisture-managing base layer, adjustable midlayer, weather-resistant shell, warm stop layer, hat, gloves, dry spare socks, and route-appropriate footwear. Carry navigation, headlamp, food, water, first aid, emergency shelter, fire-making or warming capability where appropriate, sun protection, repair items, and communication suited to the area’s coverage.
At the trailhead, reassess weather, visibility, surface, group condition, and the latest return time. Turn around for worsening coordination, persistent numbness, uncontrollable shivering, confusion, unsafe traction, uncertain navigation, rising water, avalanche exposure beyond your training, or any forecast threshold you set in advance. Reaching the summit is optional; returning with decision-making capacity is the objective.
Key facts
- Layer changes regulate moisture: venting or removing insulation before heavy sweating reduces the wetness that can accelerate cooling later.
- Winter surfaces raise effort: snow, mud, ice, elevation gain, and a heavier pack can slow travel even when perceived exertion rises.
- Wind accelerates exposed-skin heat loss: wind chill estimates risk for exposed skin but does not replace attention to wet clothing, fatigue, shelter, and duration.
- Traction must match the surface: flexible ice cleats, snowshoes, and mountaineering crampons solve different problems and do not substitute for skill.
- Turnaround rules protect judgment: a written time and observable no-go conditions are more reliable than deciding after fatigue and commitment have accumulated.
Winter hiking builds on ordinary fitness walking technique, but it adds environmental problems that pace, enthusiasm, and a phone battery cannot solve.
Begin with a winter-sized route
Do not plan from summer distance alone. Winter can remove trail markers, conceal holes and streams, turn a gentle descent into ice, close access roads, and cut usable daylight. A route that takes three hours in dry conditions may demand substantially more time after new snow or repeated traction changes.
Screen the route as a chain of decisions:
- Access: Are the road, parking area, gate, transit, and trail officially open?
- Surface: Is the likely problem mud, shallow ice, packed snow, deep snow, steep firm snow, or a mixture?
- Exposure: Where would wind, falling ice, avalanche runout, a stream crossing, or a slip have serious consequences?
- Navigation: Will the route remain obvious after snowfall, fog, or early darkness?
- Exit: Can the group shorten the outing without committing to a difficult descent?
- Communication: Is there reliable mobile service, and what is the backup if there is not?
For a first winter outing, pick a popular but not necessarily crowded route that is short, well described, mostly below exposed ridges, outside avalanche terrain, and easy to reverse. Familiarity helps, but do not assume a familiar summer trail has familiar winter hazards. The National Park Service advises checking current weather and trail conditions, carrying navigation independent of mobile service, and being willing to turn around as snow and conditions change (NPS winter hiking tips).
Set a daylight budget, not just a start time
Find local sunrise and sunset, then estimate usable light for the terrain rather than treating sunset as a finish target. Dense forest, a shaded valley, cloud, or a high ridge can reduce visibility earlier. Plan to be back before dark and carry a headlamp with spare power anyway.
Use conservative segment times and add explicit margins for layer changes, food, navigation checks, traction transitions, and a slower member. Define a turnaround time even if the endpoint is close. If the turnaround time arrives, turn around; do not borrow from the emergency margin because the summit looks near.
Leave a trip plan someone can act on
Tell a responsible person the route, direction of travel, planned parking location, participants, vehicle description, equipment or communication method, expected return, and the time at which they should contact local authorities. Update that person when the plan changes and confirm when everyone is safely back.
A vague message such as “hiking in the mountains” cannot guide a timely response. An exact plan also forces you to identify gaps before departure. The mountain tent-camping guide covers overnight systems; a winter day-hike pack should still protect you through an unplanned delay, but it is not an improvised license to turn the outing into a night outside.
Read the forecast as a system
A single temperature icon is not a winter forecast. Check an official, location-specific forecast close to departure and compare conditions at the trailhead, high point, exposed sections, and expected return time. Look at:
- air temperature and its trend;
- wind speed and gusts;
- precipitation type, timing, and accumulation;
- cloud, fog, and visibility;
- recent freeze-thaw cycles;
- daylight;
- watches, warnings, and advisories;
- recent trail or road reports; and
- the official local avalanche forecast where snow-covered steep terrain exists.
Build decision thresholds from the route. A mild trailhead with rain can become a colder, windier ridge with wet clothing. A warm afternoon can weaken snow bridges or send water over an icy crossing. A forecast that is acceptable for a sheltered loop may be unacceptable for an exposed traverse.
The National Weather Service explains that wind chill estimates heat loss from exposed skin. It does not mean equipment or skin will cool below the actual air temperature, and it does not capture every risk from moisture, exertion, illness, or prolonged exposure (NWS wind chill guidance). Use it as one input, not as a universal go/no-go number.
Define no-go and turn-back conditions at home
Examples include:
- an official closure, warning, or forecast above your competence;
- precipitation beginning earlier or heavier than expected;
- wind that makes balance, communication, or exposed-skin protection unreliable;
- visibility too poor to identify the route or hazards;
- ice that exceeds the group’s traction and movement skill;
- evidence the route enters avalanche terrain without appropriate education, forecast use, rescue equipment, and partners;
- a delayed start that consumes the daylight margin; or
- a participant who is ill, poorly rested, inadequately equipped, or already cold at the trailhead.
Write the triggers down. Precommitment keeps “we came all this way” from becoming a safety argument.
For storm-specific turnaround and shelter decisions, see our guide to hiking thunderstorm safety.
Build a layering system you can operate
The goal is not to feel maximally warm at every moment. It is to keep skin and insulation reasonably dry, block wind and precipitation when needed, and preserve enough warmth for stops or delays. Exercise generates heat; excessive insulation during a climb can produce sweat that later cools rapidly.
| Layer or item | Main job | Field adjustment |
|---|---|---|
| Base layer | Move moisture away from skin and reduce clammy contact | Choose a comfortable fit; replace if soaked during a long delay |
| Active midlayer | Adjustable insulation while moving | Zip, vent, remove, or add as pace and exposure change |
| Shell | Reduce wind and precipitation penetration | Put it on before exposure; vent it before condensation accumulates |
| Stop layer | Restore insulation during breaks or emergencies | Add immediately before cooling, over or under the shell as conditions allow |
| Hat and neck protection | Control exposed area and comfort | Remove or vent on hard climbs; replace before stopping |
| Gloves or mitts | Protect dexterity and exposed tissue | Carry a dry spare; use a warmer over-mitt for stops |
| Socks and footwear | Manage moisture, insulation, fit, and surface | Change wet socks when safe; stop for numbness or pressure |
Fabric labels alone do not guarantee comfort or thermoregulation. A review of clothing and exercise found that construction, coverage, airflow, moisture, work rate, and environmental conditions interact, while outdoor-like combinations remain difficult to reproduce in studies (Gavin, 2003). Judge the whole system in the conditions and intensity you actually use.
Start slightly cool and adjust early
Make the first layer change before the base layer is wet. Open vents, remove the hat, slow the pace, or remove a midlayer early in a climb. Before a ridge, exposed crossing, long descent, or rest, close vents and add protection while hands still work well.
Do not wait for a group member to announce distress. Ask specific questions: Are your fingers fully functional? Are your feet becoming numb? Is your base layer wet? Can you open your pack and use your headlamp? Check one another for behavior and coordination changes.
Protect hands, feet, face, and eyes
Footwear must fit with the intended socks without compressing circulation. Waterproofing can reduce external wetting but may also trap sweat; gaiters can keep snow and debris out. Carry spare dry socks in a waterproof bag and address hot spots before cold reduces sensation.
Persistent itching, peeling, or pale softened skin between the toes needs a different response from cold numbness. The guide to athlete’s foot, moisture irritation, and safe treatment explains how to dry the area, recognize common mimics, and decide when it needs clinical review.
Use gloves that allow routine tasks and warmer mitts or over-mitts for exposed stops. Protect ears, nose, cheeks, and lips as conditions require. Snow can reflect ultraviolet radiation, so sunglasses or goggles and sunscreen remain relevant in winter.
Cotton is a poor next-to-skin choice when it is likely to become wet and stay wet. More important than repeating a slogan is protecting every insulation layer from precipitation and pack leakage, carrying a dry emergency option, and changing pace or clothing before sweat saturates the system.
Choose traction by the problem underfoot
No single device makes every winter trail safe. Inspect the route description and current reports, then carry only equipment that fits your footwear and that you have practised using with gloves.
| Surface and consequence | Possible tool | Important limit |
|---|---|---|
| Thin ice on low-angle walking terrain | Flexible over-shoe ice cleats | Vary greatly in grip and durability; not mountaineering equipment |
| Packed snow or mixed low-angle trail | Chains or more aggressive hiking traction | Can ball up, shift, or lose grip on rock and steep ice |
| Deep, soft snow | Snowshoes | Improve flotation but add width, effort, and specific technique |
| Steep, firm snow or ice | Compatible mountaineering crampons, often with other technical tools | Require correct boots, fit, training, and fall-consequence judgment |
If you need snowshoes, the snowshoeing technique and safety guide explains binding fit, stride, turns, slopes, and terrain boundaries. If the route requires an ice axe, self-arrest, ropework, or crampon technique, learn from a qualified instructor. Owning the equipment does not supply the movement skill.
Poles help balance but do not guarantee arrest
Poles can test snow depth, improve balance, and reduce uncertainty on a descent. Fit winter baskets where appropriate, keep hands ready to release, and avoid relying on the wrist strap where entrapment or a fall makes that dangerous. A pole is not an ice axe and may not stop a slide.
On low-consequence terrain, practise putting traction on and taking it off before the hike. Recheck the fit after the first few minutes, remove packed snow or ice, and stop when a device twists or breaks. Do not walk a long exposed section simply because changing equipment feels inconvenient.
Recognize avalanche terrain before entering it
A walking trail can pass through avalanche terrain even when the trail itself is nearly flat. Slab avalanches commonly start on slopes steeper than about 30 degrees and can run onto lower-angle ground below. Gullies, creek beds, cliffs, trees, and abrupt flats can increase consequences. Avalanche.org reports that most slab releases occur between 30 and 50 degrees and emphasizes connected terrain and runout (slope-angle guidance, identify avalanche terrain).
Our avalanche causes and warning-sign guide explains how slabs, weak layers, weather, terrain, and triggers interact—and why a regional danger rating never clears an individual slope.
For beginners, the practical choice is a route known to stay outside start zones, paths, runout, and terrain traps. A slope-angle app or map is a planning aid, not a field clearance: map resolution, hidden convexities, route error, and overhead slopes matter.
Entering avalanche terrain requires recognized education, the current local forecast, appropriate partners, terrain selection, and rescue competence. Carrying a transceiver, probe, and shovel without training does not control exposure. When you cannot identify whether the route crosses avalanche terrain, choose a lower-consequence route or learn with a qualified provider before going independently.
Pack systems for an unplanned delay
The National Park Service organizes its Ten Essentials as systems rather than a fixed shopping list. Adapt each system to cold, route length, remoteness, group needs, and local rules.
| System | Winter day-hike examples |
|---|---|
| Navigation | Topographic map, compass, offline map or GPS, spare power, skill to use them |
| Illumination | Headlamp carried on the body, spare battery or second light |
| Weather and insulation | Layering system, warm stop layer, shell, hat, gloves, dry socks |
| Emergency shelter | Bivy, bothy bag, tarp, or other route-appropriate wind and moisture barrier |
| Food | Ready-to-eat items plus a delay reserve that remains edible when cold |
| Water | Insulated containers, accessible drink, treatment plan if appropriate |
| First aid | Personal medication, wound and blister care, emergency information |
| Fire or warming | Legal, usable ignition and tinder, or another realistic warming plan |
| Repair | Tape, cord, straps, traction or binding-specific parts, small tool if useful |
| Sun and eyes | Sunglasses or goggles, sunscreen, lip protection |
| Communication | Charged phone and, where justified, a satellite communicator or beacon |
Keep emergency insulation, headlamp, food, and navigation accessible without unpacking everything in wind or precipitation. Waterproof critical items. Test lighters, batteries, buckles, traction fit, and glove dexterity before relying on them.
Eat, drink, and pace for the conditions
Cold may reduce the urge to drink, while exercise, dry air, heavy clothing, and altitude still affect fluid needs. Carry enough accessible liquid for the route and delay; prevent bottles or hoses from freezing; drink to conditions and thirst rather than forcing a rigid universal volume. The hydration guide explains why both underdrinking and forced overdrinking can create problems. Include familiar carbohydrate-rich food that is easy to eat with gloves and does not become inedibly hard.
Pace by breathing, talk test, perceived exertion, foot placement, and group condition rather than dry-trail speed. Snow and a heavier pack can raise energy cost substantially. The uphill walking guide explains why grade changes cardiovascular and muscular demand; winter adds surface resistance, cold management, and equipment transitions.
Keep the first third deliberately easy. If a winter pack is much heavier than your usual load, the rucking guide provides a progression framework, but trail footing and emergency equipment still require route-specific practice. If someone must stop repeatedly to recover, begins stumbling, or cannot complete routine tasks, treat it as a decision signal rather than an invitation to push harder.
Cold injury: act before the emergency
Cold injury is not restricted to dramatic subzero expeditions. Wetness, wind, inactivity, fatigue, inadequate food, tight footwear, illness, and a delayed exit can combine near the freezing point. CDC/NIOSH identifies hypothermia, frostbite, trench foot, and chilblains as cold-related illnesses and recommends monitoring your own and coworkers’ condition, using dry insulation, and planning warming opportunities (CDC/NIOSH cold-stress guidance).
Suspect hypothermia from behavior and function
Early cold stress may present as strong shivering, discomfort, fatigue, and declining hand function. Worsening clumsiness, stumbling, slurred speech, confusion, unusual behavior, apathy, drowsiness, or reduced shivering are emergency signs.
Stop exposure, add shelter from wind and precipitation, replace wet clothing when practical, insulate the entire person including from the ground, and seek emergency assistance. Handle a person with significant hypothermia carefully and follow dispatcher or trained medical guidance. Do not make them walk merely to preserve the itinerary.
The Wilderness Medical Society guideline emphasizes field assessment, preventing further heat loss, insulation, appropriate rewarming, careful handling, and evacuation decisions rather than relying on one symptom or a consumer thermometer (WMS accidental hypothermia guideline). This article cannot replace wilderness first-aid training or emergency services.
Treat numbness as a stop signal
Pain, tingling, numbness, pale or waxy skin, hard tissue, swelling, or blisters can indicate cold injury. Protect the area from pressure and refreezing, remove constricting jewelry or equipment when safe, and evacuate for medical assessment. Do not rub suspected frostbite, walk on a thawed injured foot unless unavoidable for safety, or thaw tissue when refreezing remains possible.
The 2024 Wilderness Medical Society frostbite update stresses prevention by avoiding exposure, maintaining perfusion, exercise and protection when appropriate, and making rewarming decisions around the risk of refreezing (WMS frostbite guideline). Get professional guidance rather than experimenting with direct heat.
Know the non-cold stop signs too
Call emergency services for chest pain or pressure, fainting, severe or unusual breathlessness, signs of stroke, serious bleeding, a major head injury, or a limb that cannot bear weight. Cold can increase cardiovascular strain, especially during sudden heavy exertion; the American Heart Association advises people with cardiovascular disease or a substantial activity increase to discuss cold-weather exercise with a clinician (AHA cold-weather guidance).
Cold, dry air and high ventilation can also provoke exercise-induced bronchoconstriction in susceptible people. An American Thoracic Society guideline supports objective diagnosis and an individualized treatment plan rather than self-diagnosis (ATS clinical practice guideline). If wheeze, cough, chest tightness, or breathlessness recurs with exercise, seek medical assessment and carry prescribed medication according to your plan.
Use SuperAge as a readiness log, not a safety verdict
Winter decisions depend on weather, terrain, equipment, training, and live observation. Personal trends can still reveal when your margin is smaller than usual. SuperAge can help you review sleep, resting heart rate, HRV, recent activity, and recovery patterns before choosing between a demanding route and a conservative alternative.
Use the app to ask better questions: Was sleep unusually short? Has recent training load accumulated? Does an easy walk feel harder than normal? Are you recovering from illness? Those signals can justify shortening the route, slowing down, or postponing the outing.
They cannot detect avalanche stability, prove adequate insulation, diagnose hypothermia, measure airway narrowing, or authorize travel. A reassuring score never overrides a closure, forecast, cold-injury sign, medication plan, or poor group condition.
Download SuperAge to keep health and recovery trends in one private view, then combine that context with conservative winter planning.
A practical trailhead and turnaround card
Run the card at the trailhead and again at every major terrain or weather transition.
Trailhead check
- Is access open, and did the latest official weather or trail information change?
- Does every person have compatible footwear, insulation, light, food, water, navigation, and emergency shelter?
- Does all traction fit, and can each user put it on with cold hands?
- Is the route outside avalanche terrain, or does the group have the specific education, forecast, equipment, and partners required?
- What is the turnaround time, and what is the latest safe return?
- Who holds the route plan, and when will they raise an alert?
Turn around or shelter when
- the turnaround time arrives;
- the route becomes uncertain or visibility removes navigation confidence;
- wind, precipitation, ice, snow depth, water, or avalanche exposure exceeds the plan;
- clothing cannot be kept adequately dry or warm;
- traction repeatedly fails or the surface requires technical skill the group lacks;
- a person develops persistent numbness, uncontrollable shivering, clumsiness, confusion, or unusual behavior;
- a participant cannot eat, drink, communicate, or complete simple gear tasks; or
- any medical stop sign appears.
Turning around early preserves options. Waiting for certainty often means waiting until dexterity, daylight, and judgment are already worse.
Common winter hiking mistakes
Wearing every warm layer from the start
This often produces sweat during the first climb. Begin slightly cool, adjust before soaking the base layer, and reserve dry insulation for stops and emergencies.
Treating traction as permission
Ice cleats do not make steep ice harmless, and snowshoes do not remove avalanche exposure. Match the device to the surface and keep the route within your movement and rescue competence.
Following tracks instead of navigating
Tracks may belong to another route, become buried, or end at unsafe terrain. Confirm location with map, compass, terrain, and a reliable electronic backup rather than outsourcing the route to strangers.
Use the mountain navigation guide to practise map orientation, contour reading, compass bearings, short confirmation legs, and a calm lost-person protocol before winter visibility makes every step harder to verify.
Planning to use the phone for everything
Cold can reduce battery performance, gloves complicate operation, and coverage may disappear. Carry independent light and navigation, protect the battery near the body, and do not let photography consume emergency power.
Saving food and dry layers for later
Eat before coordination and judgment decline. Add insulation before shivering becomes severe. Emergency reserves are there to prevent a manageable problem from becoming an emergency.
Letting the fastest hiker set the plan
The group travels at the pace that preserves the least-prepared member’s warmth, footing, and decision capacity. Split groups create new communication and rescue problems unless planned and equipped deliberately.
Frequently asked questions
What should I wear for winter hiking?
Use an adjustable system: a moisture-managing base layer, active insulation, a wind-and-precipitation shell, a warmer stop layer, hat, neck protection, gloves plus a dry or warmer spare, suitable socks, and footwear with enough room for circulation. Adjust before sweating heavily and before exposed stops. Conditions and individual cold tolerance matter more than one universal clothing list.
Do I need microspikes for every winter hike?
No. Flexible ice cleats can help on low-angle icy walking terrain, but surfaces, designs, and consequences differ. Bare or muddy trail may not need them; deep snow may need flotation; steep firm snow or ice may require compatible mountaineering equipment and trained technique. Check current conditions and know the device’s limit.
How long should my first winter hike be?
Choose a short, familiar or well-described route with low consequence and an easy exit. Reduce your normal dry-trail distance, keep the first third easy, and return with daylight and energy in reserve. There is no universal mileage because snow depth, ice, wind, elevation, pack mass, and group skill can change the effort dramatically.
Is winter hiking safe alone?
Solo travel removes immediate help for injury, navigation error, cold stress, and equipment failure. If you go alone, choose a conservative route within your competence, leave a precise trip plan, carry independent navigation and communication, and avoid terrain where one slip or avalanche exposure has serious consequences. A partner does not make an unsafe route safe, but a prepared group can add observation and response capacity.
Can I rely on wind chill to decide whether to hike?
No. Wind chill estimates heat loss from exposed skin and helps communicate frostbite risk, but it does not fully represent wet clothing, precipitation, exertion, shelter, fatigue, duration, or individual health. Use the full forecast and route exposure, then set conservative thresholds that match your equipment and experience.
How do I keep water from freezing?
Start with drinkable water, use insulated bottles or sleeves, store bottles inverted if the lid design permits, keep a small container accessible, and protect filters whose media can be damaged by freezing. Test the system before a remote trip. Do not assume eating snow provides safe, efficient hydration; melting and treating it requires time and fuel.
What are early signs of hypothermia on a hike?
Strong shivering, declining dexterity, fatigue, clumsiness, and poor decisions can appear early. Worsening confusion, slurred speech, stumbling, apathy, drowsiness, or reduced shivering are emergencies. Stop exposure, shelter and insulate the person, seek emergency help, and follow trained guidance rather than forcing continued travel.
When should I turn around on a winter hike?
Turn around when the preplanned time arrives or when weather, visibility, navigation, snow, ice, water, avalanche exposure, equipment, or group condition exceeds the plan. Persistent numbness, uncontrolled shivering, confusion, unsafe footing, a failing headlamp, or a person unable to eat and perform simple tasks are not minor inconveniences; they are reasons to act early.
Key takeaways
- Choose a short, reversible route and reduce dry-trail expectations.
- Read temperature, wind, precipitation, visibility, daylight, access, and avalanche information together.
- Vent before sweating heavily and add dry insulation before stops.
- Match traction to the surface; learn technical equipment from qualified instruction.
- Carry navigation, light, emergency shelter, food, water, first aid, repair, and communication as systems.
- Define time and condition-based turnaround rules before commitment and fatigue grow.
- Treat numbness, loss of coordination, confusion, uncontrolled shivering, chest pain, and severe breathlessness as stop signs.
- Use health trends as planning context, never as terrain or medical clearance.
References
- National Park Service. Winter hiking tips.
- National Park Service. Ten Essentials.
- Dow J, et al. Wilderness Medical Society Clinical Practice Guidelines for the Out-of-Hospital Evaluation and Treatment of Accidental Hypothermia: 2019 Update. Wilderness & Environmental Medicine. 2019.
- McIntosh SE, et al. Wilderness Medical Society Clinical Practice Guidelines for the Prevention and Treatment of Frostbite: 2024 Update. Wilderness & Environmental Medicine. 2024.
- CDC/NIOSH. Cold and Work: Types, Causes, Preparation.
- National Weather Service. Understanding wind chill.
- Avalanche.org. Slope angle and identify avalanche terrain.
- Castellani JW, Young AJ. Practicing sport in cold environments: practical recommendations to improve sport performance and reduce negative health outcomes. International Journal of Environmental Research and Public Health. 2021.
- Gavin TP. Clothing and thermoregulation during exercise. Sports Medicine. 2003.
- Wilson KC, et al. An official American Thoracic Society clinical practice guideline: exercise-induced bronchoconstriction. American Journal of Respiratory and Critical Care Medicine. 2013.
- American Heart Association. Cold weather and cardiovascular disease.
Related Articles

Cardio without running: choose your activity and build a week
Build cardio without running with walking, cycling, water exercise, or indoor options. Learn effort cues, practical sessions, and a weekly plan you can adapt.