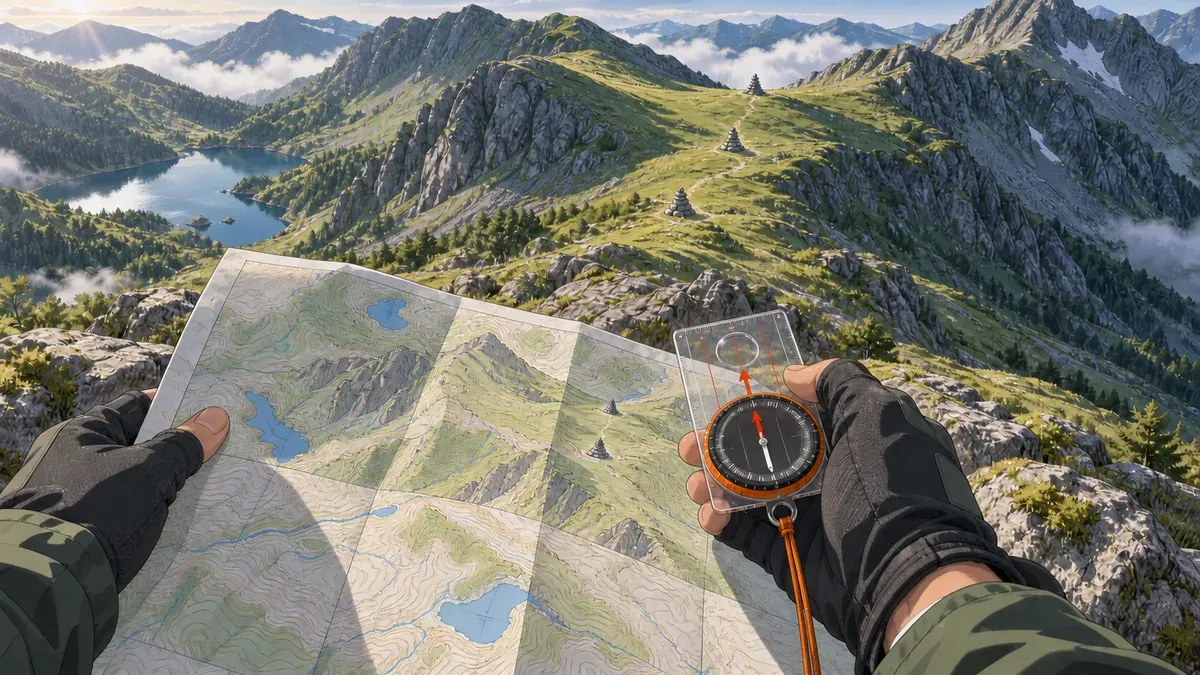
Mountain navigation: map, compass, terrain, and safer decisions
Learn mountain navigation with topographic maps, compass bearings, terrain checks, digital backups, and a calm response when you become unsure in the field.
Mountain navigation is the repeated process of knowing where you are, choosing a safe next objective, moving toward it, and confirming that the landscape still matches the plan. A topographic map shows the shape and features of the ground; a compass supplies a direction independent of phone signal; terrain, distance, time, and a GPS position can cross-check the answer. None is infallible alone.
The most useful habit is to navigate before you feel lost. Keep the map available, identify the next unmistakable feature, predict what you should see on the way, and stop when reality disagrees. A phone with downloaded maps is valuable, but it should sit inside a system that also accounts for battery, damaged hardware, outdated map data, poor visibility, weather, fatigue, and your ability to interpret the terrain.
Quick answer
For safer mountain navigation, start with a current topographic map, a compatible baseplate compass, the local magnetic-declination information, and an offline digital map or GPS as a cross-check. Before leaving, mark the route, decision points, hazards, escape options, turnaround time, and the plan left with a trusted contact.
On the move, use a short loop: orient the map, locate yourself, choose the next checkpoint, estimate direction and distance, move, then verify. Check at every junction and obvious terrain change rather than waiting for uncertainty to grow. If you cannot reconcile your position, stop. Return to a confirmed point only when the route back is known and safe; otherwise contact local emergency services, share your coordinates and last known position, protect the group from exposure, and stay where rescuers can find you unless remaining there presents an immediate threat.
Key facts
- Contour lines reveal terrain shape: their pattern shows elevation, slope steepness, ridges, valleys, saddles, and route consequences.
- Magnetic declination changes compass conversion: its value varies with location and time, so an old adjustment can produce a systematic bearing error.
- Frequent position checks limit error growth: each confirmed junction or terrain feature becomes a new known point instead of another assumption.
- Independent tools expose disagreement: map, compass, terrain, time, and satellite position can challenge one another before a small mistake becomes a rescue.
- A stop rule preserves options: pausing at the first unexplained mismatch protects daylight, warmth, battery, and decision quality.
Mountain navigation belongs inside a wider outdoor-safety practice. Browse the fitness library for conditioning and sport skills, then treat navigation as a learned field discipline rather than a fitness outcome.
Build a navigation system before the trailhead
A route line is not yet a navigation plan. The plan should tell you what evidence will confirm progress and what conditions will make you change course. The National Park Service recommends reviewing the route and useful landmarks, practising with navigation tools, packing the essentials, and leaving a trip plan with a trusted person (NPS outdoor emergency plan).
Before departure, record:
- Start, finish, and intended line: include the exact trailhead or access point, not only the mountain name.
- Checkpoints: choose junctions, stream crossings, ridges, summits, passes, buildings, or other features that should be identifiable.
- Leg direction and distance: estimate each important section rather than relying on the total route length.
- Hazards and no-go boundaries: cliffs, avalanche terrain, fast water, unstable slopes, private land, closed areas, and technical ground require explicit decisions.
- Escape and retreat options: identify where an easier descent is genuinely possible; do not assume every valley or track leads somewhere safe.
- Time limits: set a turnaround time that preserves light and weather margin even if the objective is close.
- Communication plan: leave the route, people, vehicle, equipment, return time, and alert time with someone who is not on the trip.
Use official local maps, weather, trail, closure, avalanche, and emergency information. A printed or downloaded map can be technically readable yet operationally stale. Trails move, bridges wash out, vegetation changes, access closes, and snow hides features. The map describes selected information at a particular scale and date; it does not certify present conditions.
For cold-season route planning, combine this method with the winter hiking safety guide. Snow can erase the path and transform familiar terrain, while avalanche exposure demands its own education, forecast, equipment, and partner decisions.
Read a topographic map as a model of the ground
A topographic map compresses a three-dimensional landscape onto a flat surface. The U.S. Geological Survey defines contours as lines joining points of equal elevation; their pattern shows the height and shape of terrain and the steepness of slopes (USGS topographic-map overview). Closely spaced contours usually indicate a steeper slope, while wider spacing indicates gentler ground.
Begin with four items in the margin or legend:
- Scale: a 1:25,000 map means one unit on the map represents 25,000 of the same units on the ground. It normally shows more local detail than a 1:50,000 map, while covering less area per sheet.
- Contour interval: this is the vertical difference between adjacent contour lines. Do not infer it from appearance; read the legend.
- Symbols and access markings: a thin line, boundary, right of way, trail, road, or vegetation tint has a map-specific meaning.
- Date, projection, grid, and north information: these matter when transferring coordinates or bearings between tools.
Turn contour patterns into recognizable features
Do not reduce contours to “close is steep.” Trace the complete shape:
- A ridge or spur projects from higher ground; contour bends generally point downhill.
- A valley or re-entrant cuts into higher ground; contour bends generally point uphill along the drainage.
- A saddle or pass forms a low connection between higher areas.
- A summit appears as nested closed contours with elevation increasing inward.
- A depression needs the map’s special symbol, often inward-facing hachures; a closed line is not automatically a summit.
Compare those shapes with the horizon and with the slope under your feet. “I am beside a stream” may fit several locations. “I am on the east side of a narrow valley, below a fork, with a distinct spur opposite” is a stronger position hypothesis.
Read scale as a decision about uncertainty
At 1:25,000, 1 inch represents about 2,083 ft (2.54 cm represents 635 m); at 1:50,000, the same inch represents about 4,167 ft (1.27 km). A pencil-width line may represent meaningful ground distance. GPS precision does not make the underlying route line, contour model, or boundary equally precise.
Use a map detailed enough for the terrain and activity, but keep broader context available. A detailed crop can help at a junction yet hide the valley, road, or ridge that explains the larger escape picture.
Use the compass without confusing the three norths
A baseplate compass has a magnetic needle, rotating housing, orienting arrow and lines, index mark, direction-of-travel arrow, and a straight edge. The needle responds to the local magnetic field. It does not point to grid north or necessarily to true geographic north.
The three useful references are:
- True north: direction toward the geographic North Pole.
- Grid north: direction of the north-south lines on the map grid.
- Magnetic north: direction indicated by the magnetic field at your location.
The angle between magnetic and true north is magnetic declination. NOAA notes that declination changes with both location and time (NOAA magnetic declination). Your map may state a date and annual change, while a current national mapping or geomagnetic service may provide a newer value. Use the convention specified by the map and compass instructions; never rely on a remembered slogan about adding or subtracting east or west without checking which conversion you are performing.
Keep the compass away from phones, magnets, speakers, ferrous metal, vehicles, power lines, and equipment that visibly deflects the needle. Check that the needle moves freely and settles consistently. A bubble, damaged capsule, reversed polarity, local magnetic rock, or nearby object can make an apparently precise bearing wrong.
Orient the map first
To set the map, rotate it until mapped directions and features align with the ground. In clear conditions, use unmistakable terrain. With a compass, align the relevant north-south grid lines and the corrected magnetic direction. Confirm the result with at least one visible feature; a 180-degree error can look neat on the compass.
An oriented map makes left, right, ahead, and behind correspond to the landscape. Keep it oriented as you turn. The British Mountaineering Council emphasizes setting the map and practising in forgiving conditions before the skill is needed under pressure (BMC map basics).
Take and follow a map bearing
For a conventional baseplate compass:
- Place the long edge from your known start toward the intended destination, with the travel arrow pointing forward.
- Hold the baseplate still and rotate the housing until its orienting lines are parallel with the map’s north-south grid lines, with north the correct way up.
- Read the grid bearing at the index line.
- Apply the current grid-to-magnetic correction required for that map and location.
- Remove the compass from the map, hold it level and away from interference, then turn your whole body until the magnetic needle aligns with the orienting arrow.
- Sight a distinct object on the direction-of-travel line, walk to it, and repeat.
Ordnance Survey advises breaking a journey into short sections and taking regular bearings as landmarks pass (OS compass bearings). Do not stare at the needle while walking over rough ground. Choose a tree, rock, edge, or terrain feature, put the compass away safely, and watch your footing.
Navigate with a short confirmation loop
The field loop is simple enough to repeat at every meaningful change:
| Step | Question | Useful evidence |
|---|---|---|
| Orient | Which way is the map facing? | Terrain alignment, corrected compass north |
| Locate | Where am I now? | Last confirmed point, junction, contour shape, coordinate |
| Choose | What is the next safe objective? | Checkpoint, attack point, handrail, catching feature |
| Predict | What should happen before I arrive? | Direction, distance, ascent, descent, stream or boundary |
| Move | Am I following the planned line? | Bearing, path, ridge, wall, stream, slope aspect |
| Verify | Does the ground match the prediction? | Feature sequence, time, distance, elevation trend |
A handrail is a linear feature—such as a path, ridge, stream, wall, or forest edge—that can guide movement. An attack point is an unmistakable feature near a smaller target from which the final leg begins. A catching feature lies beyond the target and tells you that you have gone too far. These techniques turn open-ended searching into bounded decisions.
The strongest confirmation uses more than one clue. A junction plus the expected stream direction and elevation trend is more persuasive than a junction alone. If the compass, contours, GPS dot, and visible terrain disagree, do not average them into confidence. Stop and find the cause.
Estimate distance and time without pretending they are exact
Measure planned map distance, then calibrate your own pace count on known ground. Count double paces over 100 yd (91 m) on flat terrain, then repeat uphill, downhill, on rough ground, and with the pack you actually carry. The number will vary with slope, vegetation, fatigue, snow, detours, and stride.
Timing provides a second estimate. Start each leg with an expected range, record the start time, and adjust for ascent, surface, group pace, and stops. Neither pacing nor timing should override clear terrain evidence. Their job is to signal “we should have reached the stream by now,” not to prove that an invisible stream must be beside you.
For routes where ascent itself drives fatigue and timing, the uphill walking guide explains how grade changes demand. Navigation planning still needs conservative field estimates rather than workout pace.
Use digital navigation as a cross-check, not an oracle
Offline mapping, a handheld GNSS receiver, or a phone can show coordinates, record a track, display elevation, and speed up relocation. Prepare it before departure:
- download the correct area and verify it opens without a network connection;
- confirm the map edition, coordinate format, datum, units, and route;
- protect the device from water, cold, impact, and accidental screen input;
- carry adequate power and a cable that actually works;
- know how to read and share coordinates without changing formats;
- reduce nonessential battery use; and
- keep an independent light and navigation method.
A position dot answers “where does this receiver estimate I am?” It does not decide whether a slope is safe, a bridge exists, a boundary is legal to cross, or a route remains appropriate. Satellite reception can degrade around cliffs, dense cover, deep valleys, or a poorly positioned device. A downloaded route can also contain somebody else’s error.
Use digital tools to challenge the map-and-terrain interpretation. If the electronic position disagrees, check coordinate systems, map datum, magnetic versus grid bearings, map age, and whether you selected the correct trail or valley. Resolve the disagreement while you still have a confirmed fallback.
Tighten the method in fog, darkness, forest, and snow
Poor visibility removes distant landmarks and makes small direction errors harder to notice. Shorten each leg, select larger attack points and catching features, and check direction and distance more frequently. Pre-record critical bearings and distances before the cloud, darkness, or snowfall arrives.
Avoid a direct bearing toward a tiny target when a deliberate offset creates a clearer decision. For example, aim knowingly to one side of a stream junction, ridge feature, or path; when you reach the linear feature, the intended turn direction is no longer ambiguous. Plan around cliffs, cornices, avalanche terrain, fast water, and other hazards with generous margins, not razor-thin compass accuracy.
The BMC recommends practising bearings, distance estimation, route alternatives, and techniques for avoiding hazards before they are needed in severe weather (BMC navigation techniques). If the route depends on precision you have not demonstrated in safe conditions, choose easier terrain or learn with a qualified local instructor.
Snowshoe travel adds equipment and terrain problems to the same navigation task. The beginner snowshoeing guide explains how to keep the route within the group’s surface, slope, and avalanche competence.
What to do when your position becomes uncertain
Being unsure is a decision point, not an embarrassment. The dangerous response is often to continue quickly in the direction that feels emotionally convenient.
Stop and stabilize the situation
Stop the group in a safe place. Account for every person. Add clothing before anyone becomes cold, protect the map and phone from weather, and note the time, remaining light, battery, food, water, injuries, and worsening conditions. Avoid splitting up.
Reconstruct the last confirmed position
Ask:
- What was the last feature everyone positively identified?
- Which direction and how long have we moved since then?
- Did we ascend, descend, cross water, pass a junction, enter forest, or change slope aspect?
- What terrain should surround each plausible position?
- Do compass direction, contours, altitude trend, track log, and coordinates support the same answer?
Do not move simply to gather more clues when movement exposes the group to cliffs, water, avalanche terrain, traffic, cold, or further uncertainty. Retrace only when the exact return line is recognized and safe.
Seek help before margin disappears
If you cannot relocate confidently, if someone is injured, or if weather, terrain, cold, heat, darkness, or medical risk is reducing the safety margin, contact the responsible local emergency service. Provide coordinates in the requested format, route and trailhead, last confirmed position, visible landmarks, group description, clothing, equipment, injuries or medical conditions, weather, and battery status.
After sharing a position, follow the dispatcher’s instructions. The NPS advises staying put when you cannot safely retrace, moving only for an immediate threat, conserving energy, sheltering from the elements, and making yourself visible (NPS outdoor emergency plan). Do not descend an unknown drainage because “water leads to civilization”; it may lead to waterfalls, gorges, cliffs, or colder terrain.
Carry signalling methods appropriate to the trip, such as a whistle, visible shelter, light, and—where remoteness justifies it—a properly registered and tested emergency communication device. Local emergency numbers, rescue systems, radio channels, and legal requirements vary, so learn them before departure.
Practise navigation as a progressive skill
Reading about bearings is not field competence. Practise when mistakes are low consequence:
- On a familiar path in clear weather, keep the map oriented and predict every junction.
- Match contour shapes to ridges, valleys, saddles, and slope aspect.
- Take short bearings between obvious features, then compare the result with the path.
- Calibrate pace and timing on varied but safe ground.
- Relocate from a point chosen by a partner without looking at the route taken.
- Repeat in rain, forest, dusk, or cloud only after the basic process is reliable and the terrain remains forgiving.
- Take formal instruction before relying on micro-navigation near serious hazards or in winter mountain conditions.
The skyrunning safety guide explains why race pressure is a poor setting for a first navigation error. Technical mountain navigation should be learned separately from aerobic preparation.
Readiness can change the route, not the map
Navigation is partly a cognitive and physical workload. Sleep loss, illness, cold, hunger, dehydration, anxiety, and accumulated fatigue can slow calculations and make people more willing to accept a convenient answer. They do not change north, but they can change the margin available to notice an error and correct it.
SuperAge can help you review sleep, resting heart rate, HRV, recent activity, and recovery trends before choosing between a complex route and a simpler alternative. Use those signals to ask whether the group should shorten the day, stay on a marked route, add a trained partner, or postpone.
The app cannot verify your position, certify a bearing, assess avalanche stability, replace a map, or authorize a route. A reassuring score never overrides official conditions, a closure, live terrain, or the first unexplained navigation mismatch.
Download SuperAge to keep personal readiness trends in one private view, then make the mountain decision with current maps, local information, and practised skills.
A practical navigation card
Use this at the trailhead and every major checkpoint.
Before moving
- Map area, edition, scale, legend, contour interval, grid, and north correction checked
- Route, hazards, escape options, decision points, and turnaround time recorded
- Offline map opened without signal; coordinates and datum verified
- Compass settled away from interference; spare power and independent light available
- Trip plan left with a trusted contact; local emergency method known
- Group skill and conditions still match the route
At each checkpoint
- Current position confirmed with at least two clues
- Map oriented and next feature identified
- Direction, distance, elevation change, and expected feature sequence predicted
- Catching feature and stop condition named
- Time, weather, light, group condition, and battery still inside the plan
Stop immediately when
- the path or terrain does not match the prediction;
- the bearing, GPS, map, and landscape cannot be reconciled;
- a checkpoint should have appeared but did not;
- a group member is missing, injured, cold, confused, or unable to continue safely;
- visibility or surface conditions exceed the practised method; or
- continuing would consume the retreat or emergency margin.
Common mountain navigation mistakes
Checking the map only after getting lost
Relocation becomes harder as unverified turns accumulate. Confirm early and often, especially after junctions, detours, summits, forest edges, and changes in slope.
Following a track or another group without verification
Boot prints and digital tracks may lead to a different objective, an obsolete path, or hazardous terrain. Treat them as observations, not authority.
Ignoring magnetic declination
A small systematic angular error grows with distance. Use current local information and the exact conversion required by your map and compass.
Letting the phone consume every backup
Navigation, photography, communication, weather, and light can all compete for one battery. Separate critical functions where the route consequence justifies it.
Forcing the landscape to match the map
People naturally prefer the hypothesis that keeps the day on schedule. When evidence conflicts, stop and try to disprove your location before moving.
Treating a bearing as a safe route
A straight line can cross cliffs, water, unstable snow, vegetation, private land, or technical ground. Direction is only one part of route choice.
Frequently asked questions
Can I navigate in the mountains with only a phone?
A phone with an offline topographic map can be an excellent navigation tool, but “only” creates a single point of failure. Battery, water, impact, cold, software, screen damage, map age, and user error can affect the same device. Carry and practise an independent method appropriate to the route’s consequence.
Do I need a compass on a marked hiking trail?
On a short, obvious, low-consequence route in stable conditions, you may rarely use it. Markers can still be hidden by fog, snow, vegetation, darkness, or damage, and a detour can leave the trail. Carrying a compass helps only if you know how it relates to the map and current declination.
What is the best map scale for mountain navigation?
There is no universal best scale. A larger-scale map such as 1:25,000 usually shows more local detail; 1:50,000 covers more area on the same sheet. Choose the detail required by terrain and route, and keep enough surrounding context for alternatives and escape decisions.
How often should I check my position?
Check whenever evidence changes: junctions, contour transitions, stream crossings, ridge points, forest edges, direction changes, and before hazardous ground. In poor visibility or featureless terrain, shorten the interval further. The goal is to catch one mismatch, not reconstruct ten of them.
Does a compass bearing guarantee I will reach the target?
No. A correct bearing can still be followed badly, use the wrong north conversion, begin from the wrong point, or cross unsafe terrain. Combine direction with distance, time, contour shape, feature sequence, and catching features.
Should I follow a stream downhill if I am lost?
Not as a general rule. Drainages can lead into gorges, waterfalls, cliffs, floods, thick vegetation, or colder shaded terrain. Stop, relocate, contact the local rescue system when needed, and follow professional instructions rather than relying on a survival slogan.
When should I call mountain rescue or emergency services?
Call early when you cannot establish a safe position or route, someone is injured or medically unwell, a person is missing, or weather, temperature, light, terrain, or battery is closing the safety margin. You do not need to wait until the situation becomes life-threatening to ask the local service what to do.
Can fitness compensate for weak navigation skills?
No. Fitness can expand movement capacity, but it can also carry you farther down a wrong route. Navigation, terrain judgment, weather planning, emergency response, and technical movement need their own training.
Key takeaways
- Plan checkpoints, hazards, escape options, turnaround time, and communication before leaving.
- Read contour patterns as terrain shapes, not just elevation numbers.
- Distinguish true, grid, and magnetic north; use current local declination information.
- Navigate in short legs and verify with at least two independent clues.
- Use GPS and offline maps to cross-check—not to silence disagreement.
- Stop at the first unexplained mismatch and seek help before the emergency margin disappears.
- Build skill progressively on forgiving terrain and use qualified instruction for consequential conditions.
References
- U.S. Geological Survey. What is a topographic map?
- U.S. Geological Survey. US Topo map symbol guide
- NOAA National Centers for Environmental Information. Magnetic declination
- Ordnance Survey. How to take a compass bearing
- British Mountaineering Council. Navigation: map basics
- British Mountaineering Council. Navigation: a few navigation techniques
- U.S. National Park Service. Outdoor emergency plan
- U.S. National Park Service. Hiking safety and the Ten Essentials
Related Articles

How to hike uphill without getting tired: pacing, breathing, and training
Learn how to hike uphill without getting tired using sustainable pacing, efficient steps, practical breathing cues, fueling, and a six-week training plan.