Trail running poles: when to use them and how to practise
Learn when trail running poles help, how to plant and stow them, and a simple practice progression. Understand the evidence before taking them onto steep trails.
Quick answer
Trail running poles are most useful when you can plant them securely, coordinate the push with your steps, and gain enough support to justify carrying them. Sustained uphill hiking is a sensible place to learn. Poles are optional tools: they do not guarantee faster running, lower energy expenditure, or protection from injury.
Practise walking on an easy, open slope before adding speed or technical terrain. Learn to stop, deploy, fold, and secure the poles without leaving tips or loose sections in other people’s path. Put them away before scrambling or any section where you need your hands. This guide teaches handling decisions; it is not a mountain qualification or an individualized rehabilitation plan.
Key facts
- Pole pressure transfers part of the movement task to the upper body.
- Terrain and technique change the energy cost of pole use.
- Secure pole plants support a controlled rhythm on suitable climbs.
- Stowed poles leave hands available for technical movement.
- Repeated practice makes transitions more predictable.
Decide whether this trail needs poles
Start with the route, your skills, and the conditions rather than a rule that every trail runner needs poles. A long, open climb offers repeated opportunities to push. A short run with frequent gates, narrow paths, and handholds may offer more carrying than useful contact.
| Situation | Sensible starting choice | Main consideration |
|---|---|---|
| Sustained, nontechnical uphill hiking | Practise using poles | Stable plants and a rhythm you can maintain |
| Smooth flat running | Compare carrying versus stowing | Arm freedom and safe tip control |
| Easy descent with good visibility | Use only if already competent | Secure contacts without reaching or rushing |
| Scrambling or a section requiring handholds | Stow before entry | Both hands must remain available |
| Crowded or narrow trail | Slow down and create space | Tips and shafts can endanger others |
Check access requirements and event rules separately before setting out; permission is not universal. Poles also do not replace navigation, appropriate clothing, food, water, or a plan to turn back. Our complete exercise guide places outdoor activity within a broader training habit.
What the research actually supports
The scientific question is narrower than “Do poles work?” Studies use different slopes, speeds, participants, and techniques. A result from treadmill walking cannot be treated as proof of faster technical trail running.
In a study of 14 mountain runners, pole-assisted uphill walking reduced the vertical energy cost by roughly 2–3% at some steep treadmill angles; perceived effort also fell at several inclines. The effects did not occur uniformly across every slope (Giovanelli et al., 2019). That is evidence for a possible, condition-specific benefit, not a universal efficiency bonus.
A six-runner pilot found different metabolic demands for steep treadmill and outdoor pole walking, reinforcing the importance of the test environment (Giovanelli et al., 2022). A separate walking experiment found no energy-cost advantage on level or uphill terrain and a higher cost downhill (2008 walking study).
Recent field research involving 17 hikers also found no significant overall reduction in physiological load or respiratory-muscle fatigue under its tested conditions (2026 field study). These small, specific studies do not settle injury prevention or long-distance running performance. Judge usefulness through controlled practice and manageable effort rather than a promised percentage.
Fit the poles for relaxed movement
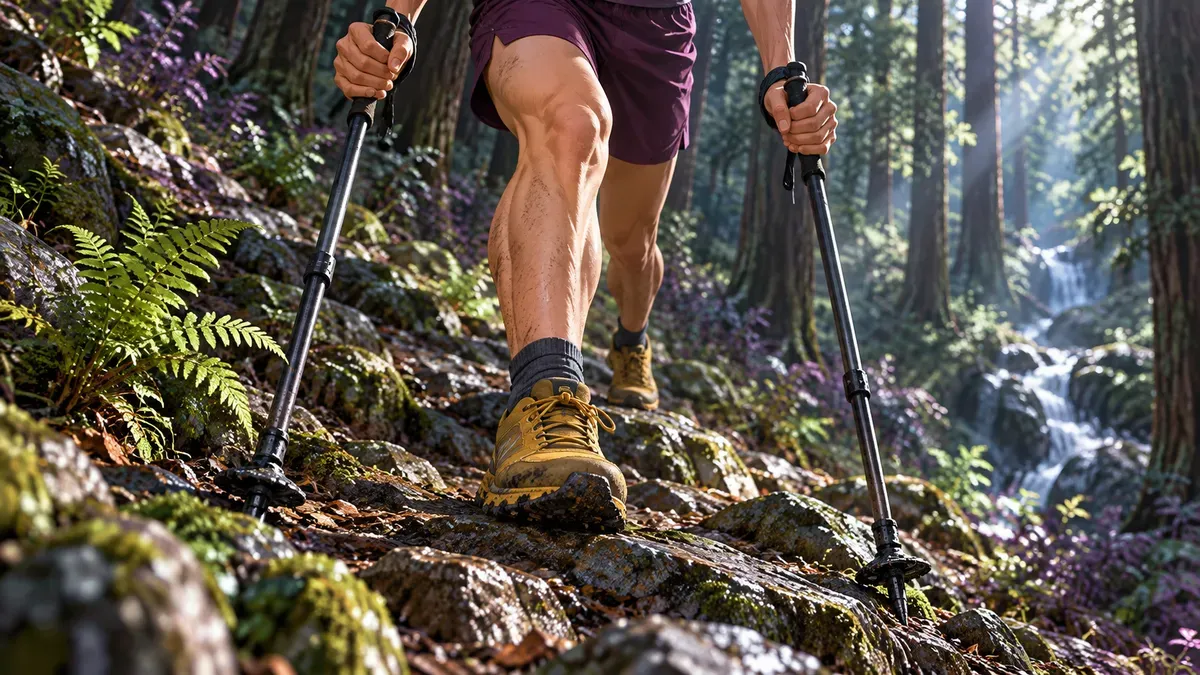
On level ground, begin with a comfortable grip and a roughly right-angled elbow when the tip is beside you. Treat this as a starting check, not a precise prescription. You should be able to plant without shrugging the shoulders, bending the wrists awkwardly, or reaching far ahead.
If the poles adjust, make changes while stopped and verify that every locking mechanism holds. Fixed-length poles need a fit that works for your intended terrain. Do not force a folding joint, improvise a missing lock, or assume an assembled shaft is secure without checking it.
Learn the specific grip and strap release on safe ground. Strap designs differ. The British Mountaineering Council’s guidance warns that trapped hands can prevent a protective reach on technical ground. Take hands out of loops where snagging or a fall is a concern, and stow the poles before scrambling. No strap arrangement makes a hazardous crossing safe.
Learn a useful plant before learning speed
Walk slowly on a wide, uncomplicated incline. Look ahead for your next foot placement while checking that the tip will meet stable ground. Place it close enough that the arm can press backward without locking straight. Keep the shoulders relaxed and the grip controlled rather than clenched.
Apply pressure after contact feels secure, then lift the tip cleanly before the next placement. Avoid stabbing blindly into vegetation, planting across your feet, or dragging tips behind you. A plant that skids, catches, or interrupts your steps is a cue to slow down and choose a simpler line.
There is no need to force a fixed stride length or cadence. The useful result is coordinated forward movement with room to adjust. If you can only sustain the pattern by holding your breath or tensing the neck, reduce the pace and the push.
Alternating rhythm
For a steady hiking climb, try the right pole with the left foot and the left pole with the right foot. Let the sequence emerge from ordinary walking. A light, repeatable contact is a better first target than a forceful push.
Paired rhythm
On a suitable steeper climb, some runners plant both poles together, take a few controlled steps while pushing, then reset. Practise this only where there is enough stable space for both tips. It is an option, not a compulsory pattern for a particular gradient.
Changing rhythm
Uneven ground may interrupt either sequence. Shorten the movement, pause, or hike without pushing rather than chasing a rhythm that no longer fits. The skill is choosing a safe contact, not maintaining a pattern at all costs. For the wider demands of climbing and descending, see our mountain running training guide.
Handle descents and transitions deliberately
Descending still requires your legs to manage speed and braking. Poles do not remove that load or guarantee that your knees are protected. Use them on a descent only when you already control the technique and can see reliable contact points. Do not chase distant plants or use them to justify running faster than you can stop.
Our downhill running technique guide covers foot placement and exposure progression separately. If you need hands for balance, a handhold, a gate, food, or clothing, stop somewhere stable and organize the poles first.
Rehearse this transition: stop clear of others, gather the poles with tips controlled, fold or collapse them according to their design, secure them to the intended carrying system, and check for dangling sections. Practise the reverse while stationary too. Keep tips away from faces and nearby runners; avoid carrying a long shaft horizontally across the trail.
A four-session practice progression
The sessions below are coaching examples, not a validated protocol or a requirement to increase every week. Add them within activity you already tolerate. Choose a short, familiar route with easy retreat; begin with about 30–60 ft (10–20 m) of uncomplicated slope rather than a remote mountain climb.
| Session | Main task | Continue only when |
|---|---|---|
| 1 | Walk slowly for 5–10 minutes, learning grip and alternating plants | Tips clear the ground and shoulders stay relaxed |
| 2 | Repeat short uphill walks; stop and deploy or stow between them | Transitions leave no loose sections or uncontrolled tips |
| 3 | Compare comfortable hiking with and without poles on the same slope | Breathing and movement remain controlled |
| 4 | Link familiar easy sections, changing rhythm or stowing as needed | Decisions stay deliberate without fatigue-related mistakes |
Allow an easier day after unfamiliar practice if your arms or legs need it. Repeat a session when coordination is inconsistent. Increase one challenge at a time: duration, terrain, or pace. Do not add all three together simply because the poles feel light.
Use the perceived-exertion guide to describe effort, and our uphill hiking guide for pacing when the climb itself is the limiting factor. Nordic walking has a different primary movement goal; its technique guide should not be copied unchanged onto technical trails.
Record useful feedback with SuperAge
Outdoor skills can help you maintain an enjoyable activity habit as you age. Pole use alone does not demonstrate a change in biological age or establish that a session was safer.
If you use SuperAge to review available activity and recovery trends, add a simple note about the route, perceived effort, pole handling, and next-day comfort. Compare similar outings rather than treating a single heart-rate reading as a verdict. An app cannot assess whether a plant is secure or a route exceeds your skills.
Correct the mistakes that matter
A common error is deploying poles only after the climb has become exhausting. Rehearse earlier decisions on easy ground. Another is pushing harder while the tips keep slipping; choose stable contact and reduce speed first.
Sore shoulders are not proof of better technique. Check whether you are reaching, gripping too hard, or suddenly adding a large dose of unfamiliar arm work. Persistent pain, numbness, weakness, or loss of control needs assessment rather than another hard practice session.
Stop exercise and seek urgent medical help for chest pressure, fainting, or severe unusual breathlessness. People with conditions that affect balance, grip, cardiovascular safety, or rehabilitation should obtain individualized guidance before challenging trail sessions. Turn back when weather, visibility, footing, or fatigue exceeds your margin, even if the poles seem helpful.
Key takeaways
- Choose poles for a specific terrain problem and practise before relying on them.
- Treat the evidence as conditional; easier-feeling movement does not prove lower energy use.
- Learn secure plants, relaxed rhythm, and safe stowing before speed.
- Keep hands free where the terrain requires them.
- Progress one challenge at a time and preserve room to stop or turn back.
Make your next practice measurable
Choose one easy slope and one handling skill to practise. Record what improved and what still needs work. Explore SuperAge to place that activity record beside your broader health trends.
FAQ
Do beginners need trail running poles?
No. Beginners can first learn comfortable pacing, route selection, and foot placement. Poles make sense when the terrain and your handling skills give them a useful role.
Do poles always save energy uphill?
No. Research results depend on slope, technique, and the tested population. Some steep treadmill conditions show small savings; other conditions do not. Reduced perceived effort is a separate outcome.
Should I alternate the poles or plant both together?
Start with an alternating pattern while walking on easy ground. A paired plant is another option for suitable climbs. Change or abandon the pattern when stable placement becomes difficult.
Can poles prevent knee injuries on descents?
They cannot guarantee injury prevention. Downhill speed control, terrain selection, preparation, and appropriate progression still matter. Pain needs its own assessment.
When should I put poles away?
Stow them before scrambling or whenever you need both hands. Also reconsider their use when crowds, narrow passages, or unreliable footing prevent safe plants.
Should I keep my hands in the straps?
Learn your specific strap system and release first. Remove hands where entrapment is a concern, and stow poles before terrain requiring handholds. Straps are not fall protection.
How can I tell whether the poles help me?
Compare familiar, manageable climbs at a similar effort. Record handling, breathing, comfort, and recovery. A faster time achieved by working harder does not prove better efficiency.
Can I learn pole technique on a treadmill?
Only in a setting that explicitly permits it and provides safe supervision and space. Outdoor placement and transitions still need practice; treadmill findings do not transfer perfectly to real trails.
References
- Giovanelli et al. (2019): energy cost and perceived effort during steep uphill pole walking.
- Giovanelli et al. (2022): steep treadmill versus overground pole walking pilot study.
- 2008 study: exertion during uphill, level, and downhill walking with and without poles.
- 2026 field study: mountaineering poles and respiratory-muscle fatigue during hiking.
- British Mountaineering Council: using trekking poles and managing technical-ground hazards.
Related Articles
Skyrunning training: technique, fitness, and mountain safety
Build a skyrunning training plan for steep, technical terrain with uphill fitness, downhill skill, strength, pacing, fueling, and mountain safety.