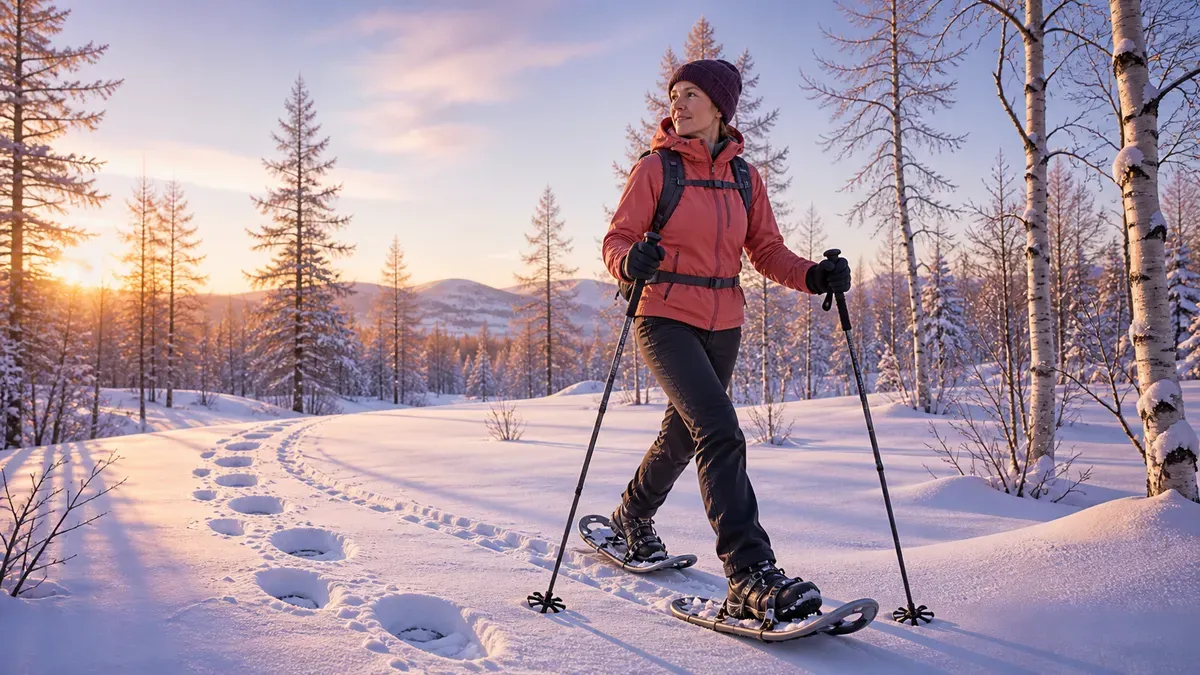
How to snowshoe: technique, gear, safety, and a beginner plan
Learn how to snowshoe with better fit, efficient technique, safe terrain choices, cold-weather gear, and a beginner progression for winter trails anywhere.
Snowshoeing turns deep or soft snow into walkable winter terrain by spreading your weight over a larger surface and adding traction beneath the foot. The basic stride is easy to learn, but a safe outing still depends on correct binding fit, controlled technique, realistic pacing, navigation, weather preparation, and terrain judgment.
Start on a marked, mostly level route where a short mistake has a small consequence. Practise fastening the bindings, walking, turning, climbing a gentle hill, descending, falling, and standing up before considering remote or avalanche-exposed terrain. Snowshoes improve flotation and grip; they do not make every snowy slope safe.
For cold-season day hikes where flotation is not the main skill, use the winter hiking safety guide to plan layers, surface-specific traction, weather thresholds, emergency insulation, and a firm turnaround time.
Quick answer
To snowshoe, center the ball of each boot over the binding pivot, tighten the straps securely without restricting circulation, and tuck away loose ends. Walk with a natural but slightly wider stance, lift each toe just enough to clear the opposite snowshoe, and place the foot deliberately so the traction teeth engage. Use short steps uphill, keep your weight centered, and descend slowly with soft knees and the torso balanced over the feet.
For a first outing, choose a short packed trail with gentle grades, check the local weather and avalanche information, carry winter essentials, and turn around before fatigue damages technique. Use poles for balance if helpful, but learn to move without leaning heavily on them.
Key facts
- Snowshoe decking spreads body weight across snow and reduces sinking compared with an ordinary boot.
- Binding position controls the stride: the boot must stay centered while the heel lifts freely and the toe clears the deck.
- Traction teeth grip firm snow: deliberate foot placement works better than shuffling or rushing.
- Soft snow raises energy cost: pace can fall sharply even when heart rate and perceived effort rise.
- Terrain choice controls avalanche exposure: flotation equipment does not replace a forecast, training, or a conservative route.
The movement builds on ordinary fitness walking technique, but snow depth, deck width, cold, and hidden terrain make pace a poor standalone measure of effort.
What snowshoes can and cannot do
A snowshoe combines a frame or molded platform, flexible decking, a boot binding, and traction beneath the foot. As the boot moves forward, the heel normally rises while the front of the binding pivots. The deck provides flotation; the cleats, rails, or crampon-like teeth provide grip.
Snowshoes are most useful when boots alone sink deeply enough to make walking inefficient or damaging to the trail. They can also add traction on packed snow. They are not interchangeable with every other winter tool:
| Tool | Best use | Important limit |
|---|---|---|
| Snowshoes | Soft or deep snow on flat to moderately steep terrain | Wide decks can catch each other; traction and edge control have limits |
| Microspikes or light traction | Firm, icy paths where flotation is unnecessary | Not designed for deep snow or technical climbing |
| Mountaineering crampons | Steep, firm snow or ice with compatible boots and trained technique | Require specific fit, skill, and fall-consequence judgment |
| Backcountry skis | Efficient travel across suitable snow and terrain | Require skiing, transition, and avalanche skills appropriate to the route |
If a route requires an ice axe, crampons, rope systems, or self-arrest competence, it has moved beyond ordinary beginner snowshoeing. The ice-climbing beginner guide explains why technical winter equipment must be treated as a compatible system rather than a collection of accessories.
Choose snowshoes by system, not by one size chart
Manufacturers commonly rate snowshoes by total load: your body, clothing, boots, pack, food, and equipment. A larger deck generally provides more flotation, but it is also heavier, wider, and less maneuverable. Dense packed trails may need less flotation than unconsolidated powder. Steep or wooded terrain often rewards a more compact shape than a flat open field.
Treat a load chart as a starting point. Snow type, route gradient, body size, gait, and local conditions change what feels stable. Renting for the first few outings or joining an introductory course lets you learn which tradeoffs matter before buying anything.
Binding and boot fit
Use insulated, water-resistant boots that fit your feet and the binding. The ball of the foot should sit near the binding pivot or the manufacturer’s marked position. The toe must not strike the deck as the heel rises, and the boot should not rotate sideways when you edge the snowshoe.
Tighten straps in the order specified by the manufacturer. Secure does not mean crushing: numb toes, new pressure points, or a cold foot can signal poor boot fit, overtightening, or developing cold injury. Tuck every loose strap so it cannot catch the opposite deck or a branch.
Traction, heel lifts, and poles
Underfoot teeth should be intact and appropriate for the expected surface. A heel lift can reduce calf strain on sustained climbs by supporting the heel, but it changes ankle position and is unnecessary on flat ground. Practise raising and lowering it with gloves before the outing.
Poles with snow baskets can improve balance, help test snow depth, and make standing up easier. Adjust them so the shoulders stay relaxed on level ground; shorten them slightly uphill and lengthen them slightly downhill only if the model permits safe adjustment. Pole technique from Nordic walking can teach rhythm, but snowshoe poles are primarily stability and terrain tools rather than a requirement for forceful propulsion.
A five-minute fit check
Perform this check near the trailhead, not after the route becomes steep:
- Match left and right snowshoes if the design is directional.
- Center each boot and fasten every binding component as instructed.
- Lift each heel and confirm that the toe clears the opening and deck.
- Walk ten steps, turn both ways, and step sideways without boot rotation.
- Recheck circulation, pressure points, loose straps, and underfoot ice after five minutes.
- Carry the tool or method specified by the manufacturer for a binding repair.
Snowshoeing technique on flat and rolling terrain
The most efficient stride looks more like walking than marching. Keep the torso tall, look ahead, and let the ankle and knee move naturally. Widen the stance only enough to stop the frames from clipping. An exaggerated wide gait wastes energy and can irritate the hips.
Walk without catching the decks
Lift the front of each snowshoe just enough to clear the snow and the opposite frame. Avoid a high-stepping gait unless the snow or obstacle requires it. Place the foot in the direction of travel, transfer weight over it, then move the other side.
On firm snow, make the step deliberate so the traction engages before you commit fully. On soft snow, avoid stomping: a smooth weighted step preserves balance and wastes less effort. When breaking trail, rotate the lead periodically so one person does not absorb all the work.
Turn with space and control
For a wide turn, take several small steps in an arc. In tighter space, plant one snowshoe, lift the other clearly, and place it in the new direction before bringing the first around. Do not twist a loaded knee while the snowshoe remains trapped.
A kick turn is useful only after practice on safe, low-angle snow. The Mountaineers’ basic course material emphasizes learning the equipment, controlled turns, climbing, traversing, falling, and standing up before increasing terrain consequence (basic snowshoe course guide).
Step over obstacles instead of straddling them
Approach logs, holes, and branches squarely when possible. Step completely over with one snowshoe, establish balance, then bring the second through. Do not place a wide deck across a narrow unsupported snow bridge. The National Park Service warns that moving water can hollow out snow from below and leave thin, hard-to-see bridges (NPS beginner snowshoeing guide).
Uphill, traverse, and downhill technique
Slope technique depends on snow firmness, traction, runout, and consequence. Practise each movement on a gentle hill where a slip ends safely.
Climb with short, complete steps
On a modest incline, shorten the stride, lean slightly from the ankles, and place the whole snowshoe rather than reaching far ahead. Press the front traction into the snow and stand over the foot before the next step. On soft snow, the leader may compact a staircase that followers can reuse.
When the direct line becomes inefficient, use broad switchbacks on suitable terrain. Do not zigzag into a hazard simply to reduce the grade. The strength and pacing ideas in the uphill walking guide transfer; the snow-specific traction and route decisions do not.
Traverse without leaning uphill
Crossing a slope places uneven pressure on the decks. Keep the body centered rather than collapsing toward the hill. Press the uphill edge into the snow and build a level platform for each step. If the snowshoe slides, the bindings twist, or every step requires a desperate pole brace, retreat to gentler terrain.
Descend under the center of mass
Face mostly downhill, keep the knees soft, and take short steps. Let the heel contact and the full traction system engage rather than leaning far back and skating on the tails. On very soft, low-consequence snow, a controlled heel-first step may sink into a stable platform. On firm snow, deliberate flat contact and lower speed matter more.
Do not use a sitting slide as a routine descent method. It removes directional control, can hide rocks or trees, and may accelerate into dangerous runout. If the slope is too steep or icy to descend upright with the equipment and skills you have, turn around.
Fall and stand up safely
Practise on flat, soft snow away from buried obstacles. If balance is lost, avoid reaching a rigid arm toward the ground; bend the knees and try to fall to the side or onto a broad area. After stopping:
- Take a breath and check for pain, slope movement, and nearby hazards.
- Roll onto the knees or side so both snowshoes are downhill or clear of each other.
- Make a stable platform with hands or crossed poles.
- Bring one foot underneath the hips and stand gradually.
Balance training can improve controlled stepping, but no gym drill guarantees secure footing on changing snow. Use the balance-training progression off the trail, then relearn the skill in a low-consequence winter setting.
Pace by effort because snow changes the workload
Snowshoe pace is not comparable with dry-trail pace. In a small study of ten active young adults, snowshoeing in unpacked snow at about 2.0 mph (3.3 km/h) produced a similar oxygen-use and heart-rate response to snowshoeing on packed snow at about 3.0 mph (4.7 km/h) and treadmill walking at 4.0 mph (6.4 km/h). The sample was small and does not provide a universal calorie formula, but it shows why surface condition can dominate speed (Connolly, 2002).
Another small study of eight men found that snowshoe binding design affected oxygen use, heart rate, and perceived exertion in powder. It cannot identify the best design for every person, but it reinforces that equipment mechanics and snow condition change the cost of travel (Dalleck et al., 2003).
Use three live signals:
- Talk test: on an easy outing, you should be able to speak in complete sentences.
- RPE: keep the first half around 3–4 out of 10 unless the plan intentionally includes harder work.
- Movement quality: shorten or stop the outing when decks clip, feet drag, bindings loosen repeatedly, or route decisions become careless.
Do not chase a dry-trail pace or calorie estimate. Snow depth, temperature, wind, elevation, route finding, pack mass, and who is breaking trail can change the effort minute by minute. The training-load guide is useful for separating duration, intensity, and recovery instead of treating every winter walk as the same workout.
A four-outing beginner progression
Repeat a stage until you can finish with stable technique and spare attention. Choose short routes with an easy exit and avoid novel terrain when weather is deteriorating.
| Outing | Terrain | Skills to practise | Stop or repeat when |
|---|---|---|---|
| 1 | 20–30 min on flat packed snow | Binding fit, natural stride, wide turn, fall and stand | Straps loosen, frames collide often, or feet become cold |
| 2 | 30–45 min on rolling marked trail | Poles, pace, gentle climb and descent, layer changes | You cannot speak comfortably or technique deteriorates |
| 3 | 45–75 min with one low-consequence hill | Switchbacks, traverse, heel lift, group spacing | Traction slides, route finding becomes uncertain, or descent feels uncontrolled |
| 4 | 60–120 min on a familiar winter route | Complete trip plan, navigation backup, food and cold management | Conditions exceed the plan or the turnaround time arrives |
After those outings, progress one variable at a time: duration, elevation, unpacked snow, remoteness, pack load, or technical terrain. Adding all six at once turns an equipment lesson into a rescue problem.
Route planning: start outside avalanche terrain
A marked recreation trail is not automatically hazard-free, and a gentle place can sit below a steep avalanche path. Avalanche.org notes that open or gladed slopes steeper than roughly 30 degrees can produce avalanches that run into lower-angle terrain below. Terrain recognition, current forecasts, group decisions, and rescue competence are learned skills, not properties of the snowshoe (avalanche terrain, avalanche basics).
Before choosing any route near steep snow, use the avalanche causes, types, and warning-sign guide to understand slab formation, connected terrain, red flags, forecast limits, and why field training remains essential.
For a beginner outing:
- Select a maintained or well-described route known to avoid avalanche start zones, paths, and terrain traps.
- Check the official local avalanche forecast and weather report before departure.
- Define turnaround time, maximum distance, and no-go terrain at home.
- Download a map, carry a physical backup, and tell a responsible person the route and return time.
- Reassess wind, snowfall, visibility, temperature, snow bridges, tree fall, stream crossings, and group condition during the outing.
The mountain navigation guide explains how to turn that map into checkpoints, bearings, terrain confirmation, and a stop rule when the ground no longer matches the plan.
Slope-angle layers and apps help with planning, but their terrain models may be too coarse for exact field decisions. Avalanche.org recommends treating them as a starting point and verifying terrain in the field (terrain-based trip planning). If the route enters avalanche terrain, take recognized training, travel with trained partners, carry the appropriate rescue equipment, and know how to use it. Owning a transceiver, probe, and shovel does not make an untrained route choice safe.
Winter clothing and essential systems
Dress to manage both exercise heat and stopped-time cold. Start slightly cool, vent before base layers become wet, and add insulation before a rest. Avoid cotton next to the skin in conditions where it may become wet and stay wet. Protect hands, feet, ears, face, and eyes; carry dry spares appropriate to the forecast and the consequence of delay.
Pack systems rather than a random list:
| System | Beginner day-trip examples |
|---|---|
| Navigation | Topographic map, compass, offline GPS, spare battery |
| Insulation and weather | Base layer, breathable midlayer, shell, warm stop layer, hat, two handwear options, spare socks |
| Light and communication | Headlamp, spare power, phone or suitable remote communication device |
| Food and water | Easy-to-eat food, extra reserve, insulated bottle, route-appropriate water plan |
| Emergency | First aid, emergency shelter, fire starter where lawful and usable, whistle, personal medication |
| Repair | Binding-specific repair item, multi-tool if appropriate, straps or cord, tape |
| Sun and eyes | Sunglasses or goggles, sunscreen, lip protection |
The National Park Service organizes its Ten Essentials around navigation, sun protection, insulation, illumination, first aid, fire, repair, nutrition, hydration, and emergency shelter. Adapt every system to the route, local rules, group, and possibility of an unplanned night out.
Cold injury and medical stop signs
Cold stress can occur even near freezing when wind, wet clothing, fatigue, and long exposure accelerate heat loss. NIOSH advises loose insulating layers, waterproof insulated footwear, warm breaks, dry spare clothing, and monitoring yourself and partners for deterioration (CDC/NIOSH cold-stress guidance).
Stop, shelter, add dry insulation, and seek appropriate help when a person develops uncontrolled shivering, clumsiness, confusion, slurred speech, unusual drowsiness, or worsening coordination. Persistent numbness, pale or waxy skin, hard tissue, or blistering can indicate cold injury. The Wilderness Medical Society emphasizes preventing moisture, wind, constriction, and prolonged exposure, and warming digits when numbness or pain appears (WMS frostbite summary).
Do not rub suspected frostbite, place numb skin against intense heat, or continue simply to protect the day’s goal. Evacuate and obtain medical assessment. Chest pain, fainting, severe breathlessness, a major fall, head injury, or a limb that cannot bear weight also overrides the route plan. This guide supports preparation and cannot diagnose or treat an emergency.
Trail etiquette and low-impact winter travel
Use the lane designated for snowshoes and avoid walking over parallel classic ski tracks. Step aside in a safe visible place for faster users, do not stop at blind corners or the bottom of hills, and repair large holes in a groomed surface when practical. Follow local rules for dogs, permits, closures, and protected areas (NPS winter trail etiquette).
Deep snow can protect vegetation, but thin cover may hide fragile plants. Stay on durable snow or the designated route, pack out all waste, avoid approaching stressed winter wildlife, and keep noise low. Leave No Trace also recommends checking weather and avalanche information, travelling in a prepared group, and separating snowshoe and ski tracks where possible (Leave No Trace winter recreation).
Use SuperAge after technique and safety are covered
Snowshoeing is an outdoor skill before it is a dashboard event. SuperAge cannot evaluate a binding, identify an avalanche path, see a hidden stream, or decide whether a descent is beyond your traction. It can help you review the background patterns that support a prepared outing: activity consistency, cardio fitness, sleep, resting heart rate, and recovery trends.
Track a few repeatable field outcomes instead of comparing raw pace across different snow:
- total moving time and elevation gain;
- average and peak RPE;
- packed versus unpacked trail condition;
- time spent breaking trail;
- whether technique stayed stable on the final descent;
- foot comfort, warmth, and binding adjustments; and
- soreness, sleep, and fatigue over the next 24–48 hours.
Compare similar routes and conditions across several weeks. Improvement may appear as the same route at a lower effort, better balance late in the outing, fewer equipment stops, or a longer duration without accumulated pain—not simply a faster kilometer.
Download SuperAge to review fitness and recovery trends around winter activity while keeping terrain and equipment decisions in trained human hands.
FAQ
Is snowshoeing hard for beginners?
Flat snowshoeing is close to walking once the bindings fit and the wider stride feels natural. Soft snow, steep grades, cold, wind, and route finding can make the same distance much harder. Begin on a short packed trail and add one difficulty at a time.
How should snowshoes fit around boots?
The boot should sit centered in the binding with the ball of the foot near the pivot specified by the manufacturer. Straps must prevent rotation without restricting circulation, the toe must clear the deck, and loose strap ends must be secured.
Do I need poles for snowshoeing?
No, poles are not mandatory on easy terrain, but snow baskets can improve balance, help test depth, and make standing after a fall easier. Practise without overloading the poles so a slip or broken pole does not remove your only source of stability.
Can I use snowshoes on ice?
Snowshoe traction may grip firm snow and limited ice, but it is not equivalent to technical crampons. If the surface, slope, or runout requires mountaineering equipment or self-arrest skills, use the correct compatible system and training—or choose another route.
How wide should my snowshoe stride be?
Only wide enough to keep the frames from clipping. A forced exaggerated stance wastes energy and can irritate the hips. Shorten the step, point both decks forward, and practise on flat snow until the clearance becomes automatic.
How do I walk uphill in snowshoes?
Use short steps, center weight over the planted foot, and press the front traction into the snow. Use a heel lift on sustained grades if the snowshoe provides one, and switchback only where the route and terrain make it safe.
Does snowshoeing burn more calories than walking?
It can require much more energy at the same apparent speed, especially in unpacked snow, but there is no reliable universal multiplier. Snow condition, equipment, grade, wind, pack mass, and individual efficiency all change the cost. Use effort and movement quality rather than a fixed calorie claim.
Do beginners need avalanche gear for snowshoeing?
Beginners should start on routes that avoid avalanche terrain. If a route enters or sits below avalanche terrain, a forecast, recognized education, trained partners, rescue equipment, and practised rescue skills are required. Carrying the equipment without the training is not a substitute for safer terrain.
Key takeaways
- Center the boots, secure every strap, and test fit before leaving the trailhead.
- Walk naturally with a small clearance between decks and deliberate foot placement.
- Practise turns, hills, descents, falls, and recovery on low-consequence snow.
- Pace by talk test, RPE, and movement quality because soft snow changes energy cost.
- Begin on marked gentle routes outside avalanche terrain and progress one variable at a time.
- Carry winter essentials, protect against moisture and wind, and act early on cold-injury signs.
- Respect ski tracks, other users, wildlife, closures, and fragile winter terrain.
References
- Connolly DAJ. The energy expenditure of snowshoeing in packed vs. unpacked snow at low-level walking speeds. Journal of Strength and Conditioning Research. 2002.
- Dalleck LC, DeVoe DE, Kravitz L. Energy cost and physiological responses of males snowshoeing with rotating and fixed toe-cord designs in powdered snow conditions. Ergonomics. 2003.
- U.S. National Park Service. Beginner’s guide to snowshoeing.
- The Mountaineers. Basic snowshoe course guide.
- Avalanche.org. Avalanche basics.
- Avalanche.org. Terrain.
- Avalanche.org. Terrain-based trip planning.
- National Institute for Occupational Safety and Health. Cold and work: types, causes, preparation.
- Wilderness Medical Society. Frostbite summary 2024.
- U.S. National Park Service. Ten Essentials.
- U.S. National Park Service. Winter trail etiquette.
- Leave No Trace. Winter recreation.
Related Articles

Functional training exercises: movements and beginner scaling
Learn functional training exercises, from squats and carries to swings and presses. Choose beginner variations, recognize form limits, and progress with control.