Side plank form: muscles, benefits, and progressions
Learn proper side plank form, muscles worked, realistic benefits, common mistakes, regressions, progressions, and a practical shoulder-aware training plan.
Quick answer
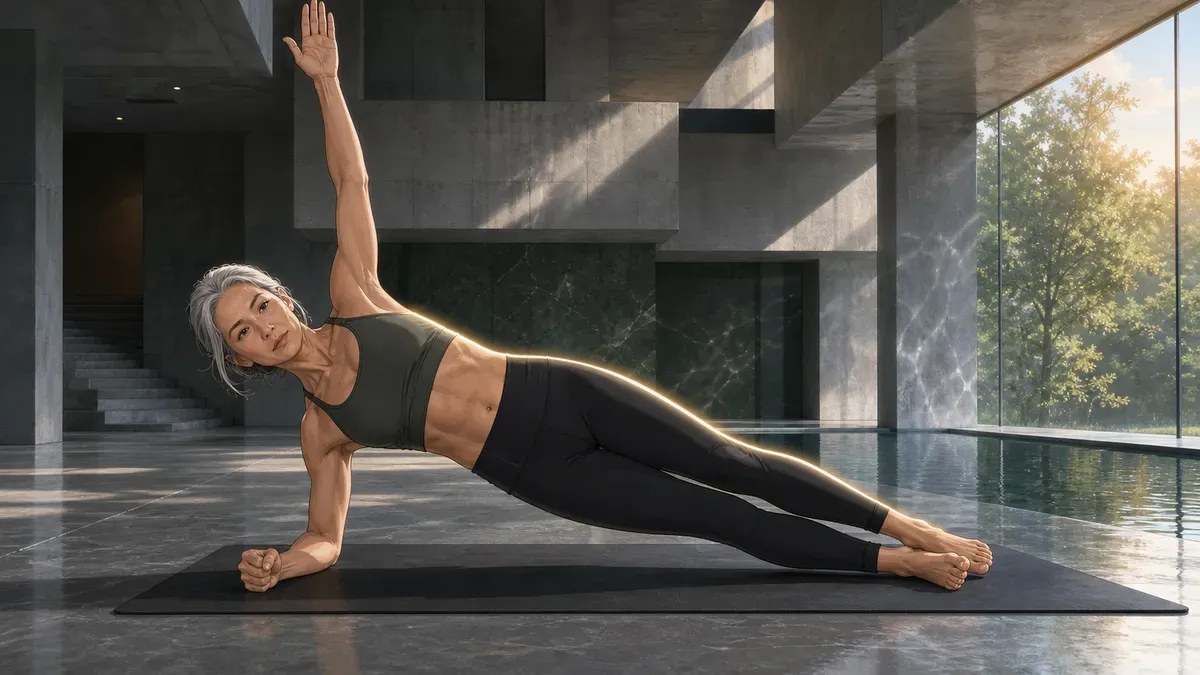
For reliable side plank form, place the supporting elbow directly under the shoulder, create a straight line from head through ribs and pelvis, press the floor away, and lift without letting the waist sag or the torso rotate. Start with the knees bent or the forearm elevated if the full version changes your alignment. Hold only while you can breathe and keep the shoulder, ribs, hips, and feet organized.
The side plank mainly trains lateral trunk endurance while also loading the shoulder girdle and the hip muscles on the supporting side. It can be useful, but it is not a complete core program, a guaranteed treatment for back pain, or a way to burn fat from the waist. Two or three controlled sets per side are usually more useful than one maximal, shaking hold.
Key facts
- The side plank challenges the trunk to resist side bending and rotation.
- The supporting shoulder transfers body weight through the forearm or hand into the floor.
- The bottom hip stabilizers help maintain a level pelvis during the hold.
- A shorter lever reduces the torque that the trunk and shoulder must control.
- Progressive practice builds capacity more reliably than repeated tests to failure.
What a side plank trains
A side plank is an isometric exercise: the body tries to hold a position while gravity creates a side-bending demand. The trunk muscles are active, but the visible goal is not to bend. It is to prevent the ribs and pelvis from collapsing toward the floor or rolling forward and backward.
This makes the exercise different from a side crunch. A crunch repeatedly shortens the space between the ribs and pelvis; a side plank asks the body to keep that relationship steady while force passes through the shoulder, trunk, pelvis, and legs. Our broader core strength training guide explains how this lateral-stability task fits beside anti-extension, anti-rotation, posterior control, and loaded carries.
Muscles worked: a coordinated chain, not one isolated target
The external and internal obliques, rectus abdominis, quadratus lumborum, spinal extensors, and deeper trunk muscles contribute according to the variation and the individual. The supporting-side gluteus medius and other hip muscles help stop the pelvis from dropping. Serratus anterior, trapezius, rotator-cuff muscles, triceps, and other shoulder-girdle muscles help maintain the support. If the shoulder is the main training goal, the shoulder exercise guide provides a broader progression across pressing, raising, rotation, and scapular control.
Small laboratory studies support that description, but they need careful interpretation. In 25 adults, several side-bridge variations produced greater recruitment on the weight-bearing side, and gluteus medius and external-oblique activation changed with the exercise setup (Younger et al., 2014). In 30 people selected for gluteus medius weakness, changing knee position and top-leg movement altered gluteal and tensor fasciae latae activity (Lee et al., 2021).
Surface electromyography measures electrical activity during a task. It does not by itself prove how much strength, muscle growth, pain relief, balance, or injury prevention a person will gain over months. The practical lesson is that leverage changes the challenge; it is not that one variation is universally best.
How to do a forearm side plank step by step
Use a firm mat. Learn the short-lever version first even if you expect to progress quickly.
- Set the shoulder. Lie on one side with the elbow under the shoulder and the forearm pointing forward. Keep the neck long rather than sinking toward the supporting shoulder.
- Choose the leg position. For the short lever, bend both knees to roughly a right angle. For the full version, straighten the legs and place the top foot slightly in front of the bottom foot before trying a stacked stance.
- Stack ribs over pelvis. Imagine the front of the rib cage and the front of the pelvis facing the same wall. Avoid starting with the chest rolled toward the floor.
- Create floor pressure. Press the forearm down and away so the supporting shoulder stays active. Do not shrug aggressively; create space between the shoulder and ear.
- Lift as one unit. Raise the hips until the head, ribs, pelvis, and thighs form one line. In the knee-supported version, the line runs from head to knees.
- Breathe behind the brace. Use quiet breaths without letting each inhale flare the lower ribs or each exhale collapse the waist.
- Finish before form fails. Lower under control when the shoulder sinks, pelvis turns, hips drop, breath locks, or pain appears.
A mirror, phone placed in front of the body, or training partner can reveal rotation that is difficult to feel. Record only a normal working set; changing the hold to impress the camera defeats the feedback.
Five cues that solve most form problems
- Elbow under shoulder: reduces the long forward lever that can make the shoulder feel unstable.
- Press the floor away: keeps the shoulder girdle active instead of hanging on passive structures.
- Belt buckle forward: helps stop the pelvis from rolling toward the ceiling or floor.
- Ribs away from the mat: maintains lateral trunk tension without forcing the hips excessively high.
- Keep breathing: makes the hold a repeatable training set rather than a breath-holding test.
There is no single perfect spinal shape measured to the degree. Aim for a comfortable, controlled alignment that you can reproduce. In a biomechanics study of curl-up, bird-dog, and side-bridge variations, corrective coaching changed muscle activity and three-dimensional spine position; breathing effects also varied by exercise (McGill and Karpowicz, 2009). Technique is a skill, not a frozen photograph.
If you want to learn the difference between gentle abdominal hollowing and the broader brace used here, see the stomach vacuum exercise guide.
A six-level side plank progression
Progress when you can complete every prescribed set on both sides with steady breathing and no meaningful loss of position. Change one variable at a time.
| Level | Setup | Practical target before progressing | Main reason to use it |
|---|---|---|---|
| 1. Elevated short lever | Forearm on a bench, knees bent, knees or feet supported | 2–3 × 15–25 seconds per side | Reduces the share of body weight and simplifies shoulder control |
| 2. Floor short lever | Forearm and lower knee on the floor | 2–3 × 15–30 seconds per side | Builds lateral trunk endurance with a shorter lever |
| 3. Long lever, staggered feet | Legs straight, top foot slightly forward | 2–3 × 15–30 seconds per side | Adds leg length while preserving a wider base |
| 4. Long lever, stacked feet | Legs straight, feet stacked | 2–3 × 20–35 seconds per side | Narrows the base and increases balance demand |
| 5. Controlled movement | Add a slow top-arm reach or a small hip lower and lift | 2–3 × 5–8 clean repetitions per side | Trains control while the shape changes |
| 6. Added lever or load | Raise the top leg, add a row, or use a light external load | 2–3 × 6–10 repetitions or 15–30 seconds | Increases demand without chasing very long holds |
These are coaching ranges, not diagnostic standards. A classic endurance-test study found that side-bridge hold times were reliable in 75 healthy young adults, but its values differed by sex and relative trunk endurance (McGill et al., 1999). Later reference work also found differences by age and activity level (Pinheiro et al., 2018). Do not compare your training hold with a young laboratory cohort and call the result a medical finding.
When to use a high side plank
A high side plank places the supporting hand on the floor with the elbow straight. It may suit someone who prefers an extended-arm support, but it adds wrist extension and changes shoulder and triceps demand. A 2024 laboratory study in 21 healthy men found that elbow position and the number of support points altered shoulder and scapular muscle activity across plank variations (Can et al., 2024). That finding supports individual progression; it does not make the high or low version safer for every shoulder.
Use the forearm version if the wrist dislikes extension. Use a raised surface or another exercise if neither arm position is comfortable.
Benefits you can reasonably expect
Better lateral trunk endurance
The most direct adaptation is greater ability to maintain a side-support position. With progressive loading, that capacity can contribute to bracing during carries, running, lifting, and contact with external forces. Transfer is not automatic: people still need to practise the actual movement or sport.
A bodyweight strength option
The exercise needs little space and no machine. The 2026 American College of Sports Medicine position stand concludes that bodyweight, elastic-band, home-based, and other nontraditional resistance training can improve strength and physical function. It also emphasizes regular participation and individualization over unnecessary complexity (ACSM, 2026).
A scalable trunk-and-hip challenge
Knee position, support height, foot stance, lever length, movement, and external resistance can all be adjusted. This makes the side plank easier to fit to current capacity than an all-or-nothing maximal hold.
Useful variety, not a complete program
The side plank does not train every trunk function or every major muscle group. Pair it with squats or hinges, pulling, pushing, aerobic work, and other trunk patterns. The World Health Organization recommends muscle-strengthening activity for all major muscle groups on at least two days per week, alongside aerobic activity (WHO guidelines). A single mat exercise cannot satisfy that full target.
What the side plank does not prove or fix
- It does not selectively burn fat from the waist. Fat loss cannot be directed to the muscle area that feels the exercise.
- It does not automatically create visible abdominal muscles; body composition, total training, nutrition, and genetics all matter.
- It does not guarantee better posture. Posture changes across tasks and comfort matters more than holding one rigid shape all day. Use our postural exercise guide for a broader approach.
- It does not prevent every back injury or treat every episode of back pain.
- It is not mandatory. A suitcase carry, supported side hold, anti-rotation press, or appropriately loaded compound exercise can train overlapping capacities.
For low back pain, guidelines recommend choosing exercise around the person’s needs, preferences, and capabilities rather than prescribing one universal movement (NICE). Pain that persists, worsens, radiates, or comes with weakness, numbness, fever, unexplained weight loss, trauma, or bowel or bladder changes needs professional assessment rather than a harder plank.
Common side plank mistakes and fixes
| What happens | Likely effect | Try this |
|---|---|---|
| Elbow sits far from the shoulder | Support feels long and unstable | Reset with elbow vertically below shoulder |
| Shoulder collapses toward the ear | Neck and shoulder fatigue dominate | Press the forearm down and create space at the neck |
| Hips sag | The hold becomes a passive endurance contest | Shorten the lever or end the set earlier |
| Hips rotate backward | Lateral demand escapes into a different position | Use staggered feet and aim both hip points forward |
| Hips pike | The body avoids the intended long line | Reduce hold time and gently extend the hips |
| Breath stops | Tension becomes difficult to repeat and monitor | Use shorter sets with two or three calm breaths |
| Top leg lifts before the base is stable | Balance and hip demand exceed trunk control | Earn the static stacked version first |
| One side gets much more volume | Practice reinforces the difference | Start with the less confident side and match clean work |
Mild muscular effort around the side of the trunk, shoulder, and hip is expected. Sharp pain, pinching, electrical symptoms, numbness, tingling, dizziness, chest pain, or a feeling that the shoulder will give way is not a cue to brace harder.
Shoulder-, wrist-, and back-aware options
If the shoulder is the limiting point
Elevate the forearm on a stable bench, use the bent-knee version, reduce the hold, and keep the elbow under the shoulder. If loading still hurts, choose a standing anti-rotation press or a light suitcase-style carry within a complete core routine and seek individualized guidance when symptoms persist.
If the wrist is sensitive
Choose the forearm version rather than the high side plank. Do not use an unstable fist or a sharply angled wrist as an improvised solution.
If the lower back feels compressed or pinched
Check whether the ribs have flared, the pelvis has rolled, or the hips have drifted behind the body. Regress to a short lever or use a standing alternative. The goal is muscular effort without escalating symptoms.
If floor transfers are difficult
Start against a wall or with the forearm on a high, stable surface. A wall press is not the same load as a floor side plank, but it can teach aligned pressure and breathing. Balance training after 50 and full-body strength work may be higher priorities than reaching the floor version.
Side plank versus similar core exercises
| Exercise | Primary challenge | Good reason to choose it |
|---|---|---|
| Side plank | Resisting side bending with bodyweight arm support | Direct, equipment-free lateral trunk endurance |
| Front plank | Resisting spinal extension in a face-down support | General anterior trunk endurance |
| Suitcase carry | Resisting side bending while walking with a one-sided load | Standing, gait-integrated lateral stability |
| Anti-rotation press | Resisting cable or band rotation | Easily adjustable standing or kneeling load |
| Russian twist | Controlling repeated trunk rotation | Rotation-specific practice when appropriate |
| Copenhagen plank | Side support plus high adductor demand | Advanced groin-strength progression after preparation |
The Russian twist guide explains when controlled rotation fits the goal and when a side plank or anti-rotation exercise is the better choice. The adductor exercise guide covers Copenhagen progressions; do not treat them as a casual next step merely because the shape looks similar.
Make progression visible with SuperAge
After technique is stable, the useful question is whether the exercise fits the rest of the week. Record the variation, clean hold time, sets, side-to-side response, and any shoulder or back symptoms. Progress only when recovery remains normal and the next session repeats the same quality.
Download SuperAge to place strength sessions beside activity and recovery trends. The app cannot judge plank form or diagnose pain, but a consistent training record can help you avoid turning one strong day into an unplanned jump in volume.
A practical four-week side plank plan
Train twice per week with at least one recovery day between sessions. Choose the hardest variation that remains clean for every set.
| Week | Main work | Progression rule |
|---|---|---|
| 1 | 2 × 10–20 seconds per side | Learn elbow, rib, pelvis, and breathing control |
| 2 | 3 × 10–20 seconds per side | Add a set only if both sides remain steady |
| 3 | 3 × 15–25 seconds per side | Add 3–5 seconds, not a harder variation and more time together |
| 4 | 2–3 × 15–30 seconds per side | Move up one level only if every set is repeatable |
Rest 45–90 seconds between sides or sets. Keep roughly 2–5 seconds of technically clean effort in reserve rather than holding until collapse. If one side fails earlier, train that side first and let the stronger side match the same clean duration; do not add a large corrective dose without a reason.
Place side planks after the main lifts if they fatigue the trunk or shoulder enough to interfere with heavier work. In a short home session, pair them with a squat, hinge, row, and push pattern. Schedule the next demanding trunk session using the principles in our rest-day and recovery guide.
Key takeaways
- Place the elbow below the shoulder, align the ribs and pelvis, press the floor away, and keep breathing.
- Start with a short lever or elevated support; progress leverage before chasing maximal hold times.
- The exercise trains lateral trunk endurance and also loads the supporting shoulder and hip.
- EMG studies describe acute muscle recruitment, not guaranteed long-term outcomes.
- Two or three repeatable sets are more useful than one form-breaking test to failure.
- Use joint-friendly alternatives when the shoulder, wrist, back, or floor transfer is the limiting factor.
- Side planks complement full-body strength and aerobic activity; they do not replace either.
FAQ
How long should I hold a side plank?
Start with 10–20 seconds in a variation you can control, for two sets per side. Build toward two or three sets of 20–30 seconds before increasing leverage or adding movement. End the set when alignment or breathing changes, even if the timer has not finished.
Is a side plank better than a front plank?
Neither is universally better. A side plank emphasizes resistance to side bending, while a front plank emphasizes resistance to extension. Choose the one that matches the missing capacity, or use both within a balanced program.
Which side is working during a side plank?
Both sides contribute, but laboratory studies generally show greater recruitment in several trunk and hip muscles on the supporting side. The exact pattern changes with knee position, foot position, top-leg movement, arm support, anatomy, and technique.
Should beginners do side planks from the knees?
Yes. A bent-knee side plank is a legitimate shorter-lever exercise, not a failed full plank. It allows a beginner to practise shoulder pressure, rib-pelvis alignment, breathing, and controlled fatigue before adding the legs as a longer lever.
Why do I feel the side plank in my shoulder?
The shoulder must transfer body weight into the floor, so muscular effort is expected. Check that the elbow is under the shoulder and press the floor away. Regress or stop if you feel sharp pain, pinching, instability, numbness, or tingling.
Can side planks reduce love handles?
No exercise can select where fat is lost. Side planks can strengthen and condition the muscles involved, but changes in body fat depend on the broader energy balance, activity pattern, nutrition, sleep, and individual biology.
Are side planks safe after age 50?
Age alone is not a contraindication. Current shoulder, wrist, back, bone-health, blood-pressure, balance, and floor-transfer considerations matter. Start with an elevated or bent-knee version and obtain individualized advice when a condition or symptom changes safe loading.
How often can I train side planks?
Twice per week is a practical start within full-body strength training. A small, easy technique dose may fit more often, but hard sets still create fatigue. Increase frequency only when form, symptoms, and recovery remain stable.
References
- Younger K, et al. Surface electromyographic analysis of core trunk and hip muscles during selected rehabilitation exercises in the side-bridge position. J Athl Train. 2014.
- Lee KE, et al. Electromyographic analysis of hip and trunk muscle activity during side bridge exercises in subjects with gluteus medius weakness. J Sport Rehabil. 2021.
- McGill SM, Karpowicz A. Exercises for spine stabilization: motion and motor patterns, stability progressions, and clinical technique. Arch Phys Med Rehabil. 2009.
- McGill SM, Childs A, Liebenson C. Endurance times for low back stabilization exercises. Arch Phys Med Rehabil. 1999.
- Pinheiro MB, et al. Reference values and reliability for lumbopelvic strength and endurance in asymptomatic subjects. Braz J Phys Ther. 2018.
- Can EN, Harput G, Turgut E. Shoulder and scapular muscle activity during low and high plank variations. J Strength Cond Res. 2024.
- American College of Sports Medicine. ACSM publishes updated resistance training guidelines. 2026.
- World Health Organization. Guidelines on physical activity and sedentary behaviour. 2020.
- National Institute for Health and Care Excellence. Low back pain and sciatica in over 16s: recommendations.
Related Articles
Reverse crunch: form, muscles, and controlled progression
Learn reverse crunch form, distinguish a pelvic curl from a leg lift, and choose manageable sets, regressions, and progressions. Build control before adding reps.