Plank exercise: proper form, benefits, and progression
Learn plank exercise form, muscles worked, realistic benefits, comfortable variations, and a four-week progression that prioritizes control over long holds.
Quick answer
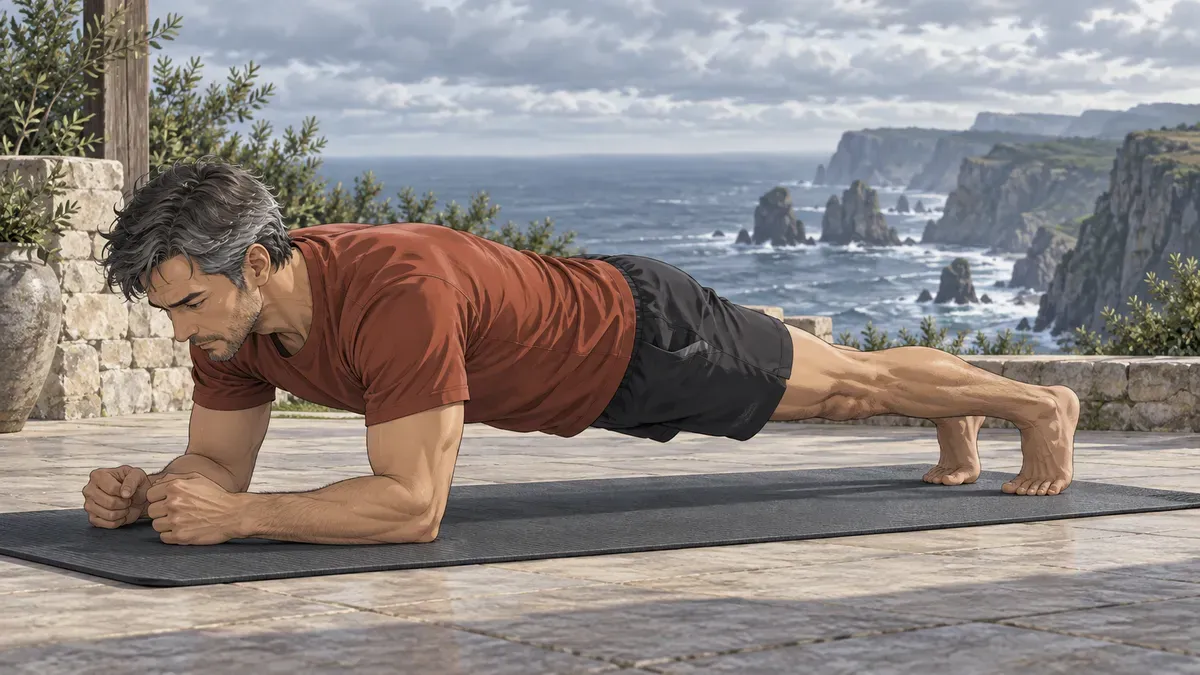
For a controlled plank exercise, support yourself on your forearms and toes, place your elbows beneath your shoulders, and keep your ribs and pelvis organized while breathing normally. Choose an elevated or knee-supported version if the floor plank makes you sag, strain, or hold your breath. End the set when you lose control rather than stretching the clock.
The front plank mainly trains the trunk to resist extension while the shoulders, hips, and legs help maintain the support. Start with two or three short, repeatable sets, twice a week. A longer hold is one possible progression; a slightly harder variation can be more useful once the basic version becomes easy. No particular duration proves health, guarantees a pain-free back, or removes belly fat.
Key facts
- The front plank challenges trunk muscles to resist extension under body weight.
- Support height and lever length change the exercise demand.
- Regular breathing helps preserve a repeatable training effort.
- Progressive practice develops capacity beyond a single maximal hold.
- A plank supplies one component of a complete strength routine.
What muscles does a plank work?
A plank is an isometric task: you produce force while trying to maintain a position. Gravity pulls the middle of the body toward the floor; the trunk must control that demand. The rectus abdominis and obliques contribute, alongside deeper abdominal and spinal muscles. The shoulder girdle transfers force through the arms, and the hip and thigh muscles help maintain the line of the lower body.
You may feel several areas working. That does not mean the exercise isolates every muscle equally. Hand versus forearm support, body proportions, stance, effort, and fatigue change the task. Feeling the shoulders before the abdomen can simply mean arm support is your current limiting factor.
For the wider training picture, our core strength training guide covers several trunk functions. This page focuses on the face-down front plank. The side plank guide covers the different challenge of resisting side bending.
For a contrasting movement task, the sit-up technique guide covers trunk and hip flexion, while the front plank emphasizes resisting extension.
Set up a forearm plank
Use a firm, nonslip surface with enough padding for comfortable elbow contact.
- Place the elbows beneath the shoulders. Rest the forearms comfortably and keep the hands relaxed.
- Prepare the legs. Extend the knees and place the toes securely on the floor.
- Lift into support. Bring the trunk away from the mat without letting the middle collapse.
- Organize the body. Keep a comfortable line from head through trunk and legs, with the neck following the torso.
- Continue breathing. Use enough abdominal tension to hold the shape without locking the breath.
- Lower deliberately. Finish before fatigue turns the movement into sagging or strain.
These fundamentals agree with the ACE front-plank instructions. A side-view recording can help you compare the first and last seconds of a set. Look for changes rather than trying to match an ideal photograph: bodies have different proportions and natural spinal curves.
Try one cue at a time. If “stay straight” makes you rigid and breathless, use “keep the ribs and pelvis moving together.” If the neck feels tense, look at the mat instead of lifting the chin to watch a timer. If the setup feels unfamiliar, practice a few brief entries and exits before adding duration.
Choose a version you can repeat
The floor plank is an option, not an admission test. Select support that lets the intended trunk effort happen without joint discomfort dominating.
| Version | Setup | Useful starting situation |
|---|---|---|
| Wall plank | Hands against a wall, feet stepped back slightly | Learning body alignment or avoiding floor transfers |
| Elevated plank | Hands or forearms on a secure high surface | Reducing the load while practicing a longer body line |
| Knee-supported forearm plank | Forearms and knees support the body | Shortening the lever when toe support is too demanding |
| Standard forearm plank | Forearms and toes support the body | Developing face-down trunk endurance |
| High plank | Hands below shoulders, arms extended | Practicing support related to a push-up, when wrists tolerate it |
| Longer-lever forearm plank | Elbows move a little farther forward | Increasing demand after the standard version becomes comfortable |
Use a surface that cannot slide or tip. For knee support, keep the hips sufficiently extended that the torso and thighs form a controlled line; sitting back toward the heels changes the exercise. An elevated forearm support can also reduce load without requiring wrist extension.
A high plank is not automatically easier or harder for everyone. It changes arm and wrist demands. When a wrist dislikes the position, return to forearm support or choose another trunk exercise rather than improvising unstable hand positions. Our shoulder exercise guide can help place arm support inside a broader strength routine.
How long should you hold a plank?
Hold it while you can reproduce the intended position and breathing. For a beginner, 2–3 sets of 10–20 seconds is a practical coaching starting point. Rest about 45–90 seconds between sets. Use shorter bouts or an easier version when necessary. These ranges are examples, not diagnostic thresholds or a tested universal prescription.
Keep a few seconds of controlled effort available when you stop. If you finish the first set at 40 seconds but the next collapses at 12, reduce the first set or change the variation. Repeatable work is easier to progress and interpret than one all-out attempt followed by exhausted fragments.
There is no need to earn a two-minute hold before progressing. If 20–30 seconds feels easy across every set, modestly change leverage or add another appropriate trunk task. Conversely, a comfortable 10-second elevated hold can be a meaningful starting point.
More muscle activation does not establish a better program
A small study had 19 participants perform four plank versions. Moving the elbows farther forward and adding a posterior pelvic tilt increased electrical activity in several abdominal regions compared with the traditional version (Schoenfeld et al., 2014). That result supports leverage as a way to change demand. It does not prove superior long-term strength, muscle growth, pain relief, or injury prevention.
Do not combine the longest lever, strongest tuck, and longest hold at once. An advanced variation should remain a controlled exercise rather than a position you can barely enter.
Benefits and limits
The clearest purpose is practicing trunk endurance and control in a face-down support. The movement takes little space and offers several ways to adjust difficulty. Those features make it convenient, but convenience alone does not guarantee an adaptation: the work must remain sufficiently challenging and consistent for your goal.
The 2026 ACSM resistance-training guidance supports bodyweight and home-based training as useful ways to develop muscle function. Its recommendations concern broader resistance programs, not proof that planks alone deliver every benefit of strength training. It also emphasizes regular participation and individualization; reaching momentary failure is not a requirement for the average healthy adult.
A plank can accompany lifting, climbing, swimming, or other activities, but improved plank performance does not automatically transfer into better sport technique. Practice the activity itself and train its other demands. Keep a squat or step, a hinge, a push, and a pull in the week instead of replacing them with additional timed holds.
A plank does not target belly fat
In a randomized study of 24 sedentary adults, six weeks of abdominal exercise improved abdominal endurance without meaningful changes in the measured fat or body-composition outcomes (Vispute et al., 2011). That was not a plank-specific trial, but it illustrates why local muscle work should not be sold as local fat loss. Our visible abs and body-composition guide addresses the appearance question separately.
Planks also do not guarantee a permanent posture change or treat every cause of back pain. The WHO guideline on chronic primary low back pain addresses care for a defined clinical condition. A generic exercise tutorial cannot replace assessment or turn one movement into a universal treatment.
Fix the limitation that ends the set
| What you notice | Useful response |
|---|---|
| Hips sag as the set continues | End sooner, elevate the support, or use knee support |
| Hips rise markedly to escape effort | Reduce difficulty and restore a comfortable body line |
| Neck tension dominates | Relax the gaze toward the mat and shorten the hold |
| Shoulders sink or feel unstable | Reset the support; regress or use a different exercise if discomfort persists |
| Breathing stops | Reduce the effort or duration until you can breathe throughout |
| Mild shaking appears near the end | End before it disrupts control; do not treat shaking as the goal |
| Low back, wrist, or shoulder pain increases | Stop the provoking version and reassess the exercise choice |
One useful question is: What changes first? If breathing fails before the trunk position changes, more seconds may simply reinforce breath holding. If elbow pressure hurts before muscular effort becomes challenging, alter padding or support. Training decisions improve when you identify the actual limiter.
The American Heart Association advises regular breathing during exercise and notes that holding the breath can raise blood pressure. If you have cardiovascular disease or a condition with exercise restrictions, ask your clinician about suitable effort and progression. A plank is not a home treatment for hypertension.
A four-week progression
This sample is for generally healthy beginners. Train twice weekly, with a recovery day between sessions, and keep the same variation until you can repeat it comfortably. Adjust the starting dose downward when needed.
| Week | Main work | Decision for the next session |
|---|---|---|
| 1 | 2 × 10–15 seconds | Repeat until setup, breathing, and lowering remain controlled |
| 2 | 3 × 10–15 seconds | Add the third set only when the first two remain repeatable |
| 3 | 3 × 15–20 seconds | Increase time modestly while keeping the same support |
| 4 | 2–3 × 15–25 seconds | Keep the version, or make one small leverage change and shorten the hold |
Do not advance because the calendar says so. Repeat a week, reduce the dose after an unusually tiring session, or choose another exercise if the version remains uncomfortable. The progression is a decision aid, not a promise of results in four weeks.
For example, an elevated plank might begin at two 12-second sets. After several comfortable sessions, add a third set. When those become easy, lower the support slightly and return to shorter holds. That is progress even though the timer initially moves backward.
Place demanding planks after the main lifts if trunk or shoulder fatigue would interfere with them. For a complete short session, use our equipment-free home workout. The WHO activity recommendations include strengthening all major muscle groups on two or more days weekly alongside aerobic activity. A plank addresses only part of that broader goal.
Track the routine with SuperAge
Progress is more informative when you record the version, sets, controlled seconds, breathing, and response afterward. Compare the same setup under similar conditions; an easy elevated hold and a difficult floor hold are different tasks.
Use your own technique notes alongside the activity, sleep, and recovery trends you review in SuperAge. The app can provide context for a consistent routine; it cannot inspect your plank position, diagnose pain, or determine a safe clinical progression. When you want to review the wider pattern, download SuperAge.
When to stop or seek guidance
Muscular effort is expected; sharp or worsening joint pain, radiating symptoms, numbness, dizziness, chest pain, or unusual shortness of breath is a reason to stop. Seek appropriate medical care for severe or concerning symptoms rather than testing another hold.
Recent surgery, a symptomatic hernia, pregnancy or postpartum concerns, persistent pelvic-floor symptoms, or an existing exercise restriction calls for an individualized approach. If floor support repeatedly provokes symptoms, a clinician or qualified exercise professional can help choose a tolerable alternative. You do not need to master this exercise to build a strong trunk.
Key takeaways
- Choose support that lets you breathe and control the ribs and pelvis.
- Use short, repeatable sets before pursuing longer holds.
- Change one variable at a time: support, lever, duration, or sets.
- Treat plank performance as a specific capacity, not a health test.
- Include other trunk functions, full-body strength, and aerobic movement.
- Stop symptom-provoking versions and seek individualized guidance when needed.
FAQ
Is a 30-second plank enough?
It can be a useful working set when the variation is challenging and controlled. There is no universal duration that makes a session effective; exercise choice, effort, repeatability, and progression matter together.
Should I plank every day?
Daily planks are not necessary. Twice weekly is a practical starting point alongside full-body training. Increase frequency only when it serves a clear purpose and recovery remains comfortable.
Is a forearm plank better than a high plank?
Neither is universally better. Forearm support avoids loaded wrist extension; hand support resembles the top of a push-up. Choose according to your goal and joint comfort.
Why do I feel a plank in my shoulders?
The shoulders help support body weight, so some effort there is expected. If they dominate, regress the support or shorten the set. Pain or instability calls for stopping the provoking version.
Should I tuck my pelvis as hard as possible?
No. A gentle adjustment can help you control the ribs and pelvis, but forcing a maximal tuck is not required. Use a comfortable position with steady breathing and increase difficulty gradually.
Can planks flatten my stomach?
Planks train muscular capacity. They do not reliably remove fat from the abdomen or guarantee a particular appearance. Body composition and visible definition involve several other factors.
What if I cannot hold a floor plank?
Start against a wall, use a stable elevated support, or try knee support. A simpler version is a valid training exercise when it provides controllable effort.
Can a plank cure back pain?
No universal exercise cures every cause of back pain. Some people tolerate planks; others need different movement or clinical guidance. Persistent or worsening symptoms deserve assessment.
References
- American Council on Exercise. Front plank exercise instructions. ACE.
- Schoenfeld BJ, et al. An electromyographic comparison of a modified version of the plank with a long lever and posterior tilt versus the traditional plank exercise. Sports Biomechanics. 2014. PubMed.
- American College of Sports Medicine. Updated resistance-training guidance for healthy adults. 2026. ACSM.
- Vispute SS, et al. The effect of abdominal exercise on abdominal fat. Journal of Strength and Conditioning Research. 2011. PubMed.
- World Health Organization. Guideline for non-surgical management of chronic primary low back pain in adults. 2023. WHO.
- American Heart Association. Getting active to control high blood pressure. AHA.
- World Health Organization. Physical activity recommendations. WHO.
Related Articles

How to do crunches: form, neck comfort, and progression
Learn how to do crunches with a controlled short curl, adjust when your neck takes over, and progress a small routine. Find a starting point that fits you.