Ski carving technique: drills for cleaner, safer turns
Learn ski carving technique with edge-control drills, pressure cues, terrain progressions, common fixes, equipment checks, and practical safety rules.
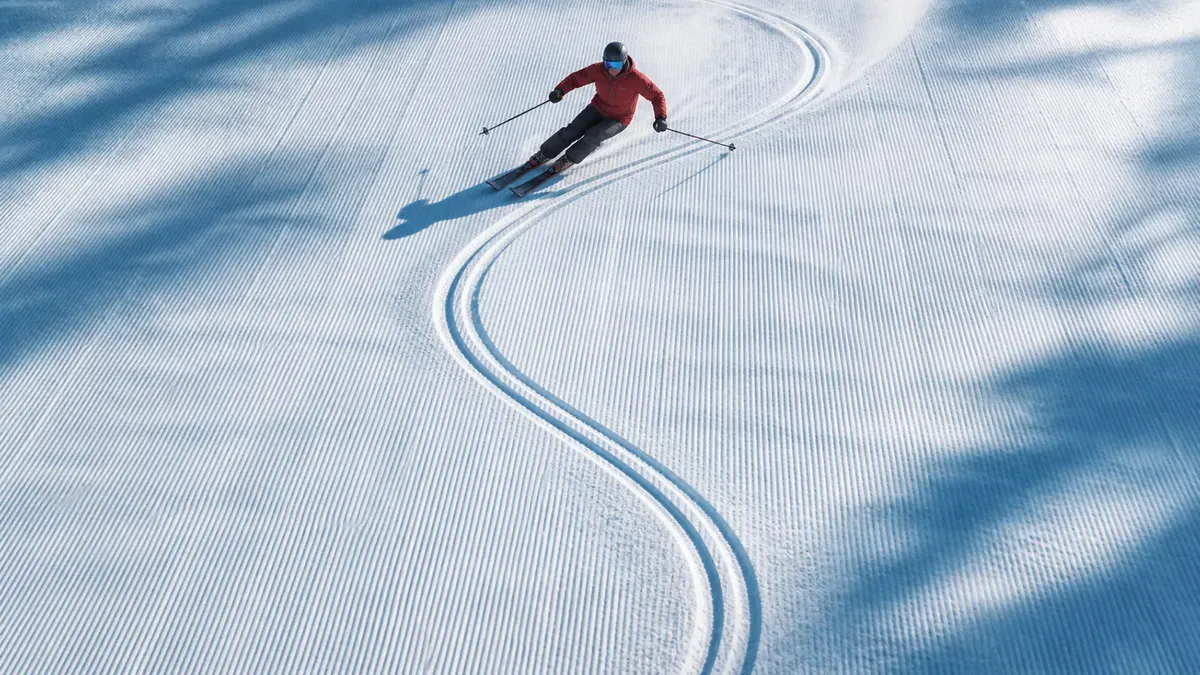
Ski carving is a turning technique in which the ski edges cut relatively clean arcs through firm snow instead of sliding broadly sideways. The tracks look like two narrow curves, but the goal is not to draw perfect lines at any cost. Good carving joins edge engagement, balanced pressure, turn shape, speed control, and enough space to finish the turn safely.
Carving should come after reliable stopping, direction control, linked parallel turns, and awareness of other slope users. Start on a wide, quiet, groomed green or easy blue run with a qualified instructor. A carved ski accelerates more readily than a skidded ski because less energy is lost sideways, so the skill can make a familiar slope feel unexpectedly fast.
Quick answer
How do you carve on skis? Begin with parallel skis across a gentle slope, flexed ankles, and centered balance. Release the old edges, guide both knees and skis progressively onto their new edges, and let the sidecut bend into an arc while pressure builds mainly through the outside ski. Keep the upper body stable and looking ahead. Complete enough of the turn across the hill to manage speed, then release the edges smoothly before the next turn.
Learn the sensation through traverses and shallow linked arcs before attempting rounder turns. If the tails wash sideways, reduce speed and edge angle, return to easier terrain, and rebuild the transition instead of leaning harder.
Key facts
- A carved ski follows a narrow edge-led path with less lateral slipping than a skidded turn.
- The skier increases edge angle progressively so the ski can grip, bend, and shape the arc.
- The outside leg manages most of the support while the inside leg stays active, light, and aligned.
- Turn completion controls speed by directing travel farther across the slope rather than relying on a last-second brake.
- Terrain progression protects technique by matching speed and consequence to the skier’s existing control.
If you are starting with your first glide, our adult beginner skiing guide sets lesson expectations and stopping milestones before you move on to carving.
What makes a turn carved?
A ski has a narrower waist than tip and tail. When it is tipped on edge and loaded against the snow, it bends. The combination of sidecut, bending, edge angle, snow resistance, pressure distribution, and skier motion helps create the curved path.
That does not mean the sidecut radius printed on a ski guarantees one turn size. Research comparing ski geometry with measured motion found that actual trajectories also depend on snow interaction and attack angle; the ski does not always travel exactly along the arc predicted by a simple geometry model (Reid et al., 2020). A modeling study likewise found that edge angle and how load is shared between the skis change contact pressure and resistance to sideways shearing (Heinrich et al., 2010).
For a learner, the useful distinction is visual and functional:
| Turn type | Snow track | Main steering strategy | Useful role |
|---|---|---|---|
| Carved turn | Two narrow arcs with limited sideways smear | Progressive edge engagement and ski bending | Smooth arcs on suitable groomed terrain |
| Skidded parallel turn | Wider brushed tracks | Edge plus deliberate sideways steering | Versatile speed and line control |
| Pivoted or short turn | Stronger redirection with compact corridor | Quick release, leg steering, and managed grip | Steeper, tighter, or more variable situations |
| Wedge turn | Converging skis with adjustable edge and pressure | Stable beginner platform for direction and speed | Early learning and low-speed control |
Carving is one tool, not the final rank in skiing. Ice, bumps, crowds, narrow trails, steep entries, and sudden obstacles may demand deliberate skidding or a complete stop. Versatility is safer than trying to carve every turn.
Our alpine skiing disciplines guide explains why carved arcs appear prominently in giant slalom while shorter technical and faster speed events create different line, force, and risk problems. Recreational carving keeps the edge-control lesson but removes race gates and racing speed.
The five movements behind a clean carved turn
Carving is not produced by one cue such as “lean in.” Five coordinated actions matter.
1. Release the old edges
Every new turn starts by ending the previous one. Allow the legs to lengthen or flex as appropriate, reduce the old edge angle, and let the center of mass move toward the next turn. Holding the old outside ski too long creates a late, abrupt transition.
Think release, cross, engage. The skis flatten only briefly. They should not be thrown sideways to manufacture a fast direction change.
2. Tip the skis progressively
Guide the ankles, knees, and legs into the new turn while the upper body remains organized. The skis should move onto edge together, although the outside ski will soon carry more support. Edge angle develops across the turn; dropping the hip inward at the start often creates balance on the inside ski rather than useful grip.
Higher edge angle can support a tighter arc, but only when speed, ski bending, snow grip, and body position agree. More angle without control can produce chatter, a sudden loss of grip, or an accelerating traverse toward other people.
3. Build pressure mainly on the outside ski
The outside ski is the ski farthest from the center of the turn. As the arc develops, balance over that leg allows the ski to bend and resist the turning forces. The inside leg should shorten and guide its ski rather than becoming rigid or passive.
In a field study of ski instructors, parallel and short turns showed different inside-to-outside foot-pressure patterns and outside-leg motion, supporting the idea that pressure strategy changes with turn type rather than following one fixed percentage (Müller et al., 2021). Use “outside ski dominant” as a direction, not an instruction to lift the inside ski or chase a universal pressure ratio.
4. Stay centered along the ski
Centered does not mean frozen over the exact midpoint. Pressure moves as the turn develops, terrain changes, and the ski bends. The useful goal is to keep the shins in contact with the boot tongues, the hips mobile, and the feet underneath a body that can respond.
Sitting far back reduces access to the front of the ski and makes edge release harder. Lunging far forward can overload the tips and remove the range needed later. Let ankle, knee, and hip flexion adapt rather than locking one “perfect” pose.
5. Shape the turn to manage speed
Carving on the fall line accelerates the skier downhill. A rounder turn that continues across the slope redirects more of that speed. Look into open space, finish the arc before traffic compresses the line, and release while there is still a safe corridor.
The NSAA Your Responsibility Code begins with staying in control and being able to stop or avoid people and objects. A narrow track does not excuse a wide, unpredictable path. Downhill users retain the right of way.
Seven ski carving drills in a safe progression
Use one cue per run and stop before fatigue erases the change. A lesson is the fastest way to match the drill to your actual movement; written descriptions cannot see your balance, equipment, traffic, or snow.
This one-cue, low-consequence progression also suits board sports. Our beginner skateboard tricks guide moves from steering and weight shifts to low jumps before ollie practice.
Drill 1: edge-awareness traverse
On a wide, gentle slope, traverse across the hill at modest speed. Roll both skis slightly uphill onto their edges, then soften the angle without pointing downhill. Notice how the tracks change from brushed to narrower.
Success signal: the skis grip without the body collapsing uphill.
Common error: forcing the knees uphill while the hips remain outside the base of support. Use less angle and stand more naturally.
Drill 2: railroad tracks on nearly flat terrain
From a shallow glide, tip both skis a little to one side and let them make a long arc. Transition gently and repeat in the other direction. Keep the turns shallow enough that speed remains low.
Success signal: two clean, roughly parallel tracks and quiet upper-body movement.
Common error: twisting the feet to hurry the turn. Make the arc longer and flatter.
Drill 3: garlands without crossing the fall line
Traverse, release the edges slightly so the ski tips drift a little downhill, then re-engage and return across the hill. Repeat two or three times on the same side before stopping and changing direction.
Success signal: you can start and stop the edge-led arc without committing to a full turn.
Common error: adding a large shoulder rotation. Let the legs control the skis under a stable torso.
Drill 4: outside-ski taps
During a very gentle, controlled turn, briefly lighten or tap the tail of the inside ski without lifting the whole ski high. Put it down immediately. This checks whether the outside leg can support the arc.
Success signal: the direction and torso remain stable during the brief tap.
Common error: hopping or balancing aggressively on one leg. Skip this drill if it reduces control; two-ski carving is the skill.
Drill 5: progressive edge ladders
Make three sets of broad turns on the same easy run. In the first set, use a small edge angle. In the second, add slightly more. In the third, return to the first angle. Keep speed and turn shape similar.
Success signal: you can change edge angle without changing into a faster or wider line.
Common error: treating the final set as a maximum-angle challenge. The purpose is control and comparison.
Drill 6: corridor turns
Imagine a wide corridor bounded by two lines. Complete each turn inside it, leaving enough width to avoid an abrupt finish. Gradually narrow the corridor only while tracks, speed, and traffic awareness remain consistent.
Success signal: round, repeatable turns rather than one long traverse and one rushed turn.
Common error: using the corridor as a race course. Reduce speed and leave greater margins around others.
Drill 7: video plus one external cue
Have a companion film one or two turns from a safe, stationary place where they are visible and do not restrict traffic. Review one feature: track width, transition timing, upper-body rotation, or turn completion. Then repeat with one external cue such as “leave two pencil lines” or “finish toward that safe landmark.”
Sensor research can distinguish carving and drifting using edge angle, symmetry, radial force, and speed, but the study involved 19 advanced or expert skiers under a fixed protocol (Fasel et al., 2021). A recreational app score is not a substitute for instruction or slope judgment.
Common carving problems and the smallest useful fix
| What you notice | Likely movement pattern | First adjustment |
|---|---|---|
| Tails spray snow at turn entry | Feet rotate before the new edges engage | Start on flatter terrain and lengthen the transition |
| Inside ski runs away or crosses | Inside leg stays long or receives too much pressure | Soften and shorten the inside leg; reduce edge angle |
| Skis chatter | Grip, speed, edge angle, and pressure are mismatched | Make a rounder, slower turn with less angle |
| Body falls inside | Hip drops inward before outside-ski support develops | Keep the torso taller and build the arc progressively |
| Turn starts late | Old edge is held too long or vision stays downhill | Release earlier and look toward the next open corridor |
| Speed rises every turn | Arcs end near the fall line | Complete more of each turn across the slope or add a controlled skid |
| Legs burn rapidly | Static crouch and excessive force replace movement | Stand taller between turns, use easier terrain, and rest |
| One direction feels much worse | Asymmetry in movement, confidence, equipment, or pain | Slow down, compare setup, and seek instructor or clinician input as appropriate |
Do not diagnose pain through a technique table. New swelling, instability, locking, numbness, severe pain, or inability to bear weight needs appropriate assessment. A ski lesson can solve a movement problem; it cannot rule out injury.
Equipment helps, but it cannot create the skill
Carving becomes easier when boots fit, edges are maintained, bases are serviceable, and skis match the skier’s size, strength, terrain, and speed. None of those variables makes one model universally best.
- Boots: the foot and lower leg need secure, comfortable contact without numbness or pressure injury. Excess space delays movements; excessive tightness is not performance.
- Bindings: have a qualified technician inspect compatibility, boot-sole condition, mounting, and release settings. Do not copy another skier’s setting or adjust by ego.
- Edges and bases: dull or damaged edges can reduce predictable grip, while an aggressive race tune may feel unforgiving. Ask a technician for a recreational setup suited to local snow.
- Skis: a shorter sidecut radius may encourage a tighter arc, but stiffness, length, construction, tune, snow, and technique all change the experience. Demo before buying when possible.
- Helmet and eye protection: wear a properly fitted snow-sport helmet and goggles. Helmets reduce some head-injury risk but do not make high speed or collision safe; research is more consistent for head injuries broadly than for preventing concussion specifically (Sulheim et al., 2017; Bailly et al., 2018).
If carving works on one ski but not another, do not assume the equipment is defective. Terrain, tune, fatigue, expectations, and unfamiliar timing may explain the difference. Compare under controlled conditions with an instructor or technician.
A four-session learning plan
This is a progression framework, not a promise that carving takes four days. Repeat a session until control is stable, and step backward when conditions change.
| Session | Terrain and focus | Drills | Progress only when |
|---|---|---|---|
| 1. Edge awareness | Nearly flat to gentle groomer | Traverse, railroad tracks, garlands | You can engage and release without abrupt rotation |
| 2. Linked shallow arcs | Wide, quiet easy run | Railroad tracks, outside-ski taps | Both directions stay controlled with narrow tracks |
| 3. Turn shape | Same run with ample space | Edge ladders, corridor turns | Speed remains stable through rounder linked turns |
| 4. Adaptation | Slightly varied but still appropriate groomer | One drill, normal skiing, video review | Technique survives small changes without losing stop capacity |
Keep ordinary skidded turns and hockey stops in every session. If the hill becomes crowded, icy, rutted, steep, or poorly visible, switch from skill practice to conservative descent. There is no training benefit in forcing a drill after its safe environment disappears.
Prepare the body without pretending the gym is snow
Carving places repeated demands on the quadriceps, hamstrings, calves, hips, trunk, and balance system. The gym can improve capacity, but it cannot reproduce edge feel or teach traffic decisions.
A simple off-snow week might include:
- two full-body strength sessions with squat, split-squat, hip-hinge, calf, row, press, and trunk-control patterns;
- two or three easy aerobic sessions;
- dynamic balance and lateral stepping in a low-consequence setting;
- gradual eccentric work such as controlled step-downs;
- recovery days before the first demanding ski session.
Our eccentric training guide explains why lowering and braking strength matter, while the balance training guide builds a general control base. The strength-training frequency guide can help distribute work without stacking every hard session together.
In 24 recreational skiers, four hours of skiing reduced eccentric hamstring torque on both sides and eccentric quadriceps torque on one side; some reductions remained 24 hours later (Niederseer et al., 2016). This small study does not define a universal time limit, but it supports ending technical practice before leg fatigue makes movements unreliable.
A warm-up should raise temperature and rehearse ankle, hip, squat, and lateral movements without exhausting the legs. Long static holds alone do not prepare edge control; our stretching and injury-prevention review separates flexibility goals from a complete warm-up.
For a practical off-snow routine before your first ski day, see our ski fitness exercises guide. It combines controlled strength, balance, and aerobic activity with gradual progression and recovery checks.
Track the learning process with SuperAge
Once terrain choice, instruction, and equipment checks are handled, SuperAge can provide recovery context. Apple Health activity, sleep, resting heart rate, heart-rate variability, and cardio-fitness trends can help you compare a ski block with your usual baseline.
The app cannot measure edge grip, certify binding release, detect concussion, or decide whether a slope is safe. Its useful role is longitudinal: noticing whether a hard ski day followed poor sleep, whether resting signals normalize after travel, and whether off-snow preparation is becoming more consistent.
Record simple technique notes beside the physiology: terrain, snow, drill, left-right difference, fatigue, and the one cue that helped. That creates a more honest learning log than treating speed or vertical descent as the definition of progress.
Download SuperAge to compare training and recovery trends with your own baseline across gym work and ski days.
Safety rules for every carving session
Before practicing, confirm that you can stop promptly from the speed the drill will produce. Choose visible terrain with space, follow local signs and closures, and yield to people downhill. Look uphill before starting or entering a trail, avoid stopping where you cannot be seen, and prevent runaway equipment.
Use a controlled skidded turn whenever a carved arc would occupy too much width. Never cross the trail on a blind roll, treat public traffic as slalom gates, or ask a filmer to stand in a hazardous location. Lessons, patrol guidance, and local rules take precedence over an online drill list.
Altitude, cold, and travel can add strain. If you are going substantially higher than usual, review our altitude sickness guide and take symptoms seriously. Stop and seek urgent help after a significant fall with loss of consciousness, confusion, repeated vomiting, worsening headache, neck or back pain, weakness, severe breathlessness, chest pain, visible deformity, or inability to bear weight.
Frequently asked questions
Can beginners learn ski carving?
Yes, but carving is not the first skiing objective. A beginner should first control direction and speed, link turns, stop reliably, use lifts safely, and understand slope etiquette. Shallow edge-led arcs on easy terrain can then build awareness under instruction.
Should both skis leave clean tracks?
In a well-executed two-ski carved turn, both can leave narrow tracks. The outside ski usually carries more support while the inside ski remains guided and aligned. Track quality varies with snow, turn phase, pressure, and skill, so one imperfect mark is not a complete technique diagnosis.
Why do my skis skid when I try to carve?
Common causes include rotating the feet before the edges engage, starting the turn late, leaning inside, using too much edge angle for the available speed, or practicing on terrain that is too steep. Return to a gentle slope and rebuild with traverses and shallow railroad tracks.
Is carving the fastest way to ski?
It can preserve speed because the skis slip less sideways, but “fastest” is not a safe recreational goal. Turn shape, traffic, visibility, terrain, and stopping distance matter more. Use skidding deliberately whenever it gives better control.
Do I need special carving skis?
Most modern piste-oriented alpine skis can make carved turns. A ski’s sidecut, length, stiffness, tune, and intended terrain influence how easily it bends and grips, but equipment cannot replace balance and instruction. Ask a qualified shop or instructor about fit rather than buying from one specification.
How much pressure should be on the outside ski?
There is no universal percentage for every skier and turn. Pressure changes with radius, speed, slope, snow, and phase. Aim for stable support mainly through the outside leg while keeping the inside leg active and the skis aligned.
Why do carved turns make me accelerate?
Clean edges dissipate less energy through sideways sliding. If each turn ends near the fall line, speed keeps building. Complete the turn farther across the slope, use a controlled skid, choose flatter terrain, or stop the drill.
Can wearable ski sensors teach carving?
They can estimate variables such as edge angle, symmetry, speed, or turn style, but the result depends on sensor validity and interpretation. A score cannot assess every hazard, pain signal, equipment issue, or movement cause. Use it as feedback beside qualified instruction, not as proof of safe technique.
Key takeaways
- Carving joins progressive edge angle, outside-ski support, centered mobility, and deliberate turn shape.
- Start with traverses, shallow railroad tracks, and garlands on wide, gentle groomed terrain.
- A clean track is not the only goal; stopping capacity, traffic awareness, and versatility come first.
- Sidecut helps create the arc, but snow, tune, speed, ski bending, pressure, and skier movement all matter.
- Lessons and equipment checks reduce guesswork; wearable scores cannot replace them.
- Stop technical practice before fatigue, surface changes, or crowds make the drill unreliable.
References
- Heinrich D, Mössner M, Kaps P, Nachbauer W. Calculation of the contact pressure between ski and snow during a carved turn in Alpine skiing. Scandinavian Journal of Medicine & Science in Sports. 2010.
- Reid RC, Haugen P, Gilgien M, Kipp RW, Smith GA. Alpine ski motion characteristics in slalom. Frontiers in Sports and Active Living. 2020.
- Müller E, et al. What are kinematic and kinetic differences between short and parallel turn in alpine skiing?. Sensors. 2021.
- Fasel B, et al. Connected skiing: motion quality quantification in alpine skiing. Sensors. 2021.
- Niederseer D, et al. Decrease in eccentric quadriceps and hamstring strength in recreational alpine skiers after prolonged skiing. BMJ Open Sport & Exercise Medicine. 2016.
- National Ski Areas Association. Your Responsibility Code. 2022.
- Sulheim S, Ekeland A, Holme I, Bahr R. Helmet use and risk of head injuries in alpine skiers and snowboarders. British Journal of Sports Medicine. 2017.
- Bailly N, et al. Effect of helmet use on traumatic brain injuries and other head injuries in alpine sport. Wilderness & Environmental Medicine. 2018.
Related Articles

Running at night: visibility, routes, and a safer session
Plan running at night with practical lighting, reflective clothing, route choices, easy effort, and sleep timing. Build a safer routine that fits your evenings.