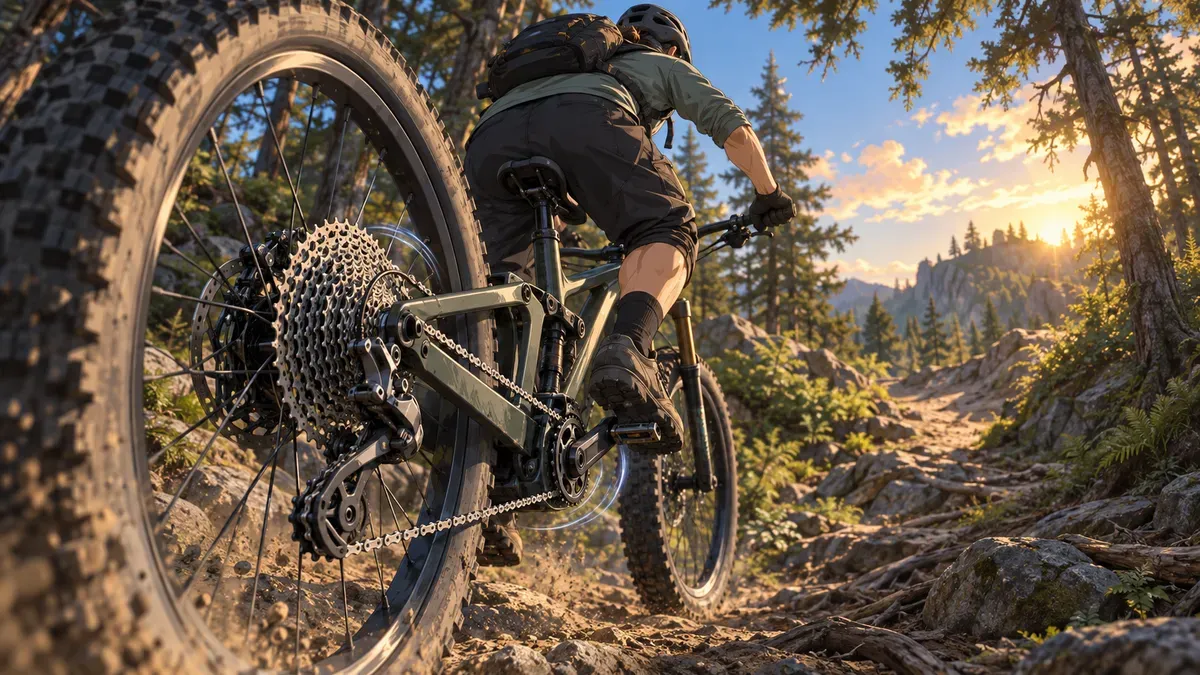
How to shift gears on a mountain bike: technique and cadence
Learn how to shift gears on a mountain bike, choose ratios for climbs and descents, protect your drivetrain, and build smoother cadence on every trail.
Quick answer
To shift gears smoothly on a mountain bike, keep the cranks turning forward, ease pressure on the pedals for a moment, make one deliberate shift, and let the chain settle before driving hard again. Choose an easier gear before a steep climb, a harder gear before speed rises, and a usable middle gear before a technical feature or stop. The goal is not to chase one perfect cadence number. It is to keep pedal strokes controlled enough that you can respond to traction, gradient, fatigue, and obstacles without grinding, bouncing, or forcing the drivetrain.
On a typical derailleur system, larger rear cassette cogs are easier and smaller rear cogs are harder. If your bike has two or three front chainrings, the smaller front ring is easier and the larger front ring is harder. Controls, shift logic, and under-load capability vary, so confirm how your particular bicycle works in its owner’s manual before practicing on a trail.
Key facts
- A lower gear reduces distance traveled per crank revolution and makes steep, slow pedaling more manageable.
- A derailleur moves the chain while the cranks rotate forward, but lower pedal force makes most shifts quieter and less abrupt.
- Trail anticipation moves a shift away from the highest-load or roughest part of a feature.
- Cadence reflects terrain, power, gearing, and rider preference; research does not identify one universal optimum.
- Repeated hesitation, skipping, chain drop, or grinding signals a technique, setup, wear, or damage problem that deserves inspection.
What mountain bike gears actually change
A bicycle gear changes the relationship between one turn of the cranks and rotation of the rear wheel. Dividing the number of teeth on the front chainring by the number on the selected rear cog gives a simple drive ratio. A smaller ratio is easier: each crank turn moves the bike a shorter distance, while the rider gains more leverage for climbing or accelerating at low speed. A larger ratio moves the bike farther per crank turn but demands more force at the pedals.
That explains the cassette pattern that initially confuses many riders:
| Chain position | Pedal feel | Typical use |
|---|---|---|
| Larger rear cog | Easier, shorter development | Climbing, low-speed control, restarting |
| Middle rear cog | Moderate | Rolling trail, practice, steady cruising |
| Smaller rear cog | Harder, longer development | Faster flat trail or descent transitions |
| Smaller front ring on a 2x or 3x | Much easier range | Long or steep climbs |
| Larger front ring on a 2x or 3x | Much harder range | Higher speeds and easier terrain |
Most current mountain bikes use a 1x drivetrain: one front chainring and a wide-range cassette. There is only one sequence of rear gears to manage. Older and some utility-oriented bikes use two or three chainrings. On these, a front shift creates a large ratio change and a rear shift fine-tunes it. Avoid assuming that a particular thumb or index lever always means “easier”; cable, electronic, grip, and integrated shifters use different control layouts.
The Trek owner’s manual describes the central principle for derailleur systems: pedal while shifting, select gears for terrain and speed, and reduce pedal load when a change must happen on a climb. Shimano’s general dealer manual also tests derailleur adjustment with the crank turning. An internal gear hub follows different operating rules, and some newer drivetrains are explicitly engineered for shifts under high load. Technique should therefore begin with the mechanism actually fitted to your bike, not a universal lever diagram from a video.
The four-part shift: scan, soften, click, drive
Smooth shifting is a timing skill. Practice this sequence on a flat, open surface before taking it onto a narrow trail.
1. Scan ahead
Look beyond the front tire. Notice whether the next few seconds bring a steeper grade, a compression, loose ground, a corner, or an obstacle that will interrupt pedaling. A shift made early can happen while the bike is stable. A late shift competes with braking, steering, body position, and a sudden rise in chain tension.
2. Keep the chain moving and soften the stroke
For a conventional derailleur, continue rotating the cranks forward. Just before operating the shifter, reduce how hard you push without completely stopping the pedals. Think “light circle” rather than “coast.” This short unloading window gives the chain room to climb or drop between cogs.
The 2025 Trek bicycle manual explains that reduced chain tension helps the mechanism shift more quickly and smoothly and advises against shifting over bumps. That is particularly relevant off-road: a calm half-second between pedal surges is a better shift window than the moment the rear wheel strikes a rock.
3. Make one deliberate change
Press the control far enough to complete one shift, then listen and feel. Rapidly issuing several commands can move past the gear you need, especially with a mechanical shifter, and a large jump under load can produce a harsh clunk. Sequential single shifts teach the relationship between lever action, pedal feel, and terrain.
There are exceptions. Some controls are designed to shift multiple gears, and some modern systems specify load-shifting capability. Use the manufacturer’s instructions for those features; do not assume that marketing for one drivetrain applies to another.
4. Let the chain engage, then drive
After the chain reaches the new cog and runs quietly, return pressure progressively. If it chatters between cogs, jumps under force, or refuses to settle, reduce load and avoid a hard pedal stroke. Repeated problems are not something to “power through.” They may indicate indexing error, a bent derailleur hanger, contamination, wear, or incompatible parts.
When to shift on real trail terrain
The same four-part action changes slightly with the feature ahead.
Before and during a climb
Downshift before cadence collapses. As the grade begins to rise, keep a few controlled pedal strokes in reserve, soften one stroke, and select an easier cog. Repeat early if the hill continues. Entering the climb in the absolute easiest gear can make the pedals spin too quickly and reduce traction; waiting until you can barely turn them loads the chain and makes a clean shift difficult.
If you are already grinding on a steep section, briefly lower pedal force without losing all momentum, shift one gear easier, and rebuild pressure after engagement. Do not stamp on the pedals while the chain is moving across the cassette. If the terrain is too steep or loose to create an unloaded stroke safely, stop in a controlled place and reset rather than forcing the shift.
Cycling UK’s climbing guidance similarly recommends selecting an easier gear just before the hill and beginning conservatively. On a mountain bike, that principle also protects traction: seated, even torque often keeps the rear tire connected better than alternating between stalled grinding and explosive surges.
Across rolling terrain
Rolling trails reward small, frequent anticipatory shifts. Move one gear easier as speed begins to bleed on a rise; move one gear harder as the bike crests, while the pedals are briefly light. The best moment often occurs just before the gradient changes rather than after your legs announce it.
This is also where riders learn that gear choice regulates effort more usefully than speed alone. A headwind, soft ground, fatigue, and tire pressure can all make the same speed demand different power. Our guide to cycling in wind explains why protecting effort matters more than defending a number on the speed display.
Before a corner, drop, root, or rock garden
Choose the exit gear before entering the feature. Brake and shift while the bike is relatively upright and the surface is predictable. Then place the cranks safely for the obstacle, focus on line choice, and avoid asking the derailleur to move the chain while the rear wheel is bouncing.
The useful gear is one that lets you accelerate with control on exit. Too hard, and the first pedal stroke may stall. Too easy, and the pedals spin without providing the push you expected. This is a small but important extension of the body-position and braking skills in our downhill mountain biking guide.
Before a stop or restart
Shift to an easier middle-range gear while still rolling toward a planned stop. Starting in the smallest rear cog demands unnecessary force and can make the bike wobble; starting in the very largest cog may produce little speed and a rapid series of immediate shifts.
If you stopped unexpectedly in a hard gear, a derailleur system generally cannot complete a shift while the chain is motionless. Move to a safe position. Depending on the bike and your skill, you may roll gently, lift the rear wheel and rotate the crank by hand, or walk to level ground. Keep fingers, clothing, and loose objects away from the moving drivetrain.
Cadence is a feedback signal, not a commandment
Cadence is crank revolutions per minute. It is useful because it reveals when gear choice and terrain are pushing you toward one of two inefficient-feeling extremes:
- Grinding: cadence falls, each stroke needs high force, the upper body rocks, and the rider may hold their breath.
- Spinning out: cadence rises beyond control, the hips bounce, and additional pedal speed produces little useful acceleration.
Many recreational guides suggest a broad 60–90 rpm range as a starting reference, including Cycling UK’s guide to gears. On a mountain-bike trail, however, cadence changes constantly and may be impossible to measure during technical sections. A number should not pull attention away from traction, obstacles, or other trail users.
The research also resists a single prescription. A review of cycling efficiency and cadence concluded that work rate explains much of energy expenditure and that the available evidence cannot establish one energetically optimal cadence. A controlled study of trained cyclists, runners, and less-trained participants found no dramatic effect of cadence on delta efficiency, even though experienced riders selected higher cadences than less-trained participants.
Different outcomes can point in different directions. At the same power, a lower cadence means more torque per pedal revolution, while a very high cadence adds the energy cost of moving the legs faster. In a small laboratory study, 80 rpm was more economical than 100 rpm during prolonged variable-intensity cycling and preserved more maximal power afterward. Those results do not prove that 80 rpm is ideal on a trail; the participants were competitive cyclists in controlled conditions, not riders navigating loose climbs and obstacles.
A practical target is therefore a controllable band:
- You can breathe without bracing or holding your breath.
- Your hips remain stable rather than bouncing on the saddle.
- Each stroke is forceful enough to maintain traction but not so heavy that the cranks repeatedly stall.
- You still have one or two gears available for the next change in gradient.
If training intensity matters, combine this feel with rate of perceived exertion rather than letting cadence dictate the session. Riders using power can read our functional threshold power guide for the difference between power, heart rate, and effort.
Does a lower gear protect your knees?
An easier gear can reduce the torque required from each pedal stroke at a given power, but “spin faster to save your knees” is too absolute. Knee load depends on power, cadence, fit, position, tissue capacity, injury history, and how long the exposure lasts.
In 12 competitive cyclists, a modeling study found lower estimated peak patellofemoral compressive force at 90 rpm than at 70 rpm at the second ventilatory threshold, while higher workload increased force. A separate in-vivo study measured forces in nine people with instrumented knee replacements and found lower forces at lower power, higher cadence, and greater saddle height within the tested conditions. These are informative mechanisms, not universal treatment rules: the studies were small, used laboratory cycling, and one involved people after knee replacement.
Use symptoms to guide the next step. If a heavy gear causes knee pain, choose an easier ratio, reduce intensity, check bike fit, and see whether symptoms settle. Stop and seek assessment for swelling, locking, giving way, acute trauma, marked loss of motion, or pain that persists or worsens. Do not use cadence advice to self-diagnose an injury.
1x, 2x, and 3x shifting without confusion
One front chainring: 1x
A 1x system is simple: use the rear cassette to move through the whole range. The largest cog is easiest, and the smallest is hardest. The chain angle grows near either end of the cassette, but those gears are part of the intended range when the drivetrain is correctly matched and adjusted.
Do not remain in the easiest cog simply because the trail rises. Choose the gear that lets you pedal smoothly with traction. Saving the final easier cog for a steeper pitch can prevent a desperate multi-shift under maximum load.
Two or three front chainrings: 2x or 3x
Use the front shifter for a large range change and the rear shifter for smaller adjustments. Moving to a smaller front ring makes pedaling substantially easier; moving to a larger one makes it harder. Because the front shift is bigger and often slower, make it before the steepest part of a climb or before accelerating onto fast terrain.
Avoid extreme combinations such as the largest front ring with the largest rear cog or the smallest front ring with the smallest rear cog. This “cross-chaining” creates a more severe chain angle and may add noise and wear. Shift the front ring, then compensate with one or more rear shifts to reach a similar effort in a straighter chain line. The exact combinations allowed by your drivetrain belong in its manual.
Electronic, automatic, and e-MTB systems
Electronic shifting changes how the command feels, not the need for line choice and anticipation. Some systems can execute multi-shifts or shift more reliably under load; others restrict functions for e-bike use. Motor assistance also increases the consequences of high chain tension. Follow the bicycle and drivetrain manuals for shift timing, multi-shift settings, and compatible parts.
Seven common shifting mistakes
- Waiting until the cranks nearly stop. The shift then happens at maximum chain tension. Read the gradient earlier and downshift while you still have momentum.
- Stopping the pedals during a derailleur shift. The mechanism can move, but the stationary chain cannot transfer to the next cog. Keep a light forward rotation.
- Driving hard before engagement. A sudden force spike while the chain is between cogs can create a bang, skip, or chain drop. Wait for a clean sound and feel.
- Shifting across rough impacts. Rear-wheel movement and chain slap make engagement less predictable. Use the smoother approach or exit.
- Changing several variables at once. Simultaneous front and rear shifts, braking, standing, and steering leave no clear feedback. Separate the actions when terrain allows.
- Watching the shifter instead of the trail. Learn the controls in a safe area so gear changes become tactile. Trail vision always takes priority.
- Blaming every bad shift on technique. A well-timed shift cannot correct a bent hanger, worn chain, damaged tooth, contaminated cable, weak battery, or poor indexing.
What noise and skipping can tell you
| Symptom | Possible explanation | Safe response |
|---|---|---|
| Brief click during one load-heavy shift | Excess chain tension or incomplete engagement | Ease pressure, let the shift finish, practice earlier timing |
| Constant chatter in one area of cassette | Indexing, cable tension, hanger alignment, or wear | Stop adjusting at random; inspect or use a qualified mechanic |
| Chain skips only under strong force | Chain/cassette wear, damaged teeth, or poor engagement | Avoid hard efforts until the drivetrain is checked |
| Chain drops off cassette or chainring | Limit/setup issue, impact, wear, or unsuitable shift | Stop safely; inspect for damage before continuing |
| Shifter moves but no shift occurs | Cable, battery, connection, derailleur, or control problem | Follow the system manual; do not force the lever |
| New noise after a crash | Bent hanger, derailleur, chain, or frame damage | End hard riding and arrange an inspection |
Shimano’s dealer documentation shows that correct indexing and derailleur-hanger alignment are prerequisites for consistent shifting. Adjustment is a mechanical repair task, not a trail technique drill. If you cannot identify the fault, a bicycle mechanic can prevent a small setup problem from becoming a damaged derailleur, wheel, or frame.
Add a drivetrain function check to the pre-ride process described in our bike touring gear and repair guide: rotate the cranks in a safe stand or test area, move through the gears, check for abnormal noise, and inspect the chain and derailleur after an impact.
A 20-minute shifting practice session
Use an empty, flat area with good traction and no traffic. Wear your normal helmet and riding footwear. Do not stare at the controls while moving.
Minutes 0–5: learn the direction
Ride easily in a middle gear. Make one rear shift, notice whether pedaling becomes easier or harder, and return to the starting gear. Repeat until you can predict the direction from touch. On a 2x or 3x bike, practice front shifts separately at low pressure.
Minutes 5–10: rehearse the unloading window
Apply moderate pressure for three pedal strokes, soften one stroke while shifting, listen for engagement, and rebuild pressure. Compare that with one deliberately late but still safe shift. The smoother sound and feel should become obvious without abusing the drivetrain.
Minutes 10–15: simulate terrain
Choose two landmarks. At the first, shift one gear easier as though a climb begins. At the second, shift one gear harder as though you have crested. Keep looking forward, make the command before each landmark, and maintain a stable line.
Minutes 15–20: choose a restart gear
Approach a stop, select an easier middle gear while rolling, brake smoothly, put a foot down, and restart. Repeat with slight variations until the first pedal stroke feels controlled rather than heavy or frantic.
Take the drill to a wide, low-consequence trail only after it is automatic. Add one challenge at a time: a gentle rise, a smooth corner, then a mildly uneven surface. This progression follows the same logic as cycling training after 50: skill quality and recoverable exposure come before intensity.
Where SuperAge fits
Shifting technique is mechanical, but the best gear choice also changes with your condition on the day. Fatigue, heat, poor sleep, and accumulated training load can turn yesterday’s comfortable ratio into today’s grind. That does not mean a lower gear is failure; it means the relationship between terrain and available capacity has changed.
SuperAge can help you place resting heart rate, sleep, activity, and recovery trends beside your riding notes. Use that context to ask practical questions: Did cadence become ragged only late in a long ride? Did hard climbing follow several poor nights of sleep? Does a repeated knee symptom track high-torque sessions or bike-fit changes? Trends can guide training adjustments, but they cannot diagnose pain or certify a damaged drivetrain.
For healthy aging, the useful outcome is durable cycling capacity: enough aerobic fitness, leg strength, coordination, and confidence to keep riding. Smooth shifts protect momentum and make intensity easier to regulate, while a balanced plan supplies the physical capacity behind the technique.
Frequently asked questions
Should I pedal while changing gears on a mountain bike?
With a conventional derailleur, yes: rotate the cranks forward, but briefly reduce pressure while the chain moves. Do not pedal backward during the change. Internal gear hubs and some specialized drivetrains have different instructions, so check the system manual.
Which mountain bike gear is easiest?
On the rear cassette, the largest cog is the easiest. On a bike with multiple front chainrings, the smallest front ring creates the easier range. “Gear one” is not a reliable universal label because displays and control systems differ.
When should I shift before a hill?
Shift as the gradient begins to rise, while you still have momentum and can soften pedal pressure. Make one change, let it engage, then decide whether you need another. Waiting until the cranks stall makes both traction and engagement harder to manage.
Is it bad to change several gears at once?
It depends on the drivetrain, but multiple changes under high load are more likely to feel harsh or overshoot the ratio you need. Beginners learn faster with deliberate single shifts. Use multi-shift only when the manufacturer supports it and terrain leaves enough control margin.
What cadence should I use on a mountain bike?
There is no single correct cadence for every rider and trail. A broad 60–90 rpm reference can help on steady terrain, but technical riding constantly interrupts it. Choose a gear that supports smooth breathing, stable hips, useful traction, and enough reserve for the next gradient change.
Why does my chain clunk when I shift uphill?
The most common technique cause is high chain tension from shifting too late while pushing hard. Anticipate the hill and briefly ease pedal force. If clunking, hesitation, or skipping persists with good timing, inspect indexing, chain wear, cassette teeth, derailleur alignment, and component compatibility.
Can I shift gears while coasting?
A conventional derailleur needs forward chain movement, so moving the lever while the cranks are stationary will not complete the change. The chain may shift only when you pedal again, sometimes under an unexpectedly high load. Internal gear hubs may allow stationary shifts; follow their manual.
How do I change gear in a rock garden?
Whenever possible, choose the gear before entry and avoid shifting as the rear wheel hits obstacles. If a change is essential, look for a smooth pedal window, lighten pressure, make one shift, and keep your line. Walking a section is safer than combining a forced shift with lost balance.
Key takeaways
- Read the trail early and shift before steepness, speed, or roughness demands an emergency response.
- For most derailleurs, keep the cranks moving forward while briefly softening pedal force.
- Larger rear cogs are easier; smaller rear cogs are harder. Multiple front chainrings add a large-range control.
- Use cadence as feedback for smoothness and control, not as a universal target.
- Select a corner-exit, obstacle, or restart gear before the moment you need to accelerate.
- Persistent noise, skipping, or chain drop deserves mechanical inspection rather than harder pedaling.
Practice one clean shift at a time
Start on flat ground and make the scan–soften–click–drive sequence automatic. Then move it to one gentle climb and one smooth descent transition. A quiet, predictable shift is the result of awareness and timing; speed can come later.
References
- Trek Bicycle. Owner’s manual: riding tips and shifting gears. Accessed 2026.
- Trek Bicycle. Bicycle owner’s manual, derailleur shifting guidance. 2025.
- Shimano. General operations dealer’s manual. 2024.
- Cycling UK. A beginner’s guide to gears. Accessed 2026.
- Cycling UK. A beginner’s guide to climbing hills on a bike. Accessed 2026.
- Ettema G, Lorås HW. Efficiency in cycling: a review. European Journal of Applied Physiology. 2009.
- Marsh AP, Martin PE, Foley KO. Effect of cadence, cycling experience, and aerobic power on delta efficiency during cycling. Medicine & Science in Sports & Exercise. 2000.
- Bini RR, Hume PA. Effects of workload and pedalling cadence on knee forces in competitive cyclists. Sports Biomechanics. 2013.
- Kutzner I, et al. Loading of the knee joint during ergometer cycling: telemetric in vivo data. Journal of Orthopaedic & Sports Physical Therapy. 2012.
- World Health Organization. WHO guidelines on physical activity and sedentary behaviour. 2020.
Related Articles
Mountain navigation: map, compass, terrain, and safer decisions
Learn mountain navigation with topographic maps, compass bearings, terrain checks, digital backups, and a calm response when you become unsure in the field.