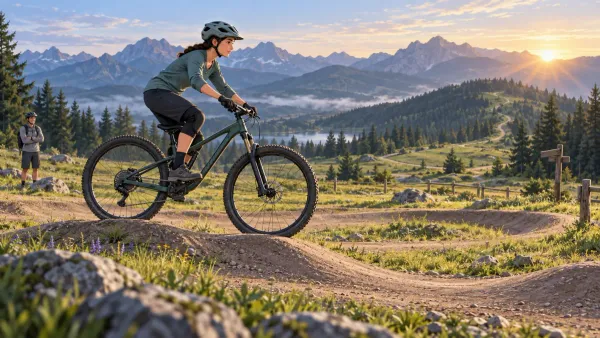
Downhill mountain biking for beginners: skills, safety, and progression
Learn how to start downhill mountain biking with safety gear, braking, body position, trail progression, training, and practical first-day checks.
Quick answer
The safest way to start downhill mountain biking is to learn on an easy, lift-served or short gravity trail with a qualified coach, a correctly fitted downhill-capable bike, a certified full-face helmet, and protective equipment appropriate to the venue. Before adding speed, practise progressive braking with both brakes, a balanced ready position, looking through the trail, choosing a line, and stopping under control. (How to ride a mountain bike: beginner technique guide)
Treat trail grades as local guidance, not a promise that every green or blue run will feel the same. Walk unfamiliar features, keep wheels on the ground until basic control is automatic, and repeat simple trails before moving up. Downhill riding has real injury risk; good equipment reduces consequences, while instruction, conservative speed, and gradual exposure reduce how often control is lost.
Key facts
- Rider skill predicts downhill performance by shaping braking, line choice, balance, and control before fitness becomes the limiting factor.
- Progressive braking manages traction by sharing demand between both tires before a corner or obstacle rather than grabbing one brake late.
- A ready position creates movement space by keeping the rider centred, relaxed, and able to let the bicycle move underneath the body.
- Trail progression limits unnecessary exposure by matching speed and features to skills already demonstrated under control.
- Protective equipment reduces specific consequences but cannot make a poor line, excessive speed, or an unsuitable trail safe.
What downhill mountain biking actually involves
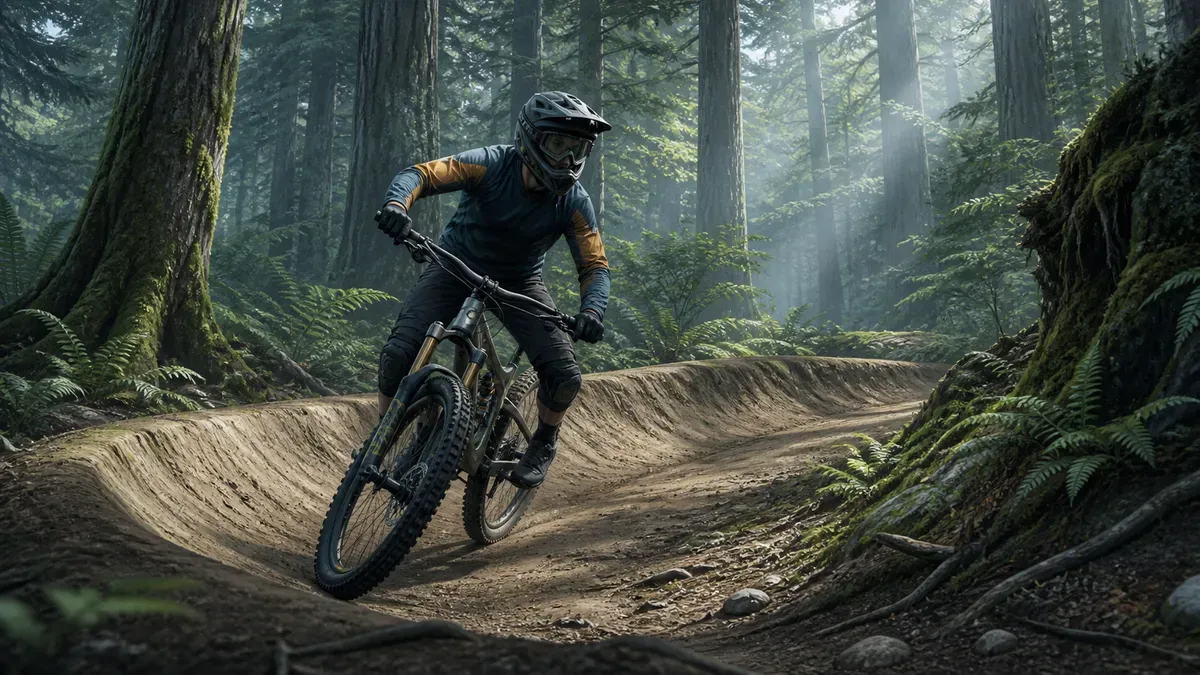
Downhill mountain biking uses gravity-focused trails that descend through turns, roots, rocks, compressions, drops, and sometimes jumps. Some riders race against the clock, but a beginner does not need to race or leave the ground. The first objective is simpler: descend an appropriate trail while staying balanced, seeing far enough ahead, regulating speed, and leaving a margin for mistakes.
Downhill differs from an ordinary trail ride in several ways:
| Feature | Downhill riding | General trail or cross-country riding |
|---|---|---|
| Main demand | Repeated descending and technical control | Mixed climbing, descending, and pedalling |
| Typical bicycle | Long-travel, gravity-oriented setup | Broader range of hardtail and full-suspension bikes |
| Common terrain | Steeper grades, berms, rocks, roots, drops, jumps | Mixed singletrack with fewer mandatory gravity features |
| Protective approach | Full-face helmet and more body protection are common | Open-face helmets and lighter protection are common |
| Beginner priority | Braking, body position, line choice, controlled progression | Pedalling, shifting, climbing, and general handling |
The boundary is not absolute. An easy bike-park trail may be smoother than a difficult natural trail, and an advanced enduro descent can resemble a downhill course. Read the actual trail, signs, weather, and venue rules instead of relying on the discipline name.
Understand the risk without exaggerating or dismissing it
Downhill crashes commonly transfer energy to the upper body. A 2026 study of 274 injured bike-park riders found that rider errors caused 77.4% of recorded injuries; the shoulder and clavicle region was the most frequent site, followed by other upper-extremity and head or face injuries. Because the study counted people treated after injury rather than every visitor equally at both parks, it describes the pattern of injuries better than any individual’s probability of being hurt (Ruedl et al., 2026).
Research on recreational downhill riders likewise reports substantial upper-extremity trauma, especially around the shoulder, while a prospective elite championship study recorded injuries during both training and racing (Breulmann et al., 2024; Fallon et al., 2024). Elite race numbers should not be applied directly to a beginner’s day at a bike park: speed, course difficulty, skill, exposure, and reporting are different.
The useful conclusion is not that beginners should avoid the sport. It is that three controls matter together:
- Reduce crash probability: instruction, suitable trails, controlled speed, good vision, and a progressive skill sequence.
- Reduce crash energy: brake before features, avoid jumps and high-consequence lines early, and stop when fatigue degrades control.
- Reduce injury consequences: use correctly fitted, certified protective equipment and ride where help and an exit plan are available.
Are you ready to try downhill?
You do not need elite fitness, but you should arrive with basic bicycle control. Before a first downhill session, be able to:
- start and stop smoothly on flat ground;
- stand on level pedals without sitting heavily on the saddle;
- use the front and rear brake together without panic-grabbing;
- look ahead while holding a chosen line;
- turn in both directions at low speed;
- ride an easy off-road surface with small bumps;
- follow instructions and stop when a feature exceeds your skill.
If any item is missing, practise it in a flat skills area or take a fundamentals lesson first. A coach can correct a dangerous habit in minutes that might otherwise be repeated for weeks.
The same principle applies to other balance sports: our beginner skateboard tricks guide separates steering, stopping, and safe exits from airtime before adding an ollie.
Delay the session if illness, dizziness, poor sleep, sedating medication, significant pain, or a recent injury affects coordination or judgment. Seek individualized medical advice if you have a condition that makes high-consequence falls especially risky. A previous concussion, neck injury, fracture, or surgery deserves a proper return-to-sport decision, not a self-test on the trail.
Choose the bicycle and protection by function
This is not a shopping list. The goal is a system that fits, works, and matches the trail.
A bicycle you can control
A dedicated downhill bike is stable and built for repeated steep descending, but many beginner gravity trails can be suitable for an appropriate enduro or trail bike when the venue permits it. Rental fleets are often the simplest first step because the operator can match the bicycle to the terrain and rider.
Check that:
- the frame size lets you stand centred without feeling stretched;
- both brakes engage predictably and the lever reach suits your hands;
- tires have usable tread and pressure appropriate to the tire, rim, rider, and surface;
- wheels, axles, cockpit, pedals, and saddle are secure;
- suspension moves freely and is set for the rider rather than copied from someone else;
- the chain, gears, and chain-retention system work without obvious damage.
If shifting is not yet automatic, practise gear direction, light-pedal changes, and choosing an exit gear with our mountain bike gear-shifting guide before adding steep or rough features.
Do not make major suspension or control changes immediately before a run. Adjust one variable at a time, note the baseline, and use the bicycle or suspension maker’s setup range. A professional mechanic should inspect unfamiliar noises, fluid leaks, brake fade, damaged tires, loose bearings, or impact damage.
Helmet and protective equipment
For gravity riding, use a full-face bicycle helmet that fits securely and carries the certification required in your market and by the venue. A downhill-specific standard such as ASTM F1952 adds performance requirements beyond a general bicycle helmet standard, including criteria for chin bars on full-face designs (ASTM International). Certification labels are meaningful only when the helmet is the right size, worn level, fastened correctly, undamaged, and used within the manufacturer’s replacement guidance.
Add eye protection, full-finger gloves, knee protection, and footwear that maintains reliable pedal contact. Elbow, back, chest, hip, or neck protection may be appropriate according to trail speed, features, venue rules, experience, and personal risk. Body armour does not justify riding faster; it changes only part of the consequence profile.
Replace or professionally assess any helmet after a significant impact according to its manufacturer’s instructions. Do not ride with cracked shells, crushed foam, damaged straps, or a fit that allows the helmet to shift.
The five foundational downhill skills
Learn these on flat ground and a gentle slope. Add terrain only after you can repeat them without rushing.
1. Build a neutral and ready position
In the neutral position, stand tall enough to rest while keeping both pedals level, hands secure, eyes ahead, and joints softly bent. In the ready position, lower the torso slightly, bend elbows and knees, keep heels supported, and create space for the bike to move.
Avoid the old cue to hang permanently behind the saddle. Moving rearward can help on a steep roll or during hard deceleration, but staying too far back unloads the front tire, straightens the arms, and reduces steering control. Think heavy feet, light hands, centred mass, then move dynamically as slope and braking change.
2. Brake before you need maximum grip
Both brakes contribute to controlled slowing. As deceleration transfers load forward, the front tire can generate substantial braking force; the rear remains useful for balance and speed regulation. Apply pressure progressively so the tires keep rolling and gripping rather than locking abruptly.
Use this sequence:
- look ahead and identify the braking zone;
- enter the ready position with level pedals;
- increase both brake pressures smoothly while the bike is relatively straight;
- release enough pressure before the turn or obstacle for the tires to steer and track;
- resume light speed control only if traction and line allow.
Official coaching guidance similarly emphasizes both brakes, body position, available traction, and practising emergency stops before they are needed (British Cycling). Never copy a fixed front-to-rear percentage: slope, surface, tire grip, geometry, and rider position change the balance continuously.
Practise stop markers on flat dirt. Begin slowly, stop before the marker without skidding, then shorten the distance only while remaining smooth. This drill teaches more than dragging a brake through an entire descent, which can build heat, fatigue hands, and leave less grip for turning.
3. Direct vision through the line
The bike tends to follow attention. Look far enough ahead to identify the next decision, then scan back toward immediate traction. Fixating on a rock, tree, or trail edge makes late steering more likely.
Use a repeating rhythm:
- scan: surface, slope, exit, and other users;
- select: the simplest rideable line with braking room;
- commit: look through the line rather than changing plans at the obstacle;
- reset: return to a stable position and scan again.
The fastest-looking line is rarely the best beginner line. Choose the path that reduces simultaneous demands: fewer abrupt turns, smaller obstacles, better traction, and a clear exit.
4. Corner with speed already controlled
Brake before the turn, look toward the exit, and keep the bike balanced. On a flat corner, gently pressure the outside foot while allowing the bicycle to lean beneath a comparatively stable body. On a supported berm, stay centred and follow the bank rather than dropping the outside pedal automatically into the ground.
Start with wide, open turns. Add tighter radius, loose surfaces, roots, or steeper entrances one variable at a time. If you enter too fast, straighten the bicycle before adding heavy braking where possible; grabbing a brake while leaned over can overwhelm the limited traction shared between steering and slowing.
5. Absorb terrain instead of fighting it
Keep arms and legs active so the bike can rise into bumps and extend into dips while the head and torso follow a calmer path. Begin with small rollers that can be ridden with both wheels on the ground. Maintain level pedals, stable pressure through the feet, and vision toward the exit.
Do not pull up on the handlebars to imitate a jump. Drops, gaps, and high-speed rock gardens require specific coaching, a feature inspection, and a safe progression. A beginner can have a complete downhill day without leaving the ground.
Read trail grades and inspect features
Many trail systems use green, blue, black, and double-black symbols, but the rating is relative to that network. The International Mountain Bicycling Association describes ratings as a way to compare technical difficulty and support informed decisions; grade, surface, obstacle size, width, and consequence all influence the classification (IMBA Trail Difficulty Rating System).
Before a run:
- read the trail map, signs, closures, and venue rules;
- ask patrol or staff which route suits a first-time downhill rider;
- inspect optional lines, drops, jumps, and blind entrances from a safe place;
- identify ride-arounds and exit points;
- check whether rain, dust, braking bumps, or maintenance has changed the surface;
- yield and pass according to local rules rather than assuming race priority.
If you cannot see a feature’s landing or exit, stop off the riding line and inspect it. Never stand in a landing zone or blind section. Respect closures: a closed trail can contain machinery, unstable ground, fallen trees, or workers who do not expect riders. IMBA’s Rules of the Trail also emphasize control, yielding, planning, and leaving minimal impact.
Wind can change balance, braking distance, falling branches, and lift operations even inside a forest. Use the same conservative decision process described in our cycling-in-wind safety guide, while following the bike park’s own closures and instructions.
A six-session beginner progression
Progress is based on demonstrated control, not the number of runs purchased. Repeat a session when the final attempts are less precise than the first.
| Session | Environment | Main skills | Ready to progress when… |
|---|---|---|---|
| 1 | Flat skills area | Ready position, level pedals, progressive stops, wide turns | Stops are smooth and repeatable without skidding |
| 2 | Gentle open slope | Braking zones, vision, standing descent | You can regulate speed without sitting or dragging one brake |
| 3 | Easiest marked trail | Scan-select-commit rhythm, trail etiquette | You finish with control and can explain each difficult section |
| 4 | Same trail with coaching | Corner entry, release, terrain absorption | Technique remains stable over several runs |
| 5 | Slightly harder trail or optional features | Line choice, small roots and rollers, ride-arounds | You can stop before every feature and choose rather than react |
| 6 | Consolidation day | Linked sections, pacing, fatigue awareness | The final run is as controlled as the first |
Stay on the easier trail if you rely on last-second braking, stare at the front wheel, lose pedals, lock tires repeatedly, or finish with forearm fatigue that prevents normal lever control. Moving up while those signals persist rehearses survival, not skill.
Small, repeatable sessions usually build more than rare all-out days. If scheduling is the main obstacle, use the practical cues in our exercise-consistency guide to protect a realistic practice rhythm.
Plan your first bike-park day
Before the first run
Arrive early enough to avoid rushing. Confirm emergency contacts, venue procedure, weather, closing time, lift rules, and whether coaching is available. Warm up for 8 to 12 minutes with easy pedalling, squats to a comfortable depth, hip hinges, calf raises, trunk rotations, and a few controlled stops.
Perform a bicycle check, then take one easy familiarization run. Stop in designated areas to review unfamiliar sections. A phone photo of the setup settings can help a rental technician restore the baseline if an adjustment makes handling worse.
During the day
Use short blocks of two or three runs separated by water, food, and a concentration check. Speed is not the only load. Downhill riding combines repeated impacts, grip endurance, isometric upper-body work, decision-making, and cardiovascular effort. A performance study identified rider skill, handgrip endurance, self-confidence, and aerobic capacity as relevant variables; in one test, riders spent most of a downhill run above their first ventilatory threshold (Chidley et al., 2015).
Finish before fatigue becomes obvious. Warning signs include:
- braking later than planned;
- missing lines you rode cleanly earlier;
- stiff arms, burning forearms, or numb hands;
- repeated foot slips or pedal strikes;
- tunnel vision and slower decisions;
- irritability, pressure to keep up, or hiding mistakes.
The phrase “one last run” is not a safety plan. If control has declined, the session is finished.
Train off the trail for more control
Downhill technique must be practised on the bike, but general fitness increases the margin available to use it.
Strength twice per week
A compact full-body session can include:
- a squat or split squat for leg force and repeated standing;
- a hip hinge for posterior-chain strength;
- a row and push-up or press for shoulder-girdle capacity;
- a calf raise for foot and ankle support;
- a carry or anti-rotation press for trunk control;
- light wrist extensor and grip work without training through pain.
Start with two controlled sets and leave two or three good repetitions in reserve. Our strength-training frequency guide explains how to distribute weekly work, while the Bulgarian split squat guide provides a scalable single-leg option.
Aerobic training and recovery
One or two easy rides plus one purposeful harder session can build capacity without turning every trail day into conditioning. Complete beginners can use our eight-week mountain bike training plan to combine easy endurance, strength, fresh skills practice, and a controlled interval progression. The cycling training guide after 50 shows how endurance, intervals, strength, and recovery fit together. If you are new to structured intensity, use the HIIT cycling guide only after basic riding consistency is stable.
Separate hard strength, interval, and downhill days until you know your response. Sleep, normal meals, hydration, and easy movement matter more than elaborate recovery products. Persistent hand numbness, focal joint pain, weakness, or symptoms that alter technique need assessment rather than another run.
What to do after a crash
First protect the scene. Move only if staying in place creates greater danger, and follow venue emergency instructions. Do not remove another rider’s helmet unless trained responders direct it or an immediate airway emergency requires action. Suspected neck, spinal, or serious limb injury needs professional help.
Stop riding and seek urgent evaluation for red flags such as worsening headache, repeated vomiting, seizure, increasing confusion, unusual drowsiness, weakness or numbness, slurred speech, unequal pupils, significant neck pain, breathing difficulty, uncontrolled bleeding, or obvious deformity.
Any suspected concussion ends the day’s riding. Symptoms can include headache, dizziness, nausea, balance trouble, confusion, memory gaps, vision change, light or noise sensitivity, or simply not feeling right. Avoid another head-impact risk and obtain medical guidance. The US Centers for Disease Control and Prevention recommends a healthcare-supervised, stepwise return to sport, with at least 24 hours per stage and regression if symptoms return (CDC HEADS UP). Local protocols may differ, so follow your clinician and governing body.
Use SuperAge after safety and technique are covered
A ride log cannot tell you whether a rock garden is safe, but it can show how a downhill day fits into the rest of your training. Record trail difficulty, run count, perceived control, mistakes, forearm fatigue, and any impacts alongside duration and heart-rate data. Those notes make progression visible even when speed is deliberately unchanged.
Track the load behind the lift-assisted day
SuperAge helps you review workouts and recovery-related trends available through Apple Health. Use that context to separate a technical practice day from a high-load session and decide whether the next day supports strength, easy aerobic work, or rest. The app does not replace coaching, trail inspection, protective equipment, or medical assessment after a crash.
For a broader framework, the recovery-between-workouts guide explains how to respond to fatigue without abandoning consistency.
Beginner downhill checklist
Before dropping into the trail, confirm:
- The trail is open, within your demonstrated skill, and suitable for current conditions.
- Helmet, eye protection, gloves, knee protection, and any required armour fit correctly.
- Brakes, tires, wheels, controls, suspension, and pedals passed a pre-ride check.
- You know the route, ride-arounds, stopping areas, last lift time, and emergency procedure.
- You can stop under control and use both brakes progressively.
- You will inspect unfamiliar features and keep wheels down unless specifically coached.
- Food, water, temperature, focus, and hand function are adequate.
- You have permission to end the day as soon as control deteriorates.
Frequently asked questions
Is downhill mountain biking suitable for complete beginners?
Yes, when the venue has genuinely easy gravity trails, appropriate rental equipment, and qualified instruction. A complete beginner should start with flat-ground braking and body-position drills rather than entering a technical descent immediately.
Do I need a downhill bike for my first session?
Not always. The correct bicycle depends on the trail and venue rules. A maintained downhill rental is often the easiest option at a lift-served park; an appropriate trail or enduro bike may suit lower-consequence terrain. Do not use a bicycle that the venue, manufacturer, or qualified mechanic considers unsuitable.
Should beginners use only the rear brake downhill?
No. Controlled stopping normally uses both brakes progressively. The front can provide substantial braking force, while the rear contributes control. Practise on flat dirt and a gentle slope so increasing pressure, load transfer, and release become familiar before steeper terrain.
Is a full-face helmet necessary for downhill mountain biking?
A full-face bicycle helmet is the prudent default for gravity-focused trails and may be required by the venue. Choose a correctly fitted helmet with certification appropriate to the market and use, ideally including a downhill-specific standard. No helmet prevents every head, brain, face, or neck injury.
When should I move from a green to a blue trail?
Move up only after repeated green runs remain controlled from start to finish: braking occurs before features, vision stays ahead, wheels follow the chosen line, and fatigue does not degrade technique. Inspect the blue trail because ratings are relative to each network.
Do I need to learn jumps to enjoy downhill riding?
No. Many riders focus on cornering, natural terrain, rollers, and technical lines while keeping both wheels on the ground. Jumps and drops are optional advanced skills that need suitable features, inspection, and coached progression.
Why do my hands and forearms tire so quickly?
A tight grip, brake dragging, lever reach, body position, rough terrain, and insufficient conditioning can all contribute. Slow down, relax the hands where safe, brake in planned zones, and have the controls and suspension checked. Stop if fatigue impairs braking or numbness persists.
Can I ride again after hitting my head if I feel mostly fine?
Not when concussion is suspected. Symptoms can be delayed, and a second impact creates additional risk. End the session, avoid driving if impaired, follow local emergency guidance, and obtain appropriate medical evaluation before a stepwise return to sport.
Key takeaways
- Start with instruction, a suitable trail, a correctly fitted bicycle, and certified protective equipment.
- Build braking, vision, ready position, cornering, and terrain absorption before speed, drops, or jumps.
- Treat trail ratings as local comparisons and inspect every unfamiliar feature.
- Repeat easy runs until control remains stable under mild fatigue; progression is earned, not scheduled.
- Stop after a head impact, deteriorating technique, hand-function loss, mechanical concern, or changing conditions.
- Use training and recovery data to support skill practice, never to overrule what the trail is showing you.
References
- Ruedl G, et al. Causes and associated factors of mountain bike injuries in bike parks in western Austria: a two-season descriptive epidemiological study. AIMS Public Health. 2026. PubMed
- Breulmann FL, et al. Recreational athletes during downhill-mountain biking show high incidence of upper extremity fractures in combination with soft-tissue injuries. Scientific Reports. 2024. PubMed
- Fallon T, et al. The epidemiology of injuries in downhill mountain biking at the 2023 UCI cycling world championships. BMJ Open Sport & Exercise Medicine. 2024. PubMed
- Chidley JB, et al. Characteristics explaining performance in downhill mountain biking. International Journal of Sports Physiology and Performance. 2015. PubMed
- ASTM International. Standard specification for helmets used for downhill mountain bicycle racing. ASTM F1952
- British Cycling. Braking tips for cycling. British Cycling Knowledge
- International Mountain Bicycling Association. Trail Difficulty Rating System. IMBA
- International Mountain Bicycling Association. Rules of the Trail. IMBA PDF
- US Centers for Disease Control and Prevention. Returning to sports after concussion. CDC HEADS UP
Related Articles
Cycling in wind: headwind pacing and crosswind safety
Learn how to cycle in wind with safer crosswind handling, steady headwind pacing, route choices, group skills, and clear signs to postpone a ride safely.