Bike touring gear: pack lighter, ride safer, and fix more
Build a practical bike touring gear list, balance bags, plan water and repairs, test the loaded bicycle, and leave with safer margins for every ride.
Quick answer
The right bike touring gear is the smallest reliable system that keeps you able to ride, eat, drink, stay warm and dry, handle common mechanical problems, and get help. Start with a bicycle that fits and works, luggage that cannot enter the wheels or block controls, weather-appropriate clothing, water and food capacity matched to the route, lights, a first-aid kit, navigation with an offline backup, and tools you have actually used.
Do not buy a complete expedition setup before a first overnight trip. Pack the bike, weigh each bag, take a loaded test ride, and remove anything whose absence has no meaningful consequence. Keep dense items low and near the bicycle’s center, balance left and right, protect sleeping gear and electronics from water, and leave frequently used items reachable. A lighter load is useful only after safety-critical equipment, medication, food, water, and thermal protection are covered.
Key facts
- A loaded test ride reveals steering, braking, heel-clearance, and attachment problems before departure.
- Low central cargo preserves more predictable bicycle handling than heavy loads high or far behind the rear axle.
- A route-specific repair kit solves likely failures only when the rider knows how to use every tool and spare.
- Water and food planning requires distance, weather, effort, resupply reliability, and individual tolerance—not a universal bottle count.
- A written contingency plan gives an overdue contact a route, check-in time, and clear action if the rider does not arrive.
Build the trip before building the packing list
A packing list cannot be correct until the trip has boundaries. A supported paved weekend between towns and a self-supported week on remote unsealed roads may both be called bicycle touring, but they create different consequences for a broken spoke, a wet sleeping bag, a missed shop, or a sudden weather change.
Write a one-page trip brief before choosing bags:
| Question | Why it changes the gear system |
|---|---|
| Where will you sleep? | Lodging can remove shelter and cooking equipment; camping adds a weather-rated sleep system and site obligations. |
| How long is the longest resupply gap? | Water, food, fuel, medication, and battery capacity must cover the gap plus a delay margin. |
| What surfaces and gradients are expected? | Tires, gearing, brake demand, handling, average speed, and tool choices change with terrain. |
| What weather can occur, not just what is forecast? | Rain, cold, heat, wind, smoke, and thunderstorms change clothing, route, water, and stop decisions. |
| How isolated is the route? | Communication, repair depth, first aid, navigation redundancy, and turnaround points become more important. |
| Who is the least experienced rider? | Daily distance, pace, mechanical training, rest, and bailout options should work for that person too. |
Download offline maps, identify water and resupply points, note bike shops and transport exits, and check road, trail, border, camping, fire, wildlife, and bicycle-equipment rules with the authorities that govern the actual route. A map icon is not proof that a shop is open or that a water source is safe. Confirm critical services close to departure and keep alternatives.
Use time rather than distance alone. A loaded bicycle climbs and accelerates more slowly, rough surfaces reduce pace, and stops for food, navigation, photographs, traffic, heat, or a repair accumulate. Give the day a conservative latest-departure time, turnaround rule, and hard stop before darkness or severe weather removes options.
Choose a bicycle that is dependable under load
You do not need a bicycle sold under a specific touring label. You need a sound frame, suitable size and fit, stable luggage attachment, gearing low enough for the route and load, brakes with adequate control, tires appropriate to the surface, and replacement parts that can realistically be serviced along the way.
Start with the bicycle you already know if it fits the trip. Changing the saddle, shoes, handlebars, luggage, tires, and riding position together shortly before departure creates several unsolved variables. Make essential changes early, then ride them long enough to reveal discomfort or compatibility problems.
The Adventure Cycling Association maintenance check recommends inspecting the frame, tires, wheels, brake pads and lever feel, drivetrain, shifting, racks, and fasteners, followed by a test ride. That is a useful minimum process, not a substitute for a mechanic when you cannot assess wear, torque, damage, or hydraulic systems confidently.
Pre-departure mechanical gate
- Clean the bicycle enough to see cracks, cuts, loose parts, leaks, frayed cables, and abnormal wear.
- Check tire condition and pressure with the tires loaded as they will be on tour.
- Confirm both wheels rotate freely, remain secure, and have no unexplained wobble or damaged spokes.
- Test each brake separately at walking speed, then together in a controlled area.
- Shift through every gear while pedaling and under moderate climbing load.
- Inspect racks, cages, bag mounts, mudguards, lights, and every strap for movement or wheel contact.
- Verify the tools fit the actual fasteners, valves, axles, brake system, and luggage hardware.
- Complete one fully loaded ride with braking, climbing, descending, standing starts, and rougher surfaces similar to the route.
Before the loaded test, use our mountain bike gear-shifting guide to rehearse anticipatory shifts, momentary pedal unloading, and the difference between a technique error and a drivetrain fault.
Stop if the loaded bicycle shimmies, steers unpredictably, rubs a tire, loses braking control, or sheds cargo. Those are design problems to solve before departure, not quirks to tolerate for several days.
Pack by function, consequence, and access
The Adventure Cycling touring checklist divides equipment into riding clothing, off-bike clothing, camp essentials, tools and spares, and sleeping and cooking gear. Use categories to prevent omissions, then challenge every item. Ask: what credible problem does this solve, how likely is that problem, what happens without it, and can another item do the same job?
Five functional systems
- Ride: helmet, eyewear, gloves if used, riding layers, rain and wind protection, lights, reflectors, and route-required safety equipment.
- Repair: inflation, puncture repair, tire removal, chain and fastener tools, route-specific spares, cleaning, lubrication, and a way to secure a damaged component temporarily.
- Sleep or lodging: shelter and sleep system for camping, or compact off-bike clothing and booking information for indoor accommodation.
- Food and water: containers, treatment when necessary, food, utensils, and cooking equipment only when the trip requires them.
- Navigation and emergency: offline maps, charging, identification, payment backup, medical information, medication, first aid, signaling, communication, and the itinerary shared with a reliable person.
Avoid packing by fear. Three duplicate tools that cannot repair your bicycle add weight without resilience. One small pump that you have tested, a patch method compatible with the tire system, and the correct spare tube or repair plug are more useful than a large unfamiliar kit.
Put weight where the bicycle can manage it
There is no universal front-to-rear percentage for every frame and luggage system. Steering geometry, rack limits, rider size, wheel strength, bag position, terrain, and the shape of the load all matter. Use these stable principles:
- place dense items such as tools, water, and food low and close to the frame;
- keep left and right loads similar enough that the bicycle does not lean or steer under unequal weight;
- stay within the bicycle, wheel, rack, bag, and attachment manufacturers’ limits;
- keep the handlebar free to turn and preserve access to brakes and shifters;
- leave heel, knee, tire, brake, chain, suspension, and lighting clearance through their full movement;
- secure every strap end so it cannot reach a wheel, rotor, chain, or crank;
- keep fragile and water-sensitive equipment protected inside the luggage, not merely under a rain cover.
Adventure Cycling’s bikepacking packing guide similarly emphasizes a practice pack, a loaded ride, heavy items low and central, daytime essentials within reach, waterproofing, and secure exterior attachments. Treat that as a handling logic rather than a brand-specific shopping prescription.
Pack by when you need an item
Create three access levels:
- While stopped briefly: snacks, water, sunscreen, rain shell, gloves, eyewear, phone or map, payment, and a small repair kit.
- At a longer stop: meal food, extra layers, first aid, charging, and the deeper repair kit.
- At camp or lodging: shelter, sleep system, clean clothing, washing items, and evening electronics.
If reaching the rain shell requires unloading the bicycle in a storm, the packing system has failed. If valuables remain attached whenever you enter a shop, add a removable pouch or deliberate carry routine.
Carry repair capability, not merely repair objects
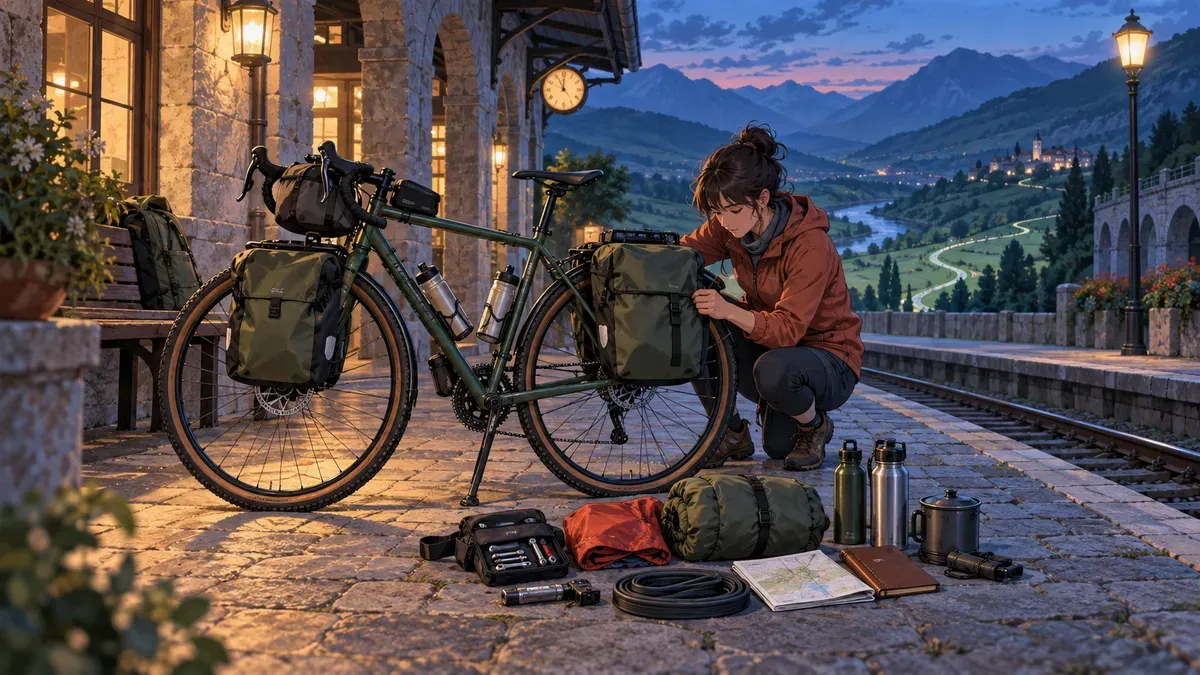
A repair kit should match the failure modes you can identify and safely address. A sensible core may include tire levers, patches, a compatible spare tube or tubeless repair method, an inflation device, a compact multi-tool with the correct bits, a chain tool and compatible quick link, and small supplies for a temporary securement. Longer or more remote trips may justify additional spokes, brake pads, cables, sealant, tire boots, or parts unique to the bicycle.
The correct list depends on the route and equipment. A spare that does not fit is dead weight; a tool that reaches a bolt but cannot provide the required procedure can create damage. Before departure, practice in a calm setting:
- Remove and reinstall both wheels using the actual axle system.
- Find the puncture, patch or replace the tube, reseat the tire, and inflate it.
- Use the chain tool and compatible connector on a scrap or supervised chain.
- Tighten luggage hardware without overtightening frame or carbon components.
- Identify brake-pad wear and know which adjustments are safe for your brake type.
- Explain which failures require a shop, transport exit, or emergency call rather than a roadside experiment.
Maintenance also prevents failures. Wipe and lubricate the chain as conditions require, inspect tires and racks each morning, listen for new noises, and check straps after rough sections. Do not ignore a recurring creak, steering change, braking change, crack, or wheel wobble because the bicycle still moves.
Plan water and food from the route, not a generic formula
Touring energy demand changes with body size, pace, hills, headwind, surface, heat, altitude, load, and ride duration. Start well fed, carry familiar foods, and eat early enough that the final hour does not depend on catching up. Separate an everyday tour from race nutrition: a sustainable touring pace and normal meals often matter more than chasing a high hourly target.
For prolonged hard riding, carbohydrate during exercise can support performance, but tolerance and intensity matter. In a randomized cycling study, 39 and 64 grams of carbohydrate per hour improved performance compared with water alone after a demanding two-hour ride, while the smaller 20-gram dose did not reach significance in that sample (Newell et al., 2015). That is evidence from trained cyclists in a controlled protocol, not a mandatory touring dose. Practice any fueling plan before a remote day and adjust for appetite, medical needs, pace, and access to normal food.
Hydration is equally individual. A meta-analysis found that fluid intake during moderate cycling longer than one hour could improve performance under studied conditions, but useful rates varied with duration and the evidence base was small (Holland et al., 2017). Use thirst, forecast, route, sweat rate learned in training, water availability, and urine and symptom context together. Avoid both deliberate dehydration and forced overdrinking. In heat or with heavy sweating, food and appropriate electrolytes may be part of the plan; people with medical fluid or sodium restrictions need individualized clinical advice.
For every day, mark:
- the longest distance and time between dependable water points;
- whether each source is potable, seasonal, closed, or requires treatment;
- one extra capacity margin for a delay, wrong turn, spill, or heat;
- foods that remain edible in the expected temperature and can be opened while tired;
- a backup meal that does not depend on a shop arriving before closing time.
Make road visibility and weather decisions part of the gear list
The US National Highway Traffic Safety Administration advises riders to use a bicycle that fits and works, wear a properly fitted bicycle helmet, increase visibility with bright or reflective equipment, use front and rear lights in darkness or poor visibility, secure cargo, choose lower-traffic routes when possible, and ride predictably under the applicable rules (NHTSA bicycle safety). Local law can differ, so verify lighting, reflector, helmet, road-access, and group-riding requirements for every jurisdiction on the trip.
A helmet is not a permission slip for a hazardous route, but fit matters. It should meet the relevant standard where it is sold, sit level, remain snug, and not block vision; NHTSA provides a concise helmet selection and fit guide. Replace a helmet according to its instructions and after an impact that requires replacement, even when damage is not obvious.
Check the authoritative forecast for the route rather than the weather at home. Build stops around heat, cold, high wind, smoke, flood risk, and thunderstorms. Our cycling in wind guide explains why gusts, traffic, wheel geometry, exposure, and rider control matter more than one universal wind-speed cutoff. The US National Weather Service states there is no safe place outside during a thunderstorm; cyclists should reach a substantial building or hard-topped vehicle and wait 30 minutes after the last thunder before resuming (NWS outdoor lightning guidance). A tent, tree, bus shelter, or open pavilion is not an equivalent lightning shelter.
Use clear stop triggers:
- you cannot hold a predictable line in traffic or crosswind;
- braking distance or traction is no longer adequate;
- heat, cold, pain, illness, drowsiness, or confusion is changing judgment;
- water or food margin no longer covers the next verified supply;
- the route enters a closure, unsafe traffic, fire, flood, or thunderstorm risk;
- a critical light, brake, tire, wheel, rack, or steering component is unreliable;
- the group can no longer reach the planned safe stop with daylight and reserve energy.
Train the rider and the loaded bicycle together
Bike touring rewards durable, repeatable effort more than one exceptional fitness test. Build weekly riding gradually, include the surfaces and hills you expect, and practice consecutive days only after single-day recovery is predictable. Strength training can support climbing, handling, and resilience, while sleep and easier days allow adaptation. Our cycling training after 50 guide provides a conservative endurance, interval, strength, and recovery framework that works beyond that age group when scaled to the rider.
The final training phase should include the real load. Start with a shorter loop near transport and mechanical help. Add climbing, braking, low-speed turns, standing starts, rough surfaces, and a safe descent. Then complete an overnight shakedown using the exact bags, shelter or lodging routine, food, water containers, lights, charging, clothing, and repair kit.
The test is successful when it finds a problem. Move a rubbing bag, remove an unused duplicate, change the gearing plan, protect a wet item, practice a repair, or shorten the first tour. Do not preserve a flawed setup to prove the rehearsal was easy.
Regular cycling can contribute to the broader physical-activity target. The CDC recommends at least 150 minutes of moderate aerobic activity per week, or 75 minutes vigorous, plus muscle-strengthening activity on two days; more is not automatically better when recovery or safety deteriorates (CDC adult activity guidance). Our complete exercise and longevity guide places that aerobic base beside strength, mobility, balance, and recovery. A tour can exceed the weekly aerobic minimum quickly, so arrive progressively trained rather than treating the first travel day as training.
Use SuperAge after the route problem is solved
Touring creates useful context around heart rate, sleep, duration, resting trends, and perceived effort, but a wearable cannot confirm that a road is open, a bridge is passable, a water source is safe, or a mechanical repair will hold. Solve those route and equipment questions with direct inspection, official information, and qualified help.
After each day, record distance, elevation, surface, weather, load, food and water notes, pain, perceived effort, mechanical issues, and how restored you feel the next morning. SuperAge can place those observations beside broader health and recovery trends so you can distinguish a demanding hill or hot day from accumulating fatigue across the trip. Our recovery between workouts guide explains why a lower-load day may protect the rest of the tour.
Do not use one heart-rate estimate or calorie number to justify extending a day. Wrist sensors can become less reliable with vibration, grip, position, temperature, and intermittent effort. The operational questions remain simple: can you steer and brake precisely, think clearly, eat and drink normally, and reach the next safe stop with margin?
When the trip is over, download SuperAge to review the riding block alongside sleep, recovery, and long-term fitness rather than treating the tour as an isolated total.
A three-pass packing method
Pass 1: consequence
Lay out only items that address a credible consequence: road safety, weather exposure, water, food, sleep, medical needs, navigation, communication, and likely mechanical failures. Check each against the one-page trip brief.
Pass 2: compatibility
Verify that every item fits the complete system. The tube matches wheel and valve; the pump works with that valve; the tool fits that axle; the bag clears the wheel; the rain layer fits over riding clothing; the charger and cable work together; the medication supply exceeds the planned duration; the offline map opens without service.
Pass 3: rehearsal
Pack every bag, weigh it, photograph the arrangement, and ride. Unpack for one roadside repair and one simulated rain stop. Set up camp or execute the lodging routine. Replicate a morning departure. Remove, relocate, or replace equipment based on evidence from that rehearsal.
Departure checklist
Route and communication
- Offline route, alternatives, resupply, water, hazards, and transport exits are verified.
- A reliable contact has the itinerary, check-in times, rider details, and overdue action.
- Local road, trail, camping, fire, border, helmet, light, and access rules are confirmed.
- Identification, payment, emergency contacts, insurance details where relevant, and required documents are protected.
Bicycle and luggage
- Fit, tires, wheels, brakes, drivetrain, steering, racks, fasteners, and lights passed a loaded ride.
- Bag mass is within all component limits and reasonably balanced left to right.
- Nothing can enter a wheel, brake, chain, crank, suspension path, or steering arc.
- Frequently needed items are reachable and critical dry items have internal waterproofing.
Rider
- Helmet and clothing work across the expected conditions.
- Food, water, medication, sun protection, and first aid cover the route plus delay margin.
- The repair kit matches the bicycle and the rider has rehearsed its core tasks.
- Daily distance and climbing leave reserve capacity for navigation, repairs, and the least experienced rider.
- Stop, turnaround, weather, and missed-check-in rules are written before departure.
Common packing mistakes
Buying bags before defining the route: define sleep, resupply, surface, weather, and isolation first.
Packing for duration instead of laundry and resupply: a longer tour rarely needs a new outfit for every day.
Concentrating everything behind the rear axle: move dense cargo lower and toward the center, then test handling.
Carrying tools without skills: rehearse the puncture, chain, wheel, and luggage fixes your kit is meant to support.
Trusting “waterproof” as a single barrier: use internal protection for insulation, medication, documents, and electronics.
Leaving straps loose for convenience: secure every end away from wheels and drivetrain before the bicycle moves.
Planning daily distance from an unloaded training ride: test the real load on representative terrain and add time margin.
Treating the forecast as a guarantee: monitor official updates and keep an exit that still works when conditions change.
Key takeaways
- Let the route, weather, resupply, surface, isolation, and least experienced rider define the gear system.
- Use a dependable bicycle you understand; complete maintenance early and verify it under full load.
- Pack by ride, repair, sleep, food-water, and emergency functions, then remove low-consequence duplication.
- Keep dense items low and central, balance the bicycle, protect clearances, and waterproof critical gear internally.
- Carry only compatible tools and spares you can use; know when the correct repair is professional help or evacuation.
- Rehearse navigation, rain access, camp or lodging, food, water, repairs, and next-morning packing on an overnight test.
- Share a written itinerary and stop when weather, visibility, fatigue, supplies, or mechanical condition remove safety margin.
- Use health and recovery data to learn from the tour, never to overrule direct route or equipment evidence.
Frequently asked questions
What bike touring gear is essential for a first overnight trip?
Start with a safe, maintained bicycle; secure luggage; helmet and route-required lights; weather layers; water and food; medication and first aid; offline navigation; identification, payment, and communication; plus puncture and basic repair equipment you can use. Add shelter, sleep, and cooking systems only if the overnight plan requires them.
Are panniers or bikepacking bags better?
Neither system is universally better. Panniers often simplify access and provide volume, while frame, seat, and handlebar bags can suit bicycles without conventional racks and encourage a smaller load. Compare attachment security, heel and tire clearance, waterproofing, steering, component limits, and handling on the actual bicycle.
How heavy should a touring bicycle be?
There is no safe universal target. Rider size, bicycle and wheel limits, racks, terrain, gearing, water gaps, weather, and experience all change the answer. Weigh each bag, respect every component limit, keep dense cargo low and central, and remove items after a loaded test shows they do not justify their cost.
Where should heavy items go on a touring bicycle?
Generally low, close to the frame, and balanced left to right. Water, tools, and dense food often work well near the center. The correct placement must also preserve steering, brake and shifter operation, heel and knee clearance, wheel and suspension clearance, and the approved limits of the bicycle and luggage system.
What repair skills should I learn before bike touring?
Practice removing both wheels, repairing a puncture, inflating the tire, using the axle system, reconnecting a compatible chain link, securing loose luggage, and recognizing unsafe brake, tire, wheel, frame, steering, or drivetrain damage. Learn equipment-specific procedures from qualified instructions or a mechanic.
How much water should I carry on a bike tour?
Carry enough to reach the next verified safe source plus a delay margin. Heat, effort, altitude, body size, sweat rate, food, and source reliability change the amount. Test your needs during training, expand capacity for remote or hot sections, and do not force a fixed intake that ignores thirst or medical restrictions.
Do I need a new touring bike for my first trip?
Often no. A bicycle that fits, works, accepts secure luggage, has suitable gearing and tires, and passes a loaded test may be enough. A mechanic can assess wear or compatibility if you cannot. Spend first on solving demonstrated safety or reliability gaps, not on matching a category label.
What is the best way to test a bike touring setup?
Complete a fully loaded day ride and then an overnight shakedown on representative terrain near easy exits. Test braking, climbing, low-speed handling, rough surfaces, rain access, food and water, navigation without service, a puncture repair, camp or lodging setup, charging, and next-morning repacking.
References
- Adventure Cycling Association. Bike touring gear packing checklist. Updated 2026.
- Adventure Cycling Association. Bikepacking gear: what to take and how to pack it. Updated 2026.
- Adventure Cycling Association. Pre-trip bike maintenance check up. Updated 2026.
- National Highway Traffic Safety Administration. Bicycle safety. Accessed 2026.
- National Highway Traffic Safety Administration. Choosing a bicycle helmet. 2024.
- National Weather Service. Lightning safety for outdoor activities. Accessed 2026.
- Newell ML, Hunter AM, Lawrence C, Tipton KD, Galloway SDR. The ingestion of 39 or 64 g per hour of carbohydrate is equally effective at improving endurance exercise performance in cyclists. International Journal of Sport Nutrition and Exercise Metabolism. 2015;25(3):285-292.
- Holland JJ, Skinner TL, Irwin CG, Leveritt MD, Goulet EDB. The influence of drinking fluid on endurance cycling performance: a meta-analysis. Sports Medicine. 2017;47(11):2269-2284.
- Centers for Disease Control and Prevention. Adult activity: an overview. Accessed 2026.
Related Articles
How to ride a mountain bike: beginner technique guide
Learn how to ride a mountain bike with safer body position, braking, cornering, climbing, line choice, trail drills, and a clear beginner progression.