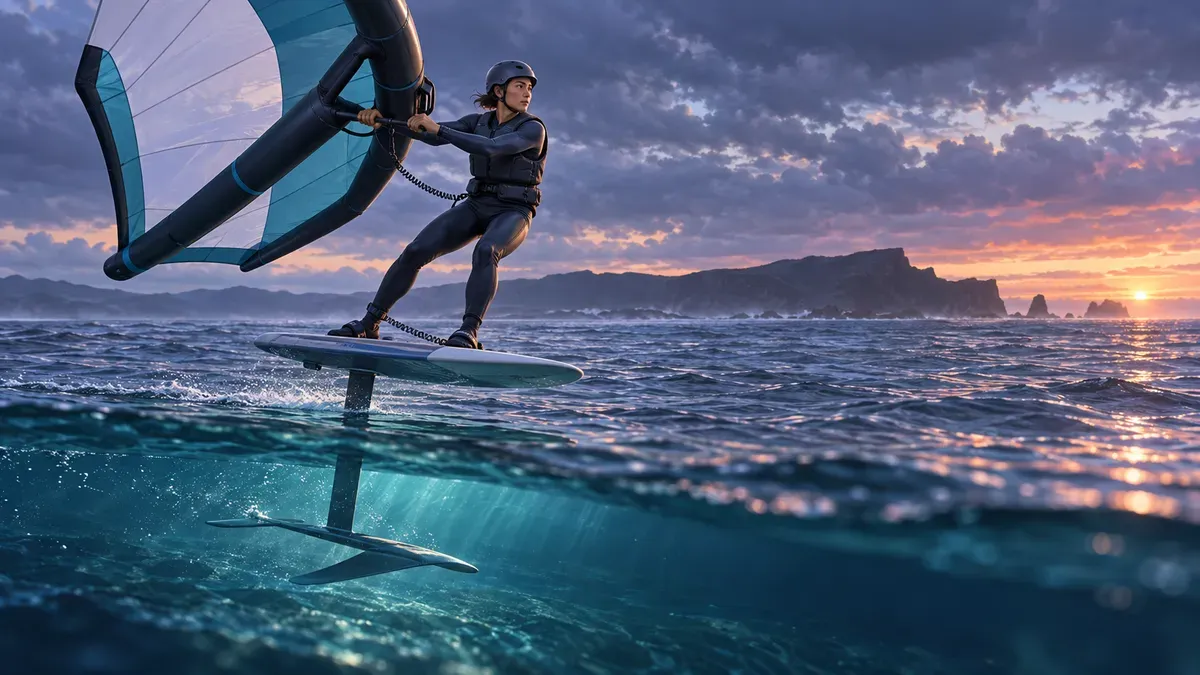
Wing foiling for beginners: gear, technique, wind, and safety
Learn wing foiling for beginners: choose a stable setup, read wind and water, build first-flight skills, fall safely, and progress without rushing.
Quick answer
Wing foiling combines a handheld inflatable wing, a board, and an underwater hydrofoil. As speed builds, the foil creates lift and raises the board above the surface. A beginner should not make that flight the first objective. Learn to rig and depower the wing, travel across and slightly upwind, turn, return to the launch point, and self-rescue on a large stable board before adding controlled foil takeoffs.
Take lessons in a spacious venue with forgiving water, a wind direction that does not carry you away from shore, enough depth for the foil, and a clear downwind escape area. Use equipment selected for your body, ability, and the conditions; wear locally appropriate flotation, thermal protection, and a water-sports helmet; connect and inspect the wing and board leashes; and stop before fatigue degrades judgment. This is a skills progression, not a test of courage or balance.
Key facts
- A hydrofoil converts forward speed and angle of attack into lift beneath the water.
- Wingsurfing practice builds steering, upwind return, turning, and self-rescue before first foil flights.
- A stable beginner setup reduces the balance and takeoff variables that must be learned at once.
- Wind direction determines whether a mistake carries the rider toward a safe landing or farther from it.
- Proactive falls create separation between the rider and the board, mast, and foil.
What wing foiling is—and why the first flight is not lesson one
The rider holds a wing that is not fixed to the board. The wing supplies propulsion; the board supplies a platform; the foil mast extends below it to a fuselage with front and rear wings. At sufficient speed, pressure differences around the underwater wings create lift. Less board touches the water, drag falls, and small weight shifts have a larger effect on pitch and direction.
That sensitivity is part of the appeal, but it makes learning several systems simultaneously inefficient. A complete beginner must understand wind direction, wing power, hand position, board steering, stance, foil pitch, traffic, depth, weather, and an exit plan. Separating those tasks makes progress more repeatable.
The Royal Yachting Association wing scheme begins with flying the wing ashore, then wingsurfing afloat, upwind progress, tacks, gybes, hazards, and self-rescue. Its first-flight stage comes after those foundations. The dedicated RYA First Flights course likewise expects established wing skills before adding the foil. The useful lesson is not that every learner must follow one certification. It is that controlled non-foiling travel is a prerequisite, not a consolation prize.
Build a beginner setup as one matched system
There is no universal best board volume, wing area, foil size, or mast length. Body mass, wind strength, water state, previous board-sport experience, local depth, and teaching method all change the answer. Rent or use school equipment first so an instructor can change one variable without turning an early purchase into a constraint.
| Component | Beginner priority | What to confirm before launch |
|---|---|---|
| Handheld wing | Predictable power and easy depowering | Correct inflation, valves closed, fabric and handles intact, wing leash secure |
| Board | Enough stability to kneel, stand, and recover | Non-slip deck, undamaged leash point, fittings secure, no waterlogging or damage |
| Hydrofoil | Forgiving lift matched to rider and conditions | Mast, fuselage, front wing, rear wing, covers, screws, and board connection checked |
| Leashes | Retain both wing and board without unmanaged entanglement | Correct type, length, attachment point, accessible release, sound stitching and swivels |
| Personal equipment | Flotation, impact, temperature, and foot protection appropriate to venue | Fit tested together, helmet secure, thermal system chosen for immersion, communication reachable |
The consequences of equipment mismatch differ across water sports. In scuba, the kit also supplies breathing gas and dive information; our scuba diving equipment guide explains how fit, compatibility, buddy checks, and maintenance turn separate components into one life-support system.
Wing: power you can switch off
The front hand generally guides the wing while the rear hand adds or removes power. The first skill is not pulling harder; it is finding the neutral position where the wing flags with minimal drive. Practice lifting it, changing hands, rotating it safely, powering gradually, and depowering immediately. If a gust controls your arms, the wing or the conditions exceed the learning task.
Wing size must match the actual wind and rider, not a generic chart in isolation. The RYA syllabus explicitly treats choosing a wing for the conditions as a learned competency. Ask an instructor to explain the choice so that you can eventually repeat the decision rather than memorizing one number.
Board: stability buys learning time
A board that supports kneeling, rising, and standing without constant recovery lets the learner focus on the wing. A small board may feel responsive after the basics are automatic, but it adds sinking, start, and balance demands too early. Check that the deck provides reliable traction and that handles allow the board and foil to be carried without putting the foil near other people.
Foil: early lift should be controllable, not dramatic
The foil must suit the rider, board, wind, and instructional stage. Beginners benefit from lift that arrives progressively at manageable speed. A shorter mast may simplify some lessons and shallow-water handling, but every mast still requires enough depth and a safe carrying technique. Component compatibility, assembly sequence, screw torque, corrosion care, and damage inspection belong to the exact equipment manufacturer and instructor; do not improvise them from a generic article.
Never set an assembled foil where feet, children, beach users, or rigging lines can cross it. Fit protective covers during transport and assembly when the system allows, and remove them only in the controlled launch sequence.
Leashes: retention changes with the environment
Wing foilers commonly retain both the wing and board, but leash design and attachment are not one-size-fits-all. The RYA leash guidance explains the competing risks: a leash that is too short can keep a rebounding board close, excess length can strike another user or entangle, and flowing water changes the release problem around fixed objects.
Inspect abrasion, elasticity, swivels, stitching, hook-and-loop material, and attachment points before every session. Keep any quick release reachable outside the impact vest or buoyancy aid. Learn the order for releasing equipment in a true entanglement or rescue scenario from a qualified local instructor; an inappropriate release can trade one danger for another.
Helmet, flotation, and clothing must work together
Use a water-sports helmet suitable for foiling impacts and fit it so it cannot obscure vision or move across the forehead. Wear a properly fitted buoyancy aid or other locally appropriate flotation. An impact vest may add torso protection, but do not assume that every impact vest meets the flotation certification or legal requirement for your venue.
Dress for time in the water, not for warmth while pumping the wing on land. Sudden cold-water immersion can trigger gasping, rapid breathing, cardiovascular strain, impaired thinking, and progressive loss of muscular control. The US National Weather Service advises wearing a life jacket, choosing thermal protection for water temperature, checking conditions, and filing a float plan in its cold-water guidance. Test the combined fit of wetsuit or drysuit layers, flotation, helmet, harness if used later, and leashes before relying on the system.
Choose conditions by consequence, not by forecast number
A wind speed that is manageable for an experienced rider on a small wing may overwhelm a beginner on different equipment. Avoid publishing one universal beginner range. Translate the forecast into consequences with an instructor who knows the site.
Start with wind direction
Stand on shore and identify exactly where the wind would carry a depowered wing, a separated board, and a tired rider. A direct offshore wind can turn a small skill failure into increasing distance from land. A strong onshore wind can drive equipment and rider into a hard beach or shore break. Cross-shore or cross-onshore flow may offer a recoverable teaching lane at some venues, but only when the shoreline, current, traffic, depth, and rescue plan support it.
Pick a visible goal point across the wind. Before foiling, prove that you can leave, make ground upwind, turn in both directions, and return near the original launch. Walking equipment back once is normal; repeatedly losing ground is evidence that the planned foiling session is premature.
Read wind, waves, current, tide, and weather together
Use the official marine or local water forecast, not only a city weather icon. NOAA describes forecast products that combine wind speed and direction with wave height, period, water level, and currents in its marine forecasting overview. Then compare the forecast with live observations: gust lines, whitecaps, cloud development, rainfall, visibility, tide, current, shore break, and what competent local riders are actually doing.
Wind against current can steepen the water. A tide can reduce usable depth over a reef or expose a launch hazard. A calm beach can conceal stronger wind outside a sheltered zone. Thunder ends the session; open water has no safe shelter from lightning. If the actual water contradicts the plan, the water wins.
Protect a large downwind and underwater margin
The learning area needs clear space downwind because every early run drifts. Keep well away from swimmers, moored boats, rocks, harbor walls, fishing activity, navigation channels, wildlife restrictions, and other learners. Foiling craft can approach quietly and on unusual angles; look before turning and learn the local right-of-way rules.
Confirm depth along the entire teaching lane, including the entry and the expected fall zone. Do not jump onto the board or foil in shallow water. Walk the board on the upwind side, hold it so the foil points away from the body and other people, and follow the equipment-specific carrying method taught locally.
Use a six-stage path to the first controlled flight
Progress when a skill is repeatable in both directions, not when it happened once.
1. Control the wing on land
Choose a clear, soft area with no overhead lines or bystanders downwind. Identify the leading edge, tips, handles or boom, leash, neutral position, and powered positions. Practice raising and lowering the wing, changing sides, rotating it, sheeting in gradually, and releasing power without dropping it onto another person.
2. Wingsurf on a stable board without foil flight
Begin kneeling if that is the lesson design. Travel across the wind, stop, reverse the wing, turn around, and return. Stand only when wing control no longer consumes all your attention. Keep the knees soft, ribs stacked over the pelvis, and hands relaxed enough to feel changing pressure.
3. Hold ground upwind and self-rescue
Steer toward and away from the wind without losing the ability to return. Learn the no-go zone where the board cannot travel directly into the wind. Rehearse the local self-rescue method while close to shore and supervised, including how to depower or secure the wing and use the retained equipment for flotation and progress. Do not discover that sequence after the wind changes.
4. Add the foil and learn controlled acceleration
Mount and check the foil with the instructor. Start with weight balanced and the wing supplying smooth forward drive. Look where you want to travel rather than at the front foot. Accelerate without abruptly leaning back. The aim is stable board speed and direction before lift.
5. Rise a little, then touch down deliberately
As lift begins, small fore-aft pressure changes control pitch. Excess rear-foot pressure can send the board climbing too quickly; a panicked forward shift can create a hard touchdown. Practice short, low flights and controlled returns to the surface. The RYA first-flight syllabus treats takeoff, maintained flight, speed reduction, controlled touchdown, and basic foot steering as connected skills—not separate tricks.
6. Extend flight before adding transitions
Build consistent flight in both directions, upwind control, and safe touchdowns before chasing foiling gybes, tacks, jumps, waves, harness use, or a smaller board. Complexity should rise only while the exit margin stays generous.
Technique cues that reduce unnecessary corrections
Let the wing pull; do not hang from it
Keep shoulders down, elbows responsive, and the grip lighter than a maximal pull. Move the wing to regulate power before twisting the torso or fighting with the arms. If the wingtip repeatedly catches the water, raise the leading edge, check hand height, and reduce power until steering is organized.
Stack the body over the board
Use an athletic stance: knees flexed, hips mobile, trunk quiet, and gaze forward. Do not turn a cue such as “lean back” into a permanent hinge. The board and foil respond to pressure through both feet. When the whole body becomes rigid, gusts and small waves produce larger corrections.
Separate roll, yaw, and pitch
Beginners often solve every error with one large weight shift. Instead, identify the plane:
- Pitch is nose up or down and changes foil height.
- Roll is side-to-side board angle.
- Yaw is the direction the board points across the water.
The wing, feet, speed, and foil interact across all three, but naming the error helps an instructor give a smaller correction. Video from shore can help when used as coaching feedback, not as proof that the conditions were safe.
Pump only after basic flight control exists
Wing and foil pumping can help create takeoff speed, but aggressive pumping adds timing, balance, and fatigue. First learn to accelerate with steady power in adequate conditions. Add coordinated pumping when an instructor can distinguish useful movement from wasted effort.
Fall away from the foil and finish before fatigue chooses for you
When a fall is unavoidable, commit away from the board and foil rather than trying to step onto submerged equipment. Protect the head with the arms when appropriate, keep the mouth closed on impact, and regain visual awareness before pulling equipment toward you. Never dive headfirst into unknown depth. A qualified instructor should teach and observe falling because direction and equipment position change the safest response.
Wing-foiling injury evidence is still limited. A 2023 retrospective online survey included 415 participants and reported 5.7 injuries per 1,000 hours; contact with the rider’s own foil, board, or wing was a common mechanism, while many reported errors occurred with fatigue. Lower-extremity acute injuries and shoulder or knee overuse complaints were prominent. The authors explicitly note self-report, recall, and selection bias, so the result describes that sample rather than predicting any beginner’s personal risk (Gangl et al., 2023).
Turn that evidence into conservative behavior, not a false probability:
- stop when repeated touchdowns become less controlled;
- leave enough energy to return, land, carry, and derig;
- do not make “one last run” after weather, visibility, pain, or concentration changes;
- keep riders separated so one person’s fall does not enter another’s line;
- inspect equipment after a hard strike before relaunching;
- seek assessment for a head impact, chest pain, severe breathlessness, loss of coordination, significant cut, suspected fracture, or persistent joint symptoms.
Prepare the body without pretending the gym teaches water judgment
Wing foiling asks for lower-limb balance, trunk control, shoulder endurance, grip, repeated kneeling-to-standing transitions, and enough aerobic capacity to self-rescue and return. Training can make those tasks less fatiguing, but it cannot substitute for wind awareness, right-of-way knowledge, or supervised foil practice.
A simple twice-weekly base can include:
- Sit-to-stand or squat variations for controlled leg drive.
- Split-stance holds and step-downs for pressure control between the feet.
- Rows and light external-rotation work for shoulder-blade and rotator-cuff capacity.
- Carries for grip and trunk control without repeated twisting.
- Calf raises and ankle mobility for stance adjustments.
- Short balance tasks that remain close to a stable support.
Our core strength progression explains how to build trunk capacity without confusing bracing with rigidity. The single-leg balance guide separates a useful practice tool from medical diagnosis, while the shoulder exercise guide offers scalable strength and mobility options.
Add easy aerobic work you already tolerate—walking, cycling, swimming, or another modality—rather than trying to get fit only during technically demanding sessions. The exercise and longevity guide places aerobic, strength, and balance work in one weekly framework. Adults with cardiovascular symptoms, recurrent fainting, uncontrolled seizures, major balance impairment, recent surgery, or a condition that makes unexpected immersion hazardous should obtain individualized medical and instructional advice before starting.
Use SuperAge to track training load, not to approve a launch
Wing-foiling progress is noisy. Wind changes, equipment changes, and skill breakthroughs can make one short session harder than a longer one. SuperAge can place the activity beside sleep, heart-rate, recovery, and broader training patterns so you can see whether a new water-sport habit supports consistency or repeatedly arrives with poor recovery.
Record useful context after the session: wingsurfing or foiling stage, duration, perceived effort, conditions, equipment change, falls, pain, and the skill that remained repeatable. Review trends rather than treating an estimated calorie total or one heart-rate trace as an objective skill score. Grip, wrist position, water, impact, and intermittent effort can all complicate wearable interpretation; our heart-rate zones by sport guide explains why zones do not transfer perfectly between activities.
SuperAge cannot certify a weather window, legal equipment, water depth, self-rescue competence, or right of way. Those decisions remain local and human. After the activity, download SuperAge to review the week as a whole and plan the next session around sustainable progress.
A conservative four-session starter plan
Session numbers are not promotions. Repeat any session until the conditions and skills are stable; pause when the venue or weather does not match the task.
| Session | Primary task | Evidence to progress |
|---|---|---|
| 1 | Wing setup, neutral position, power control, safe carrying on land | Can depower, rotate, change sides, and protect the downwind area reliably |
| 2 | Kneeling and standing wingsurfing on a stable board | Can travel across wind, stop, turn both ways, and return near the start |
| 3 | Upwind progress, goal points, and supervised self-rescue | Can hold ground, identify hazards, and execute the taught return method |
| 4 | Foil setup, low takeoffs, short flights, and controlled touchdowns | Can rise and settle without large pitch corrections in both directions |
Keep sessions short enough that the final technical attempts resemble the first. If hands, forearms, shoulders, knees, or concentration remain unusually fatigued, allow more recovery or reduce the next task. The science of rest days can help separate normal training fatigue from a pattern that needs load reduction.
First-session go/no-go checklist
People and plan
- Qualified instruction or directly appropriate supervision is arranged.
- The least experienced rider can explain the teaching area and exit plan.
- A reliable person knows the venue, group, timing, and overdue action.
- Local launch, navigation, access, environmental, and equipment rules are confirmed.
Conditions
- Wind direction leads to a recoverable downwind area rather than offshore exposure.
- Forecast and live wind, gusts, waves, current, tide, visibility, thunder risk, and water temperature fit the lesson.
- Depth is sufficient across the complete foil lane, with no hidden shallow hazard.
- Swimmers, traffic, rocks, structures, fishing lines, and other users have wide separation.
Equipment
- Wing pressure and valves match the manufacturer’s instructions.
- Foil assembly and board connection have been checked with the correct procedure.
- Wing and board leashes are sound, secured, and releasable as intended.
- Helmet, flotation, thermal protection, and footwear fit together.
- Communication and signaling equipment suit the venue and remain reachable.
Rider
- No alcohol, sedating substance, acute illness, or unexplained symptoms impair judgment.
- The rider can depower the wing and describe the self-rescue sequence.
- The session has a conservative turn-back time and clear stop triggers.
- Energy is reserved for landing, carrying, and derigging.
Common beginner mistakes—and the smaller correction
Buying advanced equipment before lessons: rent first and let an instructor match the complete system.
Looking at the feet: look along the travel line and use peripheral vision for board position.
Pulling harder in every wobble: depower, regain stance and direction, then rebuild speed.
Chasing flight before returning upwind: make controlled non-foiling return the admission test.
Using a weather-app number as permission: assess wind direction, gusts, water, depth, exits, and local warnings together.
Riding until grip fails: stop while technique, judgment, and self-rescue capacity remain available.
Treating a leash as automatic safety: select, attach, inspect, and rehearse releases for the specific environment.
Adding waves, jumps, or a small board after one good run: consolidate both directions and controlled touchdowns first.
Key takeaways
- Learn wing control, upwind return, turning, and self-rescue before first foil flights.
- Use a large stable board and a matched, forgiving foil-wing system selected for the rider and conditions.
- Choose the teaching area by downwind consequence, water depth, traffic, temperature, and rescue options.
- Wear compatible helmet, flotation, thermal protection, and inspected leashes; local rules still apply.
- Build lift gradually, keep flights low, and practice controlled touchdowns in both directions.
- Fall away from the equipment and stop before fatigue turns small errors into repeated uncontrolled falls.
- Use fitness and recovery tracking to support learning, never to certify water safety.
FAQ
Is wing foiling hard for a complete beginner?
It has a steep coordination phase because wind, wing, board, and foil interact. The task becomes more manageable when it is divided into land-based wing control, non-foiling wingsurfing, upwind return and self-rescue, then short foil flights. Previous sailing, surfing, paddleboarding, or board-sport experience may help, but it does not remove the need for venue-specific instruction.
Should I learn wingsurfing before wing foiling?
Yes. You should be able to control and depower the wing, steer, travel across and upwind, turn, return to the launch area, and self-rescue on a stable board before adding flight. That sequence follows the competency progression in the RYA wing scheme and reduces the number of new variables learned at once.
What equipment does a wing-foiling beginner need?
A matched handheld wing, stable board, hydrofoil, wing leash, board leash, water-sports helmet, locally appropriate flotation, and clothing for immersion form the core system. Exact sizes depend on rider mass, conditions, venue, and ability. Lessons or rental equipment are the safest way to discover those requirements before buying.
How much wind does a beginner need for wing foiling?
There is no single safe number. Wing area, board and foil design, body mass, gustiness, waves, current, wind direction, and instructional stage all matter. Use a qualified local instructor and official forecast for a conservative equipment-and-conditions match; do not use a generic wind range as launch permission.
Can I teach myself to wing foil?
Online theory can clarify terminology, but it cannot inspect assembly, choose a safe venue, manage traffic, observe falls, or conduct a rescue. In-person instruction is especially valuable for the first rigging, self-rescue, foil launch, takeoff, and fall practice. Independent sessions should begin only inside skills and conditions already demonstrated under appropriate supervision.
Do I need to be a strong swimmer?
You need water confidence and must meet the instructor or venue’s swimming requirement. Flotation and retained equipment support rescue but do not replace swimming ability, calm breathing, or assistance. Discuss limited swimming, panic, cardiovascular conditions, or mobility constraints with the provider before booking.
Is wing foiling good exercise?
It can contribute aerobic activity, balance, trunk control, and upper- and lower-body endurance, with demand changing sharply by skill and conditions. It should complement rather than replace structured strength, aerobic, and balance training. Early sessions may involve much kneeling, standing, falling, and recovery, so duration alone is a poor measure of load.
What should I do when I fall near the foil?
Commit away from the board and foil, avoid stepping onto submerged equipment, and follow the proactive falling method taught by your instructor. After entering the water, orient yourself before drawing equipment closer. The safest direction depends on board, foil, wing, speed, and surroundings, so supervised practice matters more than a universal verbal cue.
References
- Royal Yachting Association. RYA Wing Scheme: information and syllabus.
- Royal Yachting Association. Wingfoiling First Flights course.
- Royal Yachting Association. Winging: what it is and how to get started.
- Royal Yachting Association. Wing leash selection and inspection.
- US National Weather Service. Cold water hazards and safety.
- NOAA Office of Coast Survey. Marine forecasts and predictions.
- Gangl T, Balke M, Ayhan G, et al. Sports injuries while wingfoiling. Open Access Journal of Sports Medicine. 2023;14:69-78. doi:10.2147/OAJSM.S423872.
Related Articles

Canoe vs kayak: differences, safety, and which is easier
Canoe vs kayak: compare paddles, stability, storage, rescue, fitness demands, and safety so you can confidently choose the right craft for your first trip.