Rafting for beginners: gear, commands, safety, and first-trip prep
Learn rafting for beginners: choose a guided trip, understand rapid classes, fit essential gear, follow paddle commands, and respond safely after a swim.
Quick answer
Rafting for beginners should start with a professionally guided trip on a river section matched to the least experienced person—not with an independent launch. Wear a snug whitewater personal flotation device (PFD), a secure whitewater helmet, thermal protection suited to the water, and closed-toe footwear. During the safety briefing, learn where to sit, how to hold the paddle, the crew’s exact commands, what to do if someone falls out, and when not to stand in moving water.
A rapid’s class is only a broad difficulty signal. Water level, temperature, weather, debris, remoteness, and the length between safe recovery points can change the real consequences. The guide makes the line decision; your job is to disclose health and swimming limitations, listen for one command, paddle in rhythm, keep a stable position, and stop if the conditions or equipment are wrong.
Key facts
- A qualified guide matches river conditions, raft setup, and crew ability to a workable line.
- A fitted whitewater PFD supplies flotation during an unexpected swim but does not remove drowning risk.
- Synchronized paddle strokes give a raft predictable momentum and turning response.
- Cold immersion triggers gasping and rapid breathing before core hypothermia develops.
- Changing river flow alters rapid difficulty, hazards, and available rescue options.
Rafting combines a buoyant inflatable craft, a guide’s river judgment, and coordinated human power. That team system is what separates it from simply floating downstream. It is also why a first trip is not a test of bravery: good participation means making your actions predictable for the guide and the rest of the crew.
This guide explains what a beginner needs before a commercial or club-led outing. It cannot qualify you to guide a raft, assess an unfamiliar rapid, rig rescue systems, or choose a river without local expertise.
What whitewater rafting is—and what it is not
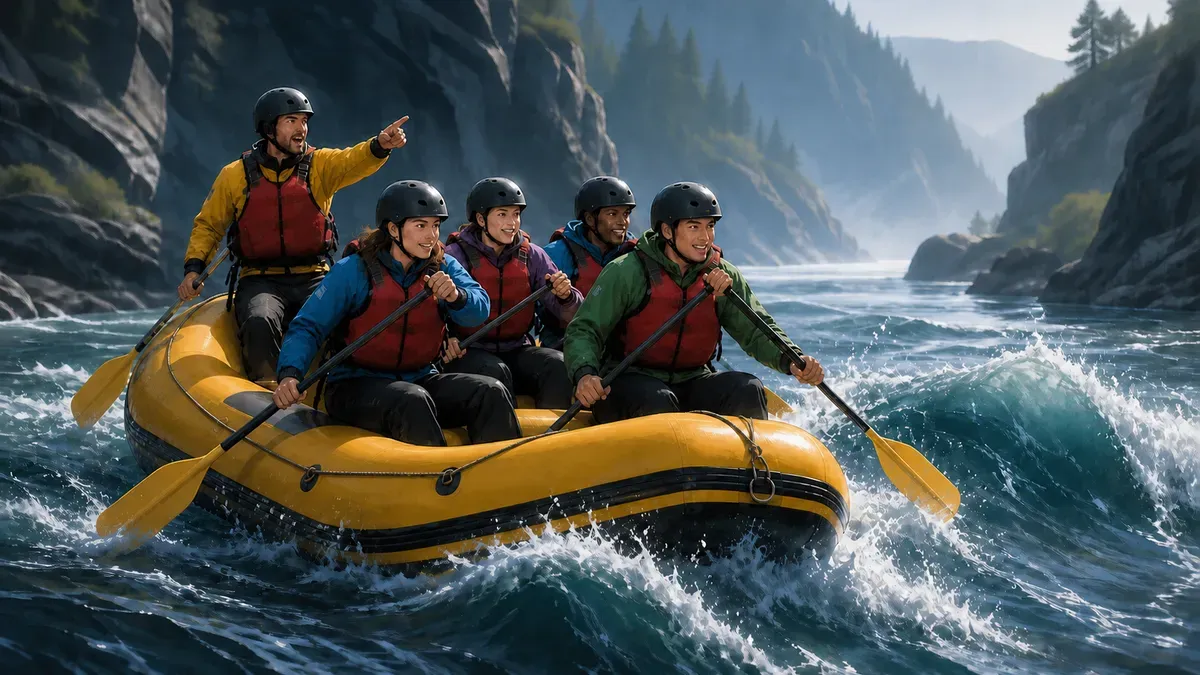
In paddle rafting, several people sit along or inside an inflatable raft and use single-bladed paddles while a guide directs the craft. Some rafts use a guide at the stern; others use an oar frame or a different crew arrangement. The exact commands and seating system vary, so the briefing for the boat in front of you always takes priority over a phrase learned online.
Several river activities share equipment and hazards but create different beginner tasks:
| Activity | Main travel system | Beginner’s primary job |
|---|---|---|
| Paddle rafting | Inflatable raft, guide, and coordinated crew | Hold position, listen, and paddle in rhythm |
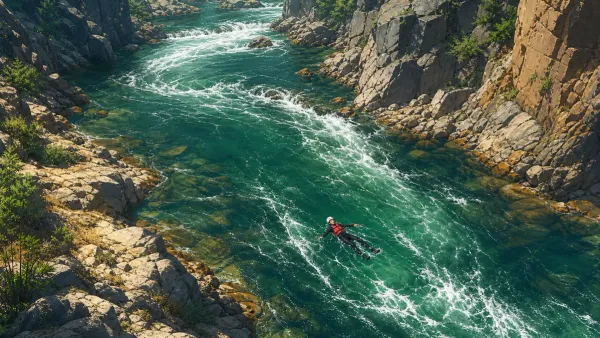
| Body rafting | PFD and direct swimming or floating | Control body position while immersed in current |
| Riverboarding | Buoyant board, often with fins | Keep the board controlled and follow a swimming line |
| Whitewater kayaking | One-person craft and double-bladed paddle | Control edges, strokes, and capsize recovery |
| Recreational canoe or kayak | Individual or tandem craft, often on calmer water | Steer, balance, and manage craft-specific rescue |
Our body rafting beginner guide covers direct swimmer position, cold entry, and foot-entrapment risk in more depth. If you are choosing between conventional paddle craft on sheltered water, use the canoe vs kayak comparison instead. Neither is a substitute for a rafting briefing because the raft’s mass, crew timing, and recovery system are different.
Choose the trip before you choose the thrill
For a beginner, the right question is not “What is the highest class I can survive?” It is “What river section, flow, guide system, equipment, and escape plan give this group a sensible first experience today?”
Treat rapid class as a description, not a guarantee
The International Scale of River Difficulty describes Class I as very easy water, Class II as easy rapids requiring some maneuvering, Class III as moderate difficulty requiring skilled maneuvering, Class IV as advanced, and Class V as expert terrain near the limits of navigation. The same guidance warns that the scale is imprecise, interpreted differently by region, and changed by water level, fallen trees, floods, cold, remoteness, and continuous rapids.
| Rating | Simplified character | What a beginner should understand |
|---|---|---|
| Class I | Small regular waves or riffles | Easy does not mean hazard-free; strainers and cold still matter |
| Class II | Easy rapids with some maneuvering | A common learning environment when the whole trip system is suitable |
| Class III | Larger waves and more skilled maneuvering | Consequences and swimming difficulty rise; do not infer suitability from the number alone |
| Class IV | Powerful, hazardous, precise lines | Advanced terrain for skilled groups, not a target for a first-timer |
| Class V | Long, turbulent, expert maneuvers | Near the limits of navigation and inappropriate as a beginner goal |
A river section can contain one named rapid that is harder than the surrounding water. A long Class II run with cold water, few exits, and a downstream hazard may demand more conservative judgment than a short, warm, well-supported training section. Ask the operator for the expected water class and the factors that could change the decision that morning.
Screen the guide and operator
The International Rafting Federation Guide Training and Education system defines competence roles for raft guides, trip leaders, and safety craft. Certification names vary by country, and local law may set different requirements, so do not rely on one logo alone. Ask for specific, current answers:
- What guide qualifications, first-aid training, and river-specific experience are required?
- Which water levels, weather events, or participant limitations trigger cancellation or a route change?
- How many guests are in each raft, and who leads the overall trip?
- How are non-swimmers or weak swimmers assessed and positioned?
- What are the entry, exit, portage, communication, and emergency access plans?
- Is the PFD, helmet, paddle, thermal clothing, and raft designed for this water and checked before launch?
- Is there a safety boat or additional downstream cover when the section warrants it?
- Can a participant opt out after the briefing without pressure?
Vague reassurance is not a safety plan. Competent staff explain limits, name the person making the go/no-go decision, and make cancellation feel routine rather than embarrassing.
Disclose what changes your risk
Tell the operator about swimming ability, recent injury or surgery, pregnancy, fainting, seizures, unstable heart or lung disease, severe cold-triggered symptoms, medication that impairs alertness or balance, and any need that could affect evacuation. This is not about automatic exclusion. It allows the guide and your clinician, when needed, to decide whether the exact trip can be adapted safely.
Do not raft while impaired by alcohol or recreational drugs. The CDC’s drowning-prevention guidance emphasizes life-jacket use, natural-water hazards, forecast checks, the buddy system, and avoiding alcohol around water. Swimming confidence helps, but a current, cold shock, impact, or entrapment can overwhelm a strong pool swimmer.
Essential rafting gear and how it should fit
Equipment reduces specific risks; it does not make every river line acceptable. The 2024 American Whitewater Safety Code treats knowledge, preparation, humility, and adaptable decisions as a system rather than a checklist that guarantees safety.
Whitewater PFD
Wear a snug vest-style PFD approved for the activity under the applicable local standard. Fasten every closure and have staff perform a lift test: when the shoulder area is pulled upward, the vest should not slide over your chin or face. It must allow full breathing and paddling without riding up.
A PFD helps keep a swimmer nearer the surface and adds some impact protection. It does not guarantee a face-up position, prevent entrapment, or replace swimming and rescue skills. Inflatable toys and casual buoyancy aids are not substitutes.
Whitewater helmet
The helmet should be intended for turbulent water, fit firmly without painful pressure, cover the vulnerable areas specified by its design, and stay stable when you shake your head. The chin strap should be secure without interfering with breathing. A loose helmet can rotate during a swim; a cycling helmet is built for a different impact and immersion environment.
Thermal system
Dress for the water temperature, wind, shade, and likely time wet—not just the air at the parking area. The operator may supply a wetsuit, drysuit, splash layer, and synthetic or wool base layers. Cotton holds water and is usually a poor insulating choice. Fit matters because bulky clothing can disrupt PFD placement and movement.
Sudden cold immersion can provoke involuntary gasping, rapid breathing, increased heart rate, and increased blood pressure before hypothermia develops. A physiological review of cold-water immersion explains why the first minutes can be dangerous even when the trip is short. Thermal gear reduces heat loss but does not erase the initial breathing response.
Closed-toe footwear and paddle
Footwear should stay on in moving water, protect against rocks, and provide traction during entry and exit. Avoid loose loops or straps that can snag. Secure glasses as instructed, remove jewelry, and keep phones or cameras out of your hands unless the operator has an approved system.
Hold a T-grip paddle with one hand covering the top grip and the other on the shaft. An uncovered T-grip can strike another rafter during sudden movement. Keep the blade controlled inside the crew’s working space; do not wave it over heads or use it as an improvised rescue pole unless the guide directs you.
Stable position and five command families
Your guide will demonstrate where to sit and how to brace in that specific raft. Common systems place rafters on the outer tube with feet secured under designated supports. Never improvise by wrapping a foot, ankle, or leg around rope or webbing. You need connection for normal movement and a clean release if the raft overturns.
Use an athletic posture: hips stable, torso ready to hinge, outside hand controlling the T-grip, and eyes on the guide or the paddler ahead. Do not lock your knees or lean so far inward that the blade cannot reach clean water.
Command vocabulary differs, but most beginner briefings include these functions:
| Command family | Crew action | Purpose |
|---|---|---|
| Forward | All or named paddlers stroke forward together | Build momentum and hold a line |
| Back | All or named paddlers reverse the stroke | Slow, reverse, or change angle |
| Left or right side only | One side paddles while the other pauses or reverses | Rotate or correct the raft |
| Stop | Remove blades from the water and listen | Prevent conflicting inputs |
| Get down or high side | Move immediately to the demonstrated safe position | Stabilize the raft around a feature or impact |
The words are less important than the guide’s definition. Repeat them aloud during the land briefing. If you miss a command, look up, secure the T-grip, and copy the demonstrated response rather than guessing.
Technique: short, connected, synchronized
Reach forward from the hips without collapsing the spine, place the blade fully in the water, and draw it back using the trunk and shoulders together. Take the blade out before it travels too far behind you. For a back stroke, follow the guide’s demonstrated start and finish positions; do not jab blindly behind the raft.
Timing beats maximal force. Six moderate strokes entering together give the guide a more predictable boat than six people pulling at different moments. Watch the person in front when the guide is not visible, and stop when the command ends.
If you fall out or the raft flips
A pre-departure safety talk should cover close, medium, and longer swimmer recovery; how the crew helps; how to receive a throw rope; what to do around an overturned raft; and when to swim away from a hazard. These are explicit elements in the IRF assessment guidance for raft guides.
The guide’s instructions and the immediate river situation override any generic sequence. A useful beginner mental model is:
- Protect the airway. Surface, control the first breath, and keep the mouth closed through waves.
- Find the guide, raft, and downstream line. Listen before committing to a direction.
- Stay near the raft when directed. It is large, visible, and often the fastest rescue platform—but a hazard may make swimming away necessary.
- Use the demonstrated whitewater position. In obstructed current, that may mean floating on your back with feet downstream and near the surface; for a reachable safe eddy, the guide may direct active swimming.
- Never stand in fast current. A foot can wedge while water pushes the body downstream and submerges the airway.
- Accept one rescue method correctly. A paddle reach, raft-side lift, safety craft, or throw rope has its own instructions. Do not grab rescuers around the neck or wrap rope around yourself.
If pulled to the raft, face it and follow the guide’s lift instruction. The crew may use the PFD shoulder area according to the practiced method. Help only as briefed; uncontrolled pulling can injure the swimmer or destabilize the boat.
If you receive a throw bag, look at the rescuer, hold the rope as instructed, and never wind it around a hand, arm, torso, or neck. Rope in moving water can create a new entanglement hazard. Do not carry or deploy rescue rope unless trained for the system.
Historical injury data should be interpreted cautiously because equipment, reporting, rivers, and commercial practice differ. A systematic review of whitewater injuries found few comparable studies and noted that face and lower-limb injuries were common among rafters. A New Zealand study of rafting mortality and hospital admissions found drowning dominated fatalities and fractures made up nearly half of hospitalizations in its older national dataset. Those findings do not predict your individual risk, but they support attention to flotation, capsize response, footwear, entry, and exit.
A four-week preparation plan
You do not need elite fitness for a suitable beginner trip. You do need enough capacity to listen and move while breathing hard, maintain a stable position, climb at the bank, and assist without exhausting yourself. Fitness never replaces a guide, but poor fatigue tolerance can reduce the quality of your decisions.
| Week | Aerobic work | Strength and control | Water confidence |
|---|---|---|---|
| 1 | 2 easy sessions of 20–30 minutes | 2 sessions: rows, squats, carries, trunk bracing | Comfortable floating and steady exhalation |
| 2 | 2 easy sessions plus 4 short moderate efforts | Add split stance and controlled step-downs | Swim easy repeats with full recovery |
| 3 | 1 easy and 1 interval session; 30–40 minutes total | Pull, push, hinge, carry, anti-rotation | Practice treading water and calm direction changes |
| 4 | Reduce volume; keep light movement | One short maintenance session | Arrive rested; do not test cold or current alone |
Use walking, cycling, rowing, or swimming for aerobic work. The guide to improving VO2 max explains how easy volume and intervals fit together; for this short preparation block, consistency matters more than chasing a score. If swimming is unfamiliar, take lessons in a controlled pool. The pool-to-open-water transition guide covers the ordinary transition, but it does not replace whitewater skills. Our swimming and cardiovascular aging review covers the broader fitness evidence, not whitewater competence.
Leave at least one easy day between demanding sessions and use the principles in the science of rest days rather than cramming missed training into the final week. Shoulder pain, acute illness, fever, worsening fatigue, or a new injury calls for adaptation, not a last-minute toughness test.
The WHO physical-activity guideline recommends 150–300 minutes of moderate aerobic activity or 75–150 minutes of vigorous activity per week for adults, plus muscle strengthening on at least two days. A rafting trip can be one enjoyable bout of activity; it does not replace a repeatable weekly routine. Use our complete exercise and longevity guide to build that larger base.
Using SuperAge after a rafting day
Rafting can create an unusual mix of paddling effort, isometric bracing, cold exposure, travel, excitement, and poor sleep. That makes the following day’s subjective condition more useful than the adventure’s headline intensity. Record the activity honestly, note impacts or shoulder discomfort, and compare fatigue with your normal pattern.
SuperAge can help place the outing inside longer trends in activity, resting physiology, sleep, and recovery. It cannot declare a river safe, evaluate a head impact, diagnose hypothermia, or clear you for another trip.
After the main recovery needs are met, download SuperAge to review how the adventure fits your sustainable training week rather than treating one dramatic day as a fitness verdict.
Recovery and red flags after the river
Change out of wet clothing promptly, add dry insulation, eat and drink according to your normal needs, and warm gradually in shelter. Gentle movement may help stiffness, but avoid another hard upper-body session when your grip, coordination, or shoulders feel impaired.
Seek urgent medical help after a significant head, neck, chest, abdominal, or spinal impact; loss of consciousness; confusion; repeated vomiting; worsening shortness of breath; blue or gray skin; severe chest pain; new weakness; uncontrolled bleeding; or persistent loss of coordination. A person who was submerged and later develops cough, breathing difficulty, unusual drowsiness, or worsening symptoms also needs prompt assessment. Follow local emergency instructions rather than driving when a serious injury is possible.
After cold exposure, persistent shivering, confusion, slurred speech, clumsiness, or declining alertness is not routine soreness. Remove wet layers, shelter the person, handle gently, and activate emergency care. Avoid alcohol as a “warming” strategy.
First-trip go/no-go checklist
Proceed only when the essential answers are yes:
- Is the guide qualified for this river class and currently familiar with the section?
- Is the route suitable for the least experienced participant under today’s flow and weather?
- Have I disclosed swimming ability, health conditions, medication, and injury honestly?
- Does my PFD pass a fit check, and do the helmet, clothing, footwear, and paddle fit?
- Can I repeat the seating system, T-grip rule, paddle commands, and swimmer response?
- Are the entry, exit, portage, communication, and emergency plans clear?
- Can I opt out without pressure if the briefing or conditions feel wrong?
- Am I sober, rested enough to follow instructions, and free from acute illness?
If one essential answer is no, fix it, change the plan, or postpone. The successful beginner trip is not the hardest one completed; it is the one in which the crew stays coordinated and every participant returns with the judgment to choose well next time.
Key takeaways
- Start with a qualified guide and a river section selected for the whole group.
- Treat rapid class as a flexible description, not a promise of safety.
- Wear a fitted whitewater PFD, secure helmet, thermal system, and closed-toe footwear.
- Cover the T-grip, listen for the guide’s vocabulary, and favor synchronized strokes over force.
- Rehearse what to do after a swim, around an overturned raft, and during a rope or paddle rescue.
- Never stand in fast current, and never wrap rope or raft rigging around your body.
- Build basic aerobic capacity, pulling strength, trunk control, and pool confidence without confusing fitness with river skill.
- Canceling when flow, weather, equipment, health, or leadership is wrong is competent participation.
FAQ
Do I need to know how to swim before rafting?
Requirements vary by route and operator, but you must disclose your real ability. A PFD adds flotation; it does not make a non-swimmer safe in every rapid. Ask what swimming test, participant placement, river class, and recovery system apply to the exact trip. If you cannot remain calm with your face wet or follow directions while floating, build controlled-water skills first.
What class of rapids is best for a first rafting trip?
There is no universal number. Class I or II water is often used for introductory trips, while some guided Class III sections may accept beginners under appropriate conditions. Flow, cold, continuity, hazards, remoteness, guide competence, and group ability can matter as much as the label. Let a qualified local operator make a conservative day-specific decision.
What should I wear under a rafting wetsuit?
Follow the operator’s system. A close-fitting synthetic or wool layer may be appropriate; cotton generally insulates poorly when wet. Avoid bulky seams or layers that interfere with the PFD. Bring dry clothing for afterward and ask whether the supplied system is designed for the current water temperature and wind.
Why must I keep one hand on the paddle T-grip?
The top grip is hard and can strike another participant when a wave or collision moves the paddle suddenly. Covering it gives you control while the lower hand guides the shaft. Keep the blade low and within the working space demonstrated by the guide.
What should I do if I fall out of the raft?
Protect your airway, locate the raft and guide, and listen. Stay near the raft when instructed, use the demonstrated whitewater position, and swim actively only toward the safe target identified by the guide. Do not stand in fast water or wrap a rescue rope around yourself. The actual line and hazard may require a different action, which is why the briefing matters.
Is rafting safe after age 50?
Age alone is not a clearance or a ban. Swimming competence, heart and lung health, medication, balance, injury history, cold response, river class, access, and rescue demands matter. Ask the operator for the real physical tasks and seek individual medical advice when a condition could affect exertion, immersion, or evacuation.
Can rafting improve fitness or biological age?
Rafting can add vigorous activity, coordination, and outdoor enjoyment, but one outing has no proven unique effect on biological age. Long-term benefit comes from the broader pattern of aerobic activity, strength, sleep, recovery, and risk management. Treat the trip as one part of that pattern, not a longevity shortcut.
Can I go rafting without a guide after one commercial trip?
No. One passenger experience does not teach river scouting, boat control, group management, rescue, changing-flow decisions, first aid, access rules, or emergency leadership. Continue through formal instruction, practice on appropriate water, and recognized guide or club pathways before taking responsibility for others.
References
- American Whitewater. Safety Code. Revised 2024.
- American Whitewater. International Scale of River Difficulty. Accessed 2026.
- International Rafting Federation. Guide Training and Education. Accessed 2026.
- International Rafting Federation. Assessment guidance for raft guides. Version 5.2.
- Centers for Disease Control and Prevention. Preventing drowning. Updated 2025.
- Wilson I, McDermott H, Munir F, Hogervorst E. Injuries, ill-health and fatalities in white water rafting and white water paddling. Sports Medicine. 2013;43(1):65–75.
- O’Hare D, Chalmers D, Arnold NA, Williams F. Mortality and morbidity in white water rafting in New Zealand. Injury Control and Safety Promotion. 2002;9(3):193–198.
- Tipton MJ, Collier N, Massey H, Corbett J, Harper M. Cold water immersion: kill or cure?. Experimental Physiology. 2017;102(11):1335–1355.
- World Health Organization. Guidelines on physical activity and sedentary behaviour. 2020.
Related Articles

Canoe vs kayak: differences, safety, and which is easier
Canoe vs kayak: compare paddles, stability, storage, rescue, fitness demands, and safety so you can confidently choose the right craft for your first trip.